
This post may contain affiliate links. Please read my disclosure and privacy policy.
This post may contain affiliate links. Please read my disclosure and privacy policy.
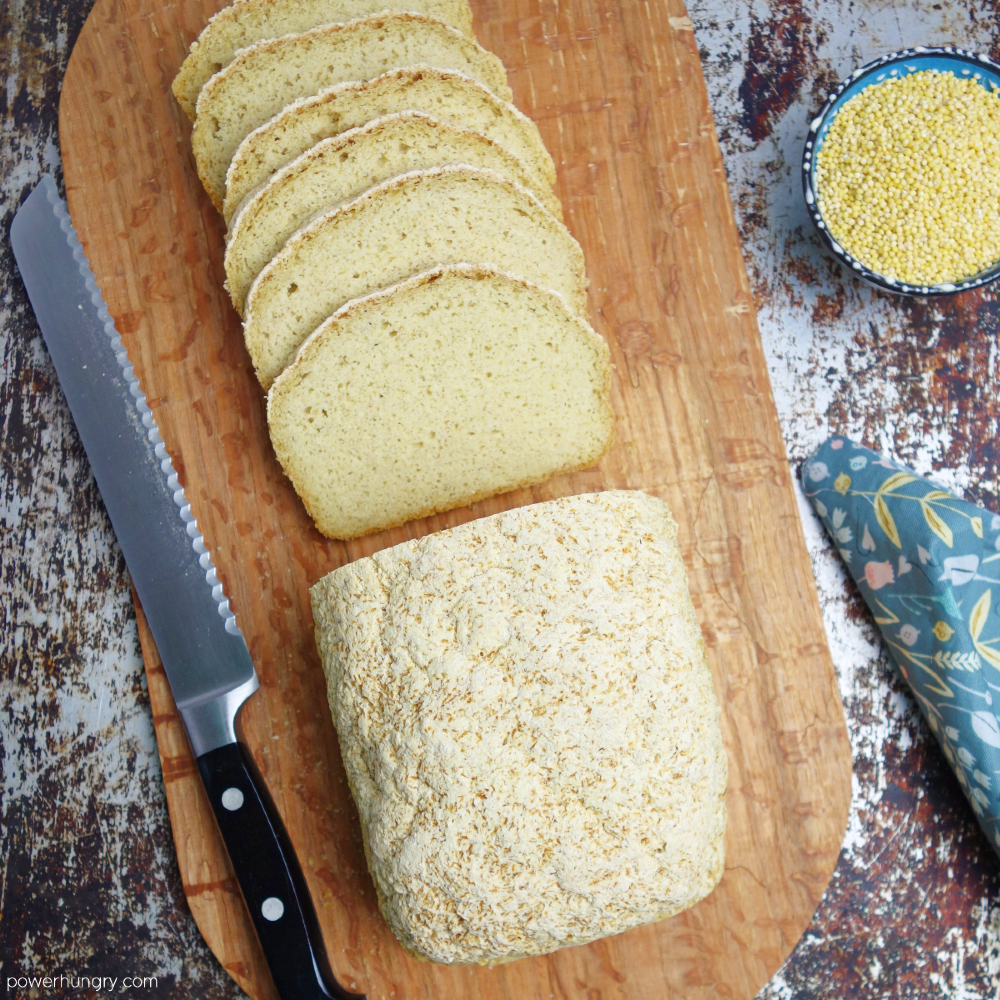
Vegan gluten-free 100% millet sandwich bread is the new white bread! This fine-textured, crusty loaf has a toasty, mild-corn flavor that goes with everything (and makes a superior piece of toast). Easy to make, it is also oil-free, sugar-free, xanthan gum-free, yeast-free and perfectly delicious.

Table of Contents
- Vegan & Gluten-Free Millet Bread (no other flours!)
- Recipe Benefits
- Ingredients for 100% Millet Sandwich Bread
- Tip: Grind Your Own Flour
- Vinegar Options
- How to Make Vegan Gluten-Free Millet Bread
- Important Note: Convection Ovens
- Slice it Thick or Thin
- What is the Texture & Taste?
- FAQ
- Can I use different flours (in place of the millet flour)?
- What kind of Millet Flour do you use?
- My oven has a convection setting. Should I use it for this bread?
- My bread came out gooey in the middle. Why?
- Can I Use Something Other than Whole Psyllium Husks?
- How Can I Vary the Flavor of the Bread?
- More Vegan Gluten-Free Millet Recipes to Try
- 100% Millet Sandwich Bread {vegan, gluten-free, no yeast} Recipe
Vegan & Gluten-Free Millet Bread (no other flours!)
Interested in making easy, gluten-free, vegan white bread? ♡
You are in luck, because today I am sharing my millet sandwich bread, a simple-to-assemble, healthy, delectable “white” bread made with 100% millet flour (no other flours or starches). Really and truly!
Regardless of whether you are brand new to gluten-free bread-baking, or just looking for a healthy, everyday gluten-free bread recipe to add to your repertoire, I highly recommend giving this delicious bread a try.
Alright friends, let’s make some easy, gluten-free bread together!

Recipe Benefits
First, allow me to say a few words about humble, frugal, and fabulous millet. Millet is a high-fiber ancient grain with a low-glycemic index (i.e., no sugar spike after eating). Further, it is high in B vitamins, calcium, iron, potassium, zinc and magnesium. I love that it has a mild flavor and that it is very inexpensive, too–perfect for making many loaves of everyday bread like this!
Millet flour is often used in combination with other flours for gluten-free baking, but my bread uses millet alone (no other flours or starches). The bread is all of the following, and more:
- Gluten-free
- Vegan (egg-free & dairy-free}
- Yeast-free (e.g., no instant yeast or active dry yeast)
- Xanthan gum-free
- Oil-free
- Sugar-free
- Nut-free
- High in fiber (3.9 g per slice)
- Minimal ingredients
- No added starches (e.g., no potato starch or tapioca starch)
- Easy
Ingredients for 100% Millet Sandwich Bread
The exact amounts of each ingredient are indicated in the recipe card at the end of the post. Toggle between US Customary (volume) and Metric (weights) for preferred measurement option.

Gluten-free bread shouldn’t require a laundry list of ingredients. You will only need the following to make this loaf:
- Millet flour
- Whole psyllium husks (not psyllium powder)
- Baking powder
- Baking soda
- Salt (always optional/adjustable)
- Water (I use filtered water from my tap, room temperature)
- Cider vinegar
Tip: Grind Your Own Flour
If you have a high-speed blender, or a small electric coffee grinder, you can grind your own flour from whole millet in little time.
High speed blenders will turn millet into millet flour in about a minute. If using a coffee grinder, you will need to grind about 1/4 cup at a time (it goes quickly). Place any extra flour in an airtight bag or container and freeze until next time.
Alas, food processors do not work for grinding whole millet into fine flour (I’ve tried, and tried again). The tiny millet grains are hard (and tenacious!), making it difficult to get anything finer than a coarse meal after 10 minutes of grinding.
Vinegar Options
Any other vinegar–light or dark–can be used in place of the cider vinegar. If you do not have vinegar, or do not use it for dietary reasons, substitute an equal amount of lemon or lime juice.
How to Make Vegan Gluten-Free Millet Bread
Making this bread is easy. Let’s do this!

Step One: Mix the Dry Ingredients.
Whisk the millet flour, baking powder, baking soda and salt in a large mixing bowl until blended.
Step Two: Combine the Wet Ingredients and Psyllium.
Whisk the water, vinegar, and psyllium husk in a medium mixing bowl. Let the mixture stand for about 5 minutes to thicken. The psyllium mixture sets into a loose, pale gel almost immediately (similar to flax and chia gels, but less sticky than the former).
Step Three: Stir to Combine

Add the psyllium mixture to the flour mixture and blend / stir to combine the wet and the dry. I find that a rubber spatula, wooden spoon, or clean hands work best. The dough will be thick, but will come together easily. Scrape the sides and bottom of the bowl to make sure the dough is completely blended.
Roughly shape the dough into a cohesive ball or general mass while it is still in the bowl.
Step Four: Shape the Dough.

Wash any excess dough off of your hands. With still moist hands, shape the dough ball into a loaf shape to fit a 9×5-inch (22.5 x 12.5 cm) loaf pan. Place the loaf in the pan (sprayed, greased, or lined with parchment paper). Smooth the top and gently press into shape, rounding the corners and sides.
Step Five: Bake the Bread.
Bake the bread in a preheated 325F (160C) oven for 90 minutes until risen (it has a significant rise!), and the surface of the bread appears golden brown, dry, and crusty. The bread will also sound hollow when tapped.
Important Note: Convection Ovens
If your oven has a convection option (sometimes called a fan oven in countries outside of the US), do not use it for this bread! This bread need to be baked using the regular (conventional, radiant) heat. More about this in the FAQS at the end of the post.

Let the bread cool, in the pan, on a cooling rack for 15 minutes.
Remove the bread from the pan and cool the loaf completely on a cooling rack.

Now that’s a fine-looking loaf of bread!
Slice it Thick or Thin

This is a sturdy bread with minimal crumbs, which translates to bread that can be sliced as thick or thin as you desire.
What is the Texture & Taste?
First, texture: This is a fine-textured, firm bread with a distinctive crust. It is similar to a firm, white (all-purpose flour) white sandwich bread. Toasting the bread results in crisp, crunchy, hearty slices.
Taste: The flavor of the bread is mild and toasty, with a subtle flavor akin to corn. I LOVE it toasted, topped with melting vegan butter and a thick slather of jam. It is excellent for sandwiches, too. I recommend slicing it thin for sandwiches given it is such a filling bread.
Have fun spreading this with everything from nut butter to hummus to jam, and don’t forget about dunking it into soups and stews (it holds up with aplomb).
FAQ
Can I use different flours (in place of the millet flour)?
I do not recommend it. The proportion of wet and dry ingredients, as well as the quantity of psyllium husk, is particular to the millet flour.
Good news! I have tested two variations–one with buckwheat flour, the other with oat flour– so that you do not have to experiment! They are equally easy and delicious:
Gluten-Free Buckwheat Sandwich Bread {vegan, no yeast}
Vegan Gluten-Free Oat Sandwich Bread {oil-free, yeast-free}
What kind of Millet Flour do you use?
I bring this up for my international readers. In the U.S. and Canada, we pretty much have one type of millet , and one type of millet flour made from that type of millet, available. It is simply labeled “millet.” It is small and pale yellow.
North American manufacturers do not specify the type of millet on packages (it is simply called “millet“), but various sources indicate that the only millet grown for human consumption in the United States is proso millet. If you have the choice of several millets in your country, opt for proso millet (and flour made from proso millet).

Do not Use Sorghum Flour or Amaranth Flour. Also note, in particular, that some countries categorize a range of grains as “millet,” even though they are not, in botanical terms, millet. For example, sorghum and amaranth. Neither sorghum flour nor amaranth flour will not work with this bread.
My oven has a convection setting. Should I use it for this bread?
No, definitely not. Convection ovens are wonderful for many types of recipes, but not every recipe. Convection ovens excel at quick, crisp cooking. They are not the right choice for long slow baking, and that is definitely the case for this bread.
Convection ovens (or the convection oven setting) can force the outer layer of this bread to rise and separate from the inside of the bread. This will lead to several results: (1) a big bubble under the surface of the loaf; (2) a gooey middle and bottom; and (3) a hard outer crust.
This bread needs the low, slow radiant heat of a conventional (radiant heat) oven.
My bread came out gooey in the middle. Why?
The most likely reasons are the following:
- Baking in a a convection oven instead of conventional oven. See the section above explaining why this makes a huge difference.
- Not gelling the psyllium separately from the other ingredients. For this recipe, the psyllium must be gelled separately from the other ingredients for the bread to work (i.e., no shortcuts in mixing all of the ingredients together at once).
- Oven temperature is off. I regularly check my oven temperature setting using an inexpensive oven thermometer. Check to make sure the oven is accurate before baking. If the oven is too hot, it can force a faster rise to the bread, leading to a bubble under the top of the loaf.
Can I Use Something Other than Whole Psyllium Husks?
Alas, no, it must be whole psyllium husks. Other gelling agents, such as flaxseed meal or chia seeds, will not work as direct substitutes (they might work, but it would involve some experimenting to determine their efficacy).
I also do not recommend psyllium powder. It can work as a substitute for the whole husks in some recipes, but not with this bread.
How Can I Vary the Flavor of the Bread?
Consider adding dried herbs or spices to the bread to vary the flavor. For example, 1 to 2 tablespoons of dried Italian herbs or herbes de Provence or 2 to 3 teaspoons of ground cumin, curry powder, garlic powder, or onion power.
For a sweet version of this bread, try my 100% Millet Banana Bread or 100% Millet Pumpkin Bread.
Happy baking! Let me know if you give this a try :).
More Vegan Gluten-Free Millet Recipes to Try
- Flourless Millet Oat Bread {vegan, GF, 5 ingredients}
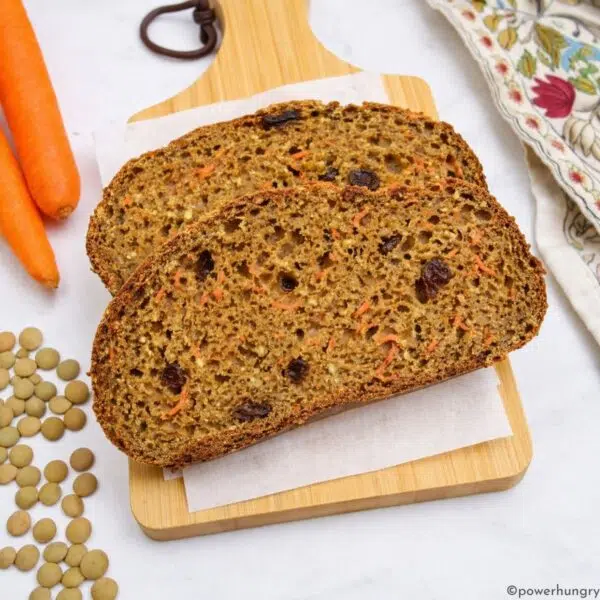
- Carrot Cake Millet Breakfast Bars
- Flourless Apple Millet Muffins
- Millet Apricot Energy Bars
- Vegan Millet Kale Quiches {GF, high protein}
- Strawberry Puffed Millet Bars {Vegan, Nut-Free, GF}

100% Millet Sandwich Bread {vegan, gluten-free, no yeast}
Ingredients
- 2 1/2 cups millet flour, (see tip to grind your own)
- 2 teaspoons baking powder
- 3/4 teaspoon fine sea salt
- 1/2 teaspoon baking soda
- 2 1/2 cups water
- 1 tablespoon cider vinegar, see notes for options
- 1/3 cup whole psyllium husks
Instructions
- Preheat the oven to 325F(160C). Note: do not use convection setting for this bread (see post for explanation). Spray or grease a 9×5-inch (22.5×12.5 cm) loaf baking pan (or line with parchment paper).
- In a medium bowl whisk the water, vinegar, and psyllium husks until blended. Let stand for about 5 minutes until thickened into a gel.
- Add the psyllium mixture to the flour mixture and mix (using a wooden spoon, rubber spatula, or clean hands) to completely combine into a dough. Scrape the bottom and sides of the bowl to combine all of the ingredients (the dough will be thick). Gather the dough in a rough ball (while still in bowl).
- With moist hands, shape the dough into a loaf shape to fit the loaf pan. Place in the prepared pan. Use moist hands to smooth the top and round the sides slightly.
- Bake in the preheated oven for 90 minutes until the surface appears pale golden brown, dry and crusty. The bread will sound hollow when tapped. Cool in the pan, on a cooling rack, for 15 minutes.
- Remove the bread from the pan and cool completely on the cooling rack before slicing.


I made the following changes:
Thank you for your recipes
I’m using convention oven mode at 375 degrees. Bread has a beautiful crust after an hour I take the bread out of my cast iron form and bake for 30 more minutes.
Add 0.5 cup of whole millet rinsed
For a nice crunch
Up the baking soda to 1 teaspoon
Brilliant, Beatrice! Thank you so much for sharing your tips. And I love the addition of whole millet for crunch, k am 💯 going to follow your lead next time I make a loaf. Cheers.
I love this bread! It’s quick to assemble, and makes a delicious loaf with a pleasant texture. It’s so easy to cut, even into thin slices.
A personal note: since I’ve had to go gluten-free, I’ve missed kneading my bread by hand. This brought back that pleasure 😊
I am so thrilled, Kathy! 😊
Hi Camilla, I am looking forward to trying your recipe for millet sandwich bread. One of the commenters had a problem with their bread turning out gooey inside, and one of the questions you asked her was if she measured the flour by cup or weight. Since I usually measure by weight when baking, I thought I should ask you what difference that would make. I have Arrowhead Mills Organic Millet Flour, and will be using the conversion on the back of the package (1/4 cup = 35 grams). Thank you!
Hi Liz!
The metric measurements are included in the recipe: there is a toggle underneath the ingredients in the recipe card, you can use US customary or metric (grams and ml measurements). I use 400 grams of flour in the recipe. Different manufacturers of flour have different weights for flour measurements by cups, but I test all of my recipes using weight. So definitely use 400 grams. Cheers 🙂
Thank you for your very helpful answer, and thanks for replying so quickly!
You’re so welcome, Liz! 😊
I’ve made this bread a few times. And it’s always been delicious it’s great toasted probably the best way I like it is toast it. And today I made a chickpea salad and then over top of the bread with some sliced tomato so delicious and all oil free!!
Thank you so much for this site!
You are so welcome, Jill! I’m glad you love the bread, it is a household favorite. The chickpea salad with tomato on top sounds so good!
I love this bread. It has been a game changer for me. I am celiac and have allergies to dairy. I really like using the whole millet soaked overnight in the blender. It is especially good toasted. Thanks so much!
Wonderful, Tracy! I am so happy to know that you love the bread 😊
Hi Camilla,
Unfortunately this was a complete flop for me.
I followed the instructions exactly and did not replace any of the ingredients. I baked it for nearly two hours. It rose to impressive heights in the oven, but was basically completely raw inside. It ended up being a gooey sticky brick. I hate to waste food, but I had to toss it.
I am not sure what happened, and why I have not had any success with your recipes using millet flour (I made your millet banana cookies, with similar issue – gluey uncooked texture)
Just wanted to share my experience with this recipe.
Hi Emily,
I’m so sorry the bread did not turn out. A few questions that might help me assist:
(1) is your oven convection/fan (as opposed to traditional radiant oven)? This is the most likely explanation for what you describe (good rise, but then it collapsed into goo).
(2) are you measuring the flour by cups? Or weight?
(3) did your bread dough look like photos in the recipe post? Or was it more wet?
Cheers, Camilla
Outstanding recipe! I made this in 3 small pans, because I cannot eat it all at once. It freezes so well! Thank you!
Wonderful, Gigi!
I had to eliminate a lot of foods from my diet a few months ago. I have made this bread a number of times. It has always come out great!
Wonderful, Catherine! So glad this humble bread suits your needs (hooray for bread!)
I have made this bread a handful of times now and really enjoy it!! 🙂 I usually freeze it and then either toast it or thaw it out and use it to make a sandwich. However, after I thaw it, I find the bread crumbles/falls apart easily. Is that normal after thawing?
Hi Allison! I am so glad that you are enjoying the millet bread! I freeze the bread regularly and have not had a problem with crumbling. Are you freezing the bread whole and then slicing the thawed loaf? I typically slice the bread and then freeze it(so I can pullout a few slices at a time). That might solve the issue. 🙂
Yes I slice it before freezing it. I was wondering if there was something I’m doing wrong with baking it. I am following the recipe exactly. Thanks for your response! I’ll continue to enjoy it 🙂
Ok, sorry that didn’t help, Allison. All the best.
This is my go-to bread recipe. I have a lot of allergies and had given up hope of finding a bread I can eat. Then I found this recipe via a facebook group, abut 2 years ago, It has changed my life! Thank you THANk YOU!
Deirdre, that is wonderful, I am so glad you can enjoy bread again with this recipe! 🙂 Cheers.
I only have a fan oven. Any other possible way of cooking? I have a slow cooker? Microwave?
Hi Marianne! I’ve been reading about different options for fan only/convection ovens and the consensus advice is as follows: (1) reduce the recommended temperature by 25 degrees; and (2) begin checking for doneness earlier. I know the second one is pretty vague, but it’s going to vary a lot from one recipe to another. Since this bread has such a long bake, perhaps start checking fifteen minutes earlier ☺️
I can’t eat baking powder. What can I use as a substitute? What does the baking powder do?
Hi Sam! Is it something in baking powder you cannot eat (e.g., the added starch or cream of tartar)? Or do you have to avoid baking soda as well (since baking powder is made from baking soda + cream of tartar + some starch to prevent caking)? The reason for both raising agents in this bread: baking soda reacts right away, causing an initial rise, but baking powder has two reactions (one to liquid, then second to heat), which helps this bread rise. Let me know if you can eat baking soda, I can recommend how to adapt the bread to baking soda alone.
Hello Camilla. This bread looks great! Do you think it will be ok to use this recipe for bread machine instead of oven? I guess if I mix everything in the order you have described and put it into the bread machine after that it should work… but not sure. Thank you
Hi Eugenia! First of all, I love your name (it is a family name on my Dad’s side–beautiful :))I Yes, I think it could work nicely if you were mixing it outside of the machine, per the directions, and then simply using the bake function on the bread machine. I would love to know if you give it a try! I have an ancient bread machine with very limited functions (still love it, though). I need to experiment with some of my loaves to see how they fare in it.
Thank you very much for your reply. I tried making the bread by mixing everything together at the beginning and then baking it in the bread maker. I’m not sure where the problem is, but the bread didn’t bake properly, even after adding an extra 20 minutes. I suspect the issue might be the psyllium rather than the bread maker. The dough was very thick from the start, more like a sticky lump. I used Uncle Tom’s psyllium, which seems to swell a lot, though I’m not sure if all psyllium behaves this way.
Could you advise what the dough consistency is supposed to be? I might try adding more water next time to make it looser. I really want this bread to turn out well, as my allergic child would love to try it, and this is one of the few recipes that suits her. And could you please let me know if I can add sugar to make it sweet? I’d like to be able to bake it regularly. I truly hope to hear from you soon.
Hi Eugenia,
Oh no, I’m sorry the bread machine version did not work out. Regarding the psyllium: I’m not familiar with that brand, I tried looking it up and could not find it. Is it a powder? It sounds like there was too much psyllium based on your description. If the psyllium is powder, not whole husks, you need to use a MUCH smaller volume (1 tablespoon whole psyllium husks is equal to 1 teaspoon psyllium powder) Could that be the issue?
Do you think it could be made into bagels? If so, would you bake it the same amount of time?
Ooh, that’s a great idea, Kathy! I would still aim for a fairly long bake, depending on the size of the bagels. I would start off with 30 minutes, but I am guessing something closer to 40 might be the ticket. You have me cited, Kathy I think I need to test this out. The bread has such a good crust, I bet it would make a good crusty bagel. I would love to know if you try it, too!
Something went wrong, I think. I haven’t baked it yet, but I have a batter, not a dough. Are the flour and water measurements supposed to be the same? 2 1/2 cups of each? I was leery of those amounts as I added them because equal amounts of flour and liquid usually do give a batter, not a dough. Did I read those measurements wrong? So here I am trying to save it with more flour and more leavening. (PS – I AM in high altitude in CO, but I adjusted the amounts per high altitude baking instructions.)
Hi Angie,
Oh no, sorry you are having issues with the recipe. Yes, the amounts are all correct, I make this bread weekly. I am wondering: did you add the psyllium husks? The psyllium makes the mixture a thick dough. Without it, it will be a loose batter, as you describe.
Yes, I did the psyllium husks soaked in water and vinegar first, as instructed. I ended up adding about 1/3 cup extra flour until the dough was pulling away from the bowl as I stirred it. It came out a bit dense, but it’s still good! Thanks!
This was amazing! I am celiac and was looking to see what I could do with my bag of millet flour when I came across this recipe! I can’t believe how easy it is and yet tastes great!
So glad you like the millet bread, Sam—enjoy every bite! 😊
Today is the third time I’ve made this bread. Always turned out great & tasty. When I used my glass or my loaf pan the hollow top occured. Today, I used my case iron pot and didn’t get the hollow top when my bread was done baking. As usual great taste. Tks for sharing your recipe with us.☺️
To overcome the gooey center, I found reducing the water about 3 Tablespoons, and adding a 1 large Tablespoon of melted coconut oil, was the answer. The coconut oil was added into the liquids AFTER it had gelled. This idea came from another millet quick bread recipe I used to make that had a lot of fat and cooked in 30 minutes. I use Canadian organic millet, and I love the bread toasted.
Thank you for the fantastic tips, Ellen! That’s marvelous 😊 I’m so glad you like bread!
This recipe is surprisingly great, and super easy. I ground my own millet and the measurement and weight were different so I went with the weight. I only had psyllium powder so I went with the weight for that too, and it worked perfectly. Thank you!
Wonderful, Kristine! I am so glad you opted for the weight over volume–I use weight to test all of the breads here, so kudos 🙂 Hooray that the bread was a success! Enjoy!
I’ve been gluten free for about 10 years. This is the best quick gf daily bread recipe I have found yet. It’s easy. The texture and taste are a dream—no crumbly sawdust here. The recipe is perfect. If you follow it, the bread turns out perfect every time…I am in love. Will definitely make this often. Millet is very inexpensive and satisfying. Win all around.
I have made this bread for years and love it! Today I made it and it turned out mushy inside. I used a different flour ~ ragi finger millet flour.
Is that flour usually work well?
Also, we were given an oven with a fan in it. Would that be a convection oven? Could that be why it turned out mushy?
Hi Heather,
I’m happy to know that you’ve been enjoying the bread for some time ☺️. As the for the sudden change in texture: I think it is unlikely to be due to the different variety of millet flour. The fan oven (we call it a convection oven in the US) is most likely the reason. I do not recommend using convection/ fan ovens for slow cooking vegan, gluten free breads such as this— they are much better suited for baking cakes and cookies (shorter duration— the moving air facilitates better browning). With breads like this, the fan can make the bread rise more quickly, over browning the top, while leaving a heavy, soggy bottom.
THANK YOU!!!! Made this 2 times! It falls apart a little bit if cut thin but that is to be expected in GF breads but I love the softness and chewy center like real sandwich bread has. I use the organic powdered psyllium husk (using weight so thank you for grams!) because that was all I have. First time I forgot to gel the husk and used old flour so it was bitter, dry and dense but the second time I gelled it as per your recipe and used fresh flour and it was to die for!!! The second time with the fresh flour, it had a little bit of a bitterness taste but for me it was so small I didn’t even notice when paired with toppings, the corn like nut flavor shined this time! Now I won’t need to go back to grains! I can have REAL BREAD again!
SOOOO happy you love the recipe, Annie. The bitterness is most likely from the millet, as you note. I’ve found that even some freshly opened bags of millet flour still have a bitter aftertaste. If you are open to gaining your own, it is 100% worth it (you can use a blender). I tend to buy whole millet in bulk (like Anthony’s brand), store it in the freezer, then grind as needed. All the best, enjoy your loaf! 🙂
Could you make this bread without making the millet into flour, just using whole millet, maybe soaked before hand? Just curious. Thanks. This is my favorite bread in the world.
Hi Linda! Yes! I developed this bread before I came up with some of my variants where I blend whole millet after soaking. You can use the same amount of water, pour it over the same weight of whole millet as millet flour (weight, not volume). Soak overnight to soften, Or use boiling water for part of the water to quick soak (20-30 minutes), then add remaining water cool. Blended the millet and water until smooth, then pour into a bowl and add the other ingredients ( I don’t like to add the psyllium to the blender because it is so hard to clean out after it thickens). Pour and spread into the baking pan and bake as usual 🙂
OMG…soooo delicious!!! Pillowy soft inside with a nice light crispy crust. I followed the recipe exactly, with one exception, I read other reviews and added a teaspoon of Italian seasoning. Perfecto! The flavor of this bread is akin to sourdough, and it’s divine! 💚❤️
I have so many food sensitivities that I have struggled with finding a bread recipe that will work for my limitations, and still turn out well. This recipe was my 33rd bread recipe attempt…and I have to look no further and I’m so stoked!
Thank you so much for this recipe! I will browsing your website for other recipes for sure, but I have a feeling this one will be my go-to weekly bread recipe.
Side note: the bread is so beautiful I took several photos and shared the recipe with my family and friends.
This brought me near tears, PBE–thank you so much for taking the time to write. Most of all, I am so happy that this bread works so well for your needs, and that you had such success making it! Enjoy every last crumb 🙂 xo
I don’t have proso but have the five positive millets at home. Foxtail, barnyard, brown top, kodo, little.
Can any of these work?
Hi Aparna,
Yes, those should work! A few people have tried using amaranth or sorghum in place of millet, and those will not work. Cheers
Made it this time with 2 tsp cinnamon added and soaked 50 grams dried cranberries and 50 grams chopped walnuts before adding in. Yum! Was able to ditch the baking soda and vinegar and do 3.5 tsp baking powder instead (made for someone who can’t do avidic). I’ve also made it with 1 Tbsp Italian seasoning added and it was tasty! Trying to think of what else I can add to it😁
YUM and YUM, Christina! Both variations sounds stellar to me. I love dried fruit and nuts in bread, plus some cinnamon…I am going to have to follow suit with my next loaf. Thank you for sharing your adaptation with baking powder, that will be super helpful to others. Cheers!
Can you tell me how many grams are in the one slice of bread you use on the Nutrition Label.
Thank you so much.
Hi Linda,
Apologies, I do not have that information. I make this bread often, though, so next time I make it I will weight the bread and add that information. Cheers 🙂
That would be great. Thanks!
As someone with celiac disease I’ve eaten and made a LOT of gf bread. I can say wholeheartedly that this is my very favorite. The taste and texture are outstanding, the slight flavor of corn is so delicious. It was really simple to make, too. Thank you for your wonderful gluten-free recipes! I’ve been trying to eat more oil free Foods too, so I’m looking forward to trying more of your WFPB bakes.
Wow, that is high praise, Greta, I am humbled. Thank you so much 😊
I am amazed that this was so easy and quick to make!!!! I made it the other day and will be making it again (many times). Mine was a bit damp in the middle (it’s my oven) so I just toasted the cut pieces and it was PERFECT!!!! You are soooooo on point with simple recipes – I am forever hooked. <3 <3 <3
Lina, you made my day–so happy you are loving the bread, and thanks so much for your kind words!
I’m honestly shocked at how well this turned out. I ground my own flour in a little coffee grinder. The loaf is heavy but surprisingly not at all as dense as I expected. I sprayed my pan and used parchment and it came right out, and was perfectly cooked after 90 minutes. To me, it almost tastes like cornbread with its nutty sweetness. I’m very excited to have bread again!
Thank you for this recipe! I was searching for an easy gluten and lectin free bread to make with millet and / or sorghum. This was it! Turned out great for my first try. I’m going to toast a slice to see the flavor / texture difference. I agree with everyone, it does taste like cornbread and that is just fine!
Thank you, Camilla, for this great bread recipe. I made it to keep in the freezer for toast and it’s delicious! The tangy taste of the millet reminds me of sourdough. It’s a new favorite and I’ll try the oat/brown rice flour version next.
Wonderful, Joanne, I am so glad you like the bread! I love it for toast, too. Enjoy!
My Millet Bread comes out soggy and heavy. I bake it about 20 minutes longer than the recipes says to?????
Hi Jeanette,
Oh no, I am sorry to hear that. It is a heavy/dense bread, but it should not be soggy. Did the bread rise well? If it did not rise well, then it is likely an issue with the baking powder (that would mean less/little rise, which would make the bread more dense and soggy). Or your oven may be running low and it just needed more time in the oven.
Hi.
I went wfpb no oil in December. I had been gf for almost 13 years and df since a child. The bread is amazing. I had no hiccups and did the recipe exactly as you wrote it. I love the heart, cornmeal like crust. I walk in and ate 3 slices. I am putting the other two sections in the freezer for later consumption.
I was worried as my baking powder use by date said 2019 anc I used cups vs weighing it for grams. It is delicious. I’m taking a picture and posting it on FB
Jill, welcome! So glad you are here, and so pleased that you like the millet bread so much. It is definitely one of my very favorite recipes 🙂 I am with you, I love the corn-like flavor and crustiness. Hooray, glad the baking powder still had life in it! Enjoy every crumb 🙂
This bread came out great! Shape and flavor! I put some quinoa flakes on top to “decorate”.
Have you ever tried adding some seeds to this bread? Do you think it would work? Sub out 50 grams of the flour with a mix of seeds maybe? I assume the acid is essential and cannot be dropped? Thank you for this recipe! It’s the first one of yours I have tried but now I’ve found plenty more I want to try 🙂
Hi Christina,
So glad you like the bread! Yes, you could definitely add seeds. But I do not advise replacing some of the flour with a seed mix. Instead, simply add the seeds (even as much as 50 grams, as you mention) to the existing recipe. Cheers 🙂
I purchased pure living sprouted millet flour to bake the millet bread recipe. When I weigh 2.5 cups in grams it weighs 353 grams not 400 grams. Should I add more millet flour?
Hi Cheryl,
I use grams for all of my recipe testing, since cup measurements can vary, so definitely go with 400 grams. Cheers 🙂
Thank you for so simple recepi.It was very helpful to read in comments that it is possible to soak millet.I am doing this when using whole millet.Up to now I managed just making oats bread, but now I will make variations. Have you tried to combine millet and buckwheat to make bread or just buckwheat bread, maybe also both of them previously soaked?Thank you for your creativity and inspiretion.
You are so very welcome, Zora! I have not tried the millet and buckwheat together (I need to!) But I think you could successful substitute millet flour for the rice flour in my buckwheat sandwich bread here: https://www.powerhungry.com/2021/01/28/gluten-free-buckwheat-sandwich-bread-vegan-no-yeast
Since you like being able to soak the millet, here is what I suggest. Soak 210 grams of whole millet (that is the weight of rice flour I use on the recipe). Drain. Blend the drained millet with the 2.5 cups of water called for in the recipe (blend for a few minutes until the millet is completely broken down into a smooth mix). Then add the remaining ingredients to make a dough. Bake as directed.
Hi it says at the beginning that it’s for people who can’t eat psyllium husks. But then they are listed in the ingredient list. I’m allergic to them.
Hi Dana,
I am not sure where you are reading in the post that this bread is for people who cannot eat psyllium husks. I note that this bread has no other flours or starches (psyllium husks are neither of these things). This particular bread recipe definitely requires psyllium husks.
I came up with a chia millet bread variation for those who cannot eat psyllium. Here is the link: https://www.powerhungry.com/2023/01/16/3-ingredient-chia-millet-bread-v-gf-oil-free/
Cheers.
What could substitute psyllium husk? If it works as a binder, could chia seeds or flax seeds work?
Hi Mariya,
Psyllium asks as a binder here, but it also adds volume to baked goods in a way that is different from chia and flax. This means the latter two options cannot be automatically subbed in for psyllium; the proportions of ingredients may have to change, and/ or sometimes chia or flax will not work at all, depending on the recipe. For this bread, I created a chia alternative . Here is the recipe: https://www.powerhungry.com/2023/01/16/3-ingredient-chia-millet-bread-v-gf-oil-free/
Finnaly a bread that I can eat with out any worry. I thank you from the bottom of my heart. But can you please tell me if it possible to use Air Fryer instead of conventional oven?
Hi Venkat,
I am so glad that you are enjoying the bread! I do not advise making a full size loaf in convection ovens (air fryers are mini convection ovens) because this needs a long steady bake (radiant heat/conventional oven) to cook though evenly.
But, a solution could be to halve the recipe and make muffin size portions that would fit in the air fryer. The bake is much shorter, so better chance of baking all the way through. About 1/2 cup dough per muffin, max. You would have to play with baking times, but I am guessing 30 minutes? I would love to know if you try it.
I see that the bread is best for 2 days in an airtight container. Would it be safe to vaccum seal it for it to last longer, if you want it shelf stable and not refrigerated or frozen..? I found that putting it in the fridge or freezer its not the same.. and I have found that it does mold quickly too…
Hi Marika,
I imagine that a vacuum sealer would work great if you have vacuum containers. I worry that it would be completely smooshed if using a bag (I am remembering my husband trying to vacuum seal a coffeecake someone gave us–it wasn’t pretty). But perhaps google for tips on how other people have vacuum sealed loaves of bread? I would wager some clever people have come up with tips and tricks on the subject.
Hi Camilla!
This is a wonderful recipe. I make this loaf quite frequently because we like it so much.😁. I follow the recipe exactly as written and it turns out perfect every time. Thanks for sharing your creative talents with all of us – it is greatly appreciated. ♥️ Much gratitude ♥️
I am so glad that you are enjoying the recipe so much, Jennifer! ❤️
This is phenomenal. Perfect ratios. Better toasted, of course. Thank you!
That’s wonderful, Jenifer, I am so glad you like the bread!
Love it. Lovely compact. So quick and easy. The hard part was waiting for it to cool down.
I’m so glad it turned out so well, Nicolien! I’ve been there, the cool-down period for baked goods can be so hard! 🙂
Really Amazing bread recipe
Ila, I am so glad to know that you like it! Thanks so much for taking the time to post a comment, I really appreciate it 🙂
Can I replace the baking powder with anything and can I soak the millet flour for 12 to 24 hours in water to lower anti nutrients? Thinking it might cause a problem since I am supposed to add water to psyllium husk later after the dry ingredients are mixed.
Hi Julian,
I do not have any experience soaking flour so I am not sure how that would work in a recipe like this. However, I can say that you can add the psyllium later (if you do experiment with soaking). I’ve done even more psyllium breads since this one and have discovered that the presoak is not necessary for a long-cooking bread like this one (it will absorb the liquid as it bakes). Cheers.
Thanks for replying Camilla, i soaked for 24 hours, it worked fine and turned out the same as the non soaked one i made earlier, I’m hoping the soak lowered phytic acid. Overall the bread is awesome but only if i toast it, If i eat it straight its quite bland but toasted is 10/10 amazing and crunchy. I am going to attempt to do the version you have shared with yeast instead of baking powder or soda, i am thinking the yeast version is probably slightly healthier. I also have a big bag of tapioca starch and coconut flour would it be worth doing like maybe 300g millet and making up the rest to 400g in either of these flours? Thanks Camilla!
Hi Julien,
I am so glad to know that the soaking method worked and that you like the results, that’s wonderful. If you want to enhance the flavor, you can add herbs or spices of your choosing, or increase the salt slightly.
Regarding the tapioca flour or coconut flour: I can speak from experience that changing the recipe should be done as an experiment. Even if it seems like a perfectly logical replacement, it may not work. I think the tapioca flour version is more likely to work. I would not do a weight replacement of coconut flour to make up for 100 grams of millet flour. Coconut flour is so unlike grain flours, it is used in much smaller quantities (it is very absorbent). So if you do try coconut flour to make up for some of the millet flour (say, 100 grams of millet flour), you may only need to add 1/3 that amount (33 g) of coconut flour. I have had success combing oat flour and coconut flour in baked goods, so it could work nicely, it just might take a few tries to get the proportions right. It’s part of the fun when it does work out :). Cheers.
Can you tell me exactly how you added the soaked millet to the recipe. Did you soak the whole millet, drain, blend, and then add to the recipe? Did you change anything else?
Hi Tina,
If you want to soak whole millet to make the recipe, use the same weight of whole millet (400 grams). Soak and drain. Blend the millet with the 2.5 cups water until completely smooth and then add the remaining ingredients (no need to gel the psyllium separately). Spread in the pan and bake 🙂
Turned out really good! Very simple recipe and easy to make. Making for the 2nd time right now. The texture was good on the first loaf but a little dense. This time I measured the ingredients with a scale so we’ll see how that works out. It’s delicious toasted, gets very crunchy. The flavor changes when its toasted, tastes much better than not toasted. Great with honey or jam or with soup.
I am so glad that you like the recipe, Beckah. Thank so much for taking the time to post a comment.
This looks delicious! Has anyone tried making a pizza crust with the millet bread recipe? I may endeavor this myself….
Did I read somewhere you have to make the psyllium gel separate from the other liquids? And if that is the case, you mix it with the water?
Hi Janie!
You may very well have read that. But I have put it to the test in multiple recipes, and it is not true :). If a specific recipe tells you to mix it separately, that is fine, you should follow the directions as written. But psyllium will absorb liquid and gel regardless of whether it is mixed with the liquid separately or when the psyllium, liquid and other ingredients are combined together. Cheers.
Again, can you adapt this for a bread maker, please?
Hi Anna! I have not tried this or the sorghum bread in a bread maker so I cannot advise whether it will work. If you did decide to try it, I would stick with a quick bread setting. These two breads require longer bakes–i would think you would need to be able to manually adjust the baking (I have a very old-fashioned bread maker that I have not used much in recent years. It has preset times for the bakes).
This bread was amazing!! Very reminiscent of cornbread in my opinion. But I would easily make a sandwich with it. I only had powdered psyllium and it worked just fine.
Wonderful, Janelle! I am so glad you like the bread. Millet reminds me of corn in flavor, too. Thank you so much for sharing that psyllium powder worked just fine, that’s super helpful 🙂
Oh great to read this comment, Janelle! I’ve been loving this delicious fail-proof millet bread for the last three years without more than tweaking a bit. But I live rurally and my online order for more psyllium husk delivered psyllium husk powder. I tried making it anyway but it needed a lot more water just to mix and form the loaf. I will be so glad if it turns out again this time.
This bread is the best thing that I have found while switching to a gluten-free diet. I make another loaf every time I finish the last one, give loaves to friends, and have never had a bum loaf. In fact, it just gets better every time I tweak it for altitude or internal temperature, and it lasts for up to 5 days on the kitchen counter in a ceramic breadbox wrapped lightly in a dishtowel. Thanks and much appreciation to Camilla for the recipe and clear writing!
HI Susan,
Oh, how frustrating to receive the wrong product. You mention needing to use a lot more water, so I am wondering if you used the same (1) volume (cups measurement) or (2) weight? If it was volume, that would explain needing to add a lot more water. Most psyllium powder is approximately 5 grams per teaspoon, while whole psyllium husks are 5 grams per tablespoon. So you may be able to sue the powder so long as you adjust and use the weight or an equivalent volume (closer to 5.5 teaspoons, not 1/3 cup). I hope that might work! I am so happy you love the recipe 🙂
Hi, I was wondering can I make this recipe without the chia seeds? I am looking for an easy millet flour bread or bun recipe that does not use xanthan gum or psyllium husks etc.
Thanks
Hi Anshirley,
I am guessing that you meant can you make WITH chia seeds, yes? Since this recipe uses psyllium husks? If that’s what you meant, then YES, but with a few changes. I made a version of this bread with chia seeds specifically for those looking to avoid psyllium husks :). Here it is: 3 Ingredient Chia Millet Bread
This bread is awesome! I’ve made it twice and it turned out perfectly both times. The taste is nutty and sweet and wholesome and perfect. I am so pleased with the simplicity of the recipe and the overall flavor. When toasted it is extra crispy and yummy. This bread does not fight with any topping you might wish to use, in fact it makes everything taste better. Thank you! for sharing. This is a perfect recipe for me and I believe others will love it too!
I am so thrilled you like it, Sandy! 🙂
Im.noy sering why I can’t base the bread in convection oven.
Hi Ellen,
I think something must have happened with your keyboard or autocorrect?
Thank you for the speedy reply. I have never weighed ingredients and don’t have a scale, so maybe I will look into getting one.
Hello Camilla –
Can I use Organic Traditions “Whole Psyllium Flakes” instead of the husks?
Thank you.
Catherine
Hi Catherine,
I looked up the whole psyllium flakes (I was not familiar with that brand). It appears that they use the term “flakes” to refer to whole husks, so yes, definitely use. For best accuracy, I still recommend weighing the psyllium (the organic traditions nutrition ion label did not give a volume measurement for a serving, so I could not compare to other brands of psyllium husks).
Hello Camilla,
I’m writing to you from Germany. I’m translating the text using Google Translate. So you’ll know if a sentence doesn’t sound quite right. 🙂
I find the “100% Millet Sandwich Bread” recipe very appealing and will try it out in the next few days.
I particularly like two things about your website:
1. You put a lot of effort into explaining the recipes and also the additional information.
2. You respond regularly and quickly to your readers’ comments.
Big compliment!!
I have a question about the “100% Millet Sandwich Bread”.
Why are there 2 different types of baking powder in it?
Baking powder and baking soda?
Baking soda is actually a type of baking powder, or am I misunderstanding that?
Best wishes from Germany
Bernd
Hi Bernd,
Thanks so much for the kind remarks. I am glad your are interested in making the millet bread, it is one of my favorites.
Baking powder and baking soda are alike, but not the same. Baking soda is the commercial name for sodium bicarbonate. When it comes into contact with an acidic liquid (like vinegar or lemon juice) it produces carbon dioxide gas. The bubbles from the gas add lift to baked goods. It begins to happen as soon the two are mixed. Baking powder is a combination of sodium bicarbonate and some form of powdered acid (often cream of tartar). When moisture is added to baking powder, the same gaseous reaction can occur without there needing to be an acidic ingredient in the recipe.
The reason both are used in recipes like this one is to achieve the best rise. The baking soda provides a good amount of initial lift (which this unusual bread needs). The baking powder adds to that lift, but it also gives a second lift because most commercial baking powders are what is know as “double acting.” They create initial lift with the reaction to liquid, then a second reaction and additional lift that occurs from the heat. That’s really important for breads like this that have a long, slow bake (and it also prevents the bread from collapsing after the initial rise).
I hope this helps to explain! Cheers.
SOOO GOOODDD! was searching for a bread recipe that was vegan gf, actually healthy and tapioca free!!! (doesnt agree with me) i am DEFINITELY trying more of these bread recipes asap!
Hi brrr,
I am so happy this bread was such a success for you! Thank you so much for posting, I hope you try some additional breads, too 🙂
Very bitter. Couldn’t eat it.
Hi Ioana,
Oh no, I am so sorry to hear that. If the bread is very bitter it is because the millet flour was rancid. Millet flour can spoil very quickly if not stored properly. The spoiled oils in the millet create a very bitter flavor. I stongly suggest storing the flour in an airtight container in the freezer.
Please confirm which millet flour measurement within the recipe is correct to use, 2 and 1/2 cups or (400 g) millet flour? Note my experience in making the bread which is why I’m asking.
First time I made the bread I made it with 2 and 1/2 cups of millet flours. It was not cooked all the way through, as another reviewer mentioned dense and little doughy. I made a note to simply cook a little longer.
Upon making the bread a second time I made it using 400 grams of millet flour and it was almost perfect!
Third time making this bread I was perplexed and measured 2 and 1/2 cups of millet flour…weighing in at 300 grams.
So, please advise which is correct amount of millet flour to use to the ratio of the other ingredients.
Thanks so much.
Hi Janet,
Sorry for any confusion with amounts. I always recommend going by weight. It is how I measure all gluten free flours for the recipes. Cups measurements can vary (a lot) for one baker, even more between different bakers ☺️ I get 400 grams when I measure 2.5 cups. I’m using bobs red mill millet flour (they list 1/4 cup as 40 grams. That’s 400 grams for 2.5 cups). Cheers
I just left a comment, and noticed a bunch of question marks. Don’t know what happened there
No worries Kala, I removed them: For some reason Wordpress does not like certain emojis, they are converted to question marks 😐
Hi there! Thanks for such a clean, healthy and good tasting bread! would flax or chia seeds be a good substitute for the psyllium husk? I’ve been eating the bread daily, and I’ve read some mixed reviews about it so wondering if there could be a substitute every now and then. Thank you!
hi Kayla! I am so glad that you like the bread! And I have you covered regarding flax and chia variations. I develoed two separate recipes for each options. Here they are: 3-Ingredient Millet Chia Bread and 3-Ingredient Millet Flax Bread. Enjoy!
This is the best bread! I can hardly believe how great it turned out! I can sandwiches and toast again!
I am so glad you like it , Nadia!
Can’t wait to try the recipes!!!
have been eating gluten free for awhile
(both my children very intolerant).
But unwittingly I have been also eating foods which are contributing to arthritic pain for me .
So it’s back to the drawing board to find different recipes. Going to start with the millet loaf.
Many thanks for sending
Regards
Deni
Welcome, Denise! Let me know if your have any questions or concerns about the recipes. Enjoy the millet bread!
Made this..I live in India, so various millets and isabgol (psyllium) are easily available. The recipe was easy to make; the bread has good structure, cuts well. Doesn’t rise, ofc. But the taste is – dry with a hint of bitter. Maybe because my flour was old. Also has a slight psyllium aftertaste. I have IBS, so this is a definite alternative to wheat bread..makes a sandwich, toasts well. I will have it with strong tasting toppings/fillings. Also will try again with fresher flour. Thank you.
Hi Anjali,
I am glad you will give it another try with fresh flour. That should make a significant difference. You can also add flavorings to the bread if you like (sweet or savory spices, herbs). Also: you mention that your loaf didn’t rise? It should definitely rise. Perhaps check the freshness of your leavening? Cheers.
Hey, Camilla! I just tried this recipe today and I can say, without a doubt, that this is the best gf and egg free bread I’ve ever made. I’ve tried so many in the past but this has had the best crumb!!
Just a query, I followed the recipe exactly (i.e measurements, oven setting, husks not powder etc) but the inside was still quite sticky. I also baked it for longer (roughly 30-40 minutes), since the recipes states that it should sound ‘hollow’ when tapped on. I let it cool down completely before cutting into it, so I’m unsure where I may have gone wrong- would you have any idea?
Thank you so much for making this recipe available! Also, of all the bread recipes on this website, which one do you like the best? I’m definitely going to have a go at more in the future!!
All the best xx
Would this work with ground flax instead of psyllium husks? (I have a fairly severe psyllium sensitivity/allergy)
I’ve got you covered, Key! I came up with this flax version for those with psyllium sensitivities 🙂 https://www.powerhungry.com/2024/04/19/3-ingredient-millet-flax-bread/
Hi
I was wondering what the purpose of baking soda is. Thank you.
I am looking forward to making this recipe.
Hi Alina,
Baking soda is a leavening agent used to make baked goods, such as breads, rise . Yeast and baking powder are also leavening agents. When baking soda reacts with an acid , it produces carbon dioxide gas, which causes the batter or dough to rise (it also affects the texture, making it lighter, less dense. Cheers.
I would like to know if millet bread can be made in a bread making machine
Hi Lynette,
It is possible, but I have never tested it. I would think a quick breads setting would be best (since this is not a yeast bread). Apologies that I cannot give more guidance.
This bread ist the best! Thank you so sooo much for the recipe ❤️
You are so welcome, Sabine, I am so glad you like it 🙂
I just made the bread, I doubled the recipe, and for some reason, it came out very doughy , I even put it back in the oven to bake for another half hour. I’m thinking now, because I doubled the recipe, I should have doubled the time?
Vimala
Hi Vimala,
I ama so sorry the bread did not turn out. Yes, the issues are most likely due to the doubling. Unfortunately, not all baking recipes can be doubled. That is especially the case for alternative breads such as this one.
Hello,
To reduce phytic acid don’t you have to soak the millets at least for 4-6 hours? In that case, should I dry them and toast them and then grind?
Hi Isa,
Based on my cursory google search, that seems to be true. There is mixed opinion about phytic and other antinutrients— there are benefits as well as negatives when consumed in excess. Im not sure on the best way to reduce phytic acids in millet in particular, butn8 8magine there are some good resources out there.
I had so much millet lying around and did feel like only using it to make porridge. One day I was searching for recipes to use up some of this millet. Long story short I found your recipe and on this rainy Saturday morning I decided to make bread. I have never made bread before and this one turned out great. Now if I could only stop eating it there might be some to take over to my mom’s so she could try it.
Thanks, for such an easy and tasty recipe. I’ll be making another one as soon as I grind some more millet.
I am thrilled to pieces to read this, P J. I am so happy that you discovered the recipe, gave bread baking a try ( go you!) and are enjoying the results so much . 🙂
Mine came out heavy and dense, about the size of a banana bread. There is always nexr time eh?
Hi Cecil,
I am sorry the bread did not come out as you expected. This is a robust, dense bread (not like a traditional wheat flour yeast bread). I am not sure what you mean by the size of a banana bread, but assuming you mean it was small. It could be that your leavening agents were expired, or the bread did not get into the oven soon after mixing?
Hello! Just wanted to let you know the millet bread turned out delightful. I’ve made two batches of it so far and everyone at home loves it. My gas oven wasn’t working so I made it in the microwave convection and faced zero issues!
I also tried the chia seed bread which too turned out great! Thanks for the amazing recipes!
Em, that is such good news! I am so happy to know that the brea worked in your microwave/convection oven. I know more and more people are using smaller oven appliances for a variety of reasons, so I am sure that will help others. And another yay that you enjoyed the chia bread, too 🙂
Would I have to add anything additional if I wanted to create these as “Bagels” or could I get away with just placing this batter into the donut pan and have a bread bagel? Lol
Hi Charlotte,
Ooh, great idea! I think straight to the donut pan. And maybe some everything bagel seasoning 🙂 Let me know how it goes!
Hi Camilla, Millet can have a bitter taste more so to some people than others. Is there any way to minimize the bitterness? Great recipes, thank you.
Hi Susie,
You can offset bitterness by adding herbs or spices. Adding a little bit of vanilla (1/2 to 1 teaspoon) will not make the bread sweet, but can add a mellowness. 🙂
I am going to make this just as soon as my ingredients arrive, later this week. Have you ever made 100% millet hamburger buns? Do you think this same recipe would work shaped into buns instead of a loaf? I might try doubling the recipe and making some of each unless you have a recipe for the buns? Thanks so much for sharing your recipes!!
Hi Tammy! I think that hamburger buns are a great idea. I have used this recipe to make rolls , so yes, flattening into buns should work, too. It will take a lot less time to bake, perhaps 40 minutes, depending on the size. Maybe less, so perhaps start checking at 30 minutes 🙂
Hi Camilla
Thanks for the recipe! I really appreciate the work youve put into this one recipe.
I just made my first batch, and everythings good but its a bit mushy on the inside and it sticks to my mouth and throat a lot like i can feel it slide ever so slow down my throat lmao, so i have to have a glass of water nearby when i eat it. Can you tell me where i went wrong here? Cant imagine that’s intended and granted i use a square baking pan thing.
I want to make one as close to the ones you’ve shown in pictures, looks insane.
Thanks in advance
Hi SmithJSmith,
Welcome, I am glad you gave the millet bread a try!
The bread should definitely not be mushy inside. You mention you used a square baking pan? Could you share dimensions? The pan size makes a difference for how breads bake. If it was too deep, the bread will not bake properly. A few other troubleshooting questions:
*did you use a traditional oven or convection (fan) oven? I do not recommend the latter
*did you use whole psyllium husks or powder?
*did you weigh your ingredients? Or use volume measures (e.g., cups, tablespoons)?
That would help me figure out what might have gone wrong.
Outstanding! It is really a wonderful bread, I was surprised that I like the flavor of millet, solo, so much.
Thank you for this recipe! Since going plant based and gluten and dairy etc free I have been searching for a bread recipe as I was missing my “bread”. This ticked all my boxes!
I halved the recipe and made a nice little loaf in a small bread loaf tin that was perfect.
I used lemon juice instead of ACV.
I am going to experiment with adding a few things to the bread.
So wonderful to enjoy bread again!
I have it toasted with nut butter! Yummo!
Thank you 🙂 🙂
Thank you so much for this recipe!
I am recovering from a bad flu and my brain is a mush so of course I did not waited to read the instructions and mixed the psyllium with the flour doh, poured in a lined baking pan thinking will give it a go anyway, got scared and didnt bake it but put it in the fridge overnight thinking will somehow use the batter next day for pancakes or something. Forgot and exactly 24h after i took it out and was soo thick!! left it on the counter while i warmed up the oven to 160C and baked it as instructed. O M G!! IT WORKED!
So if anyone makes same mistake, you can still save it!
THANK YOU THANK YOU!!
I am so happy that you are recovering , and so proud of you for making the recipe work in spite of everything–cheers to you! Thanks so much for sharing so that others (including me!) know 🙂
Made this bread in fan oven… 160c, should have dropped the temperature down I think. The bread looked ready, but when I lifted it out the loaf tin, it had completely sunk. Can you think of any other explanation? Thank you.
Hi Sophie,
Oh darn, I am sorry to hear that the bread sank after baking. I am almost certain that it is because of the fan oven. I mention this in the post (under Convection Ovens–that is what they are called in the United States). This bread needs to baked with traditional (radiant) heat, otherwise it can rise too quickly and subsequently sink.
Can I substitute ground flax seed for psillium husk
Hi Sue,
Rather than subbing flaxseed meal in this recipe (which won’t work, as the recipe is written), you can sub an equal weight of flaxseed meal for the ground chia seeds in my 3-Ingredient Millet Chia Bread (https://www.powerhungry.com/2023/01/16/3-ingredient-chia-millet-bread-v-gf-oil-free/). I developed the recipe for people who were interested in this millet bread but cannot eat psyllium husks. Cheers!
This is a great recipe – 5 stars! I have made it at least six times and tried other flour options just to use up bits of leftover flour). Quinoa flour was great tasting but the rise is less and loaf is moister in its consistency. Blended quinoa and buckwheat really great flavor still slightly less rise than the original.
Spelt and buckwheat is in the oven now – the dough smelled fantastic!
Fantastic, Dale! Thank you so much for sharing your tips from experimenting with other grains, too, that’s great .
Hello there,
I’m having to follow an anti-inflammatory way of eating at the moment and I’ve been searching high and low for a gluten-free, vegan, but un-processed bread recipe… and here it is!
I think it’s my fourth loaf that’s in the oven as we speak and they’ve all turned out really well.
I wanted a loaf that was soft enough for a sandwich, but that would also toast and this is perfect.
I also love the crusty outside.
I wrap mine in a tea towel once it’s cool and it lasts for a good few days. I’m in England and so it’s pretty chilly here at the moment, but come the warmer weather it’ll have to live in the fridge.
I’m getting used to the millet flavour and love that it comes together so quickly.
Thanks so much.
Take care all,
Hilly x
I am so glad that this bread works well for you, Hilly! Thank you, too, for the tea towel tip 🙂
Cheers!
Is there a way to my the crust softer?
Hi Marika,
Yes, there is a way! When the loaf first comes out of the oven it produces a lot of heat and steam. When the hot air hits the cold air, the water vapor condenses, or “sweats.” If you cover your bread with a clean kitchen dishtowel or bowl, you can trap that water in your bread, resulting in a softer crust!
Wow, just wow!! Thank you Camilla for this excellent recipe. I followed your instructions exactly and this bread recipe came out incredible. Soft on the inside and crunchy on the outside. My house smells devine.
I am thrilled, Marianne–enjoy every bite! 🙂
I made the bread today and was generally happy with the result. Easy to make, easy to slice, only it was a bit too moist and had a bitter after taste.
I’ll try taking it out of the loaf pan after one hour to ‘dry’ it out during the last 1/2 hr of baking as another baker had done. I used Bob’s Red Mill Millet flour – anything else that might cause the bitter aftertaste?
Great recipes overall – thank you!
Hi Patricia,
I am glad you like the bread–so sorry it had a bitter taste. That has come up in some other comments in the past. Millet flour can go bad really quickly, and (alas) several people have specifically mentioned Bob’s Red Mill millet flour producing a bitter taste (a sign that the flour has gone rancid). This has included bags that are well before the expiration date. I would contact their customer service number (or email) to let them know, and to request a refund.
@Camilla, I noticed the bitter taste right after I make it. I slice up, freeze in sections. The bitter taste seems to disappear later!
Also your recipe has so far cured my IBS-D,, One slice in the morning with my coffee!
Thank you immensely!
That’s a great discovery @Susan, thank you so much for sharing that!
I am over the moon to learn that the bread has improved your IBS! Hallelujah xxxooo
Love this bread, I’m GF and sensitive to yeast so it’s perfect! Thank you so much for coming up with this!
What I’ve learned making it a few times:
– I prefer double the salt
– waiting LONGER than the 5 minutes specified for the psyllium to gel produces inferior results (I saw a comment where someone waited 15m, I’d bet waiting longer soaks up too much of the water and doesn’t allow enough to react to the baking powder)
– I take it out of the pan as soon as I can and put it upside down in the turned-off oven for a bit (15m or so) – this dries it out further and makes for a nice crust on the bottom and sides.
You are very welcome Devon! Thanks so much for sharing your tips, that’s great 🙂
Time to leave a comment. I’ve been making this bread weekly for a long time now. It is by far my favorite gluten free bread recipe. It is extremely easy and convenient. It toasts great.
I love doing variations such as adding sesame seeds, poppy seeds, everything bagel seasoning or herbs, and salt.
I grind my own millet flour in a blendtec. Thank you for creating such a great recipe.
Britt, thank you so much for taking th time to write a comment–it means a lot! I am so happy that you enjoy making and eating it, and that you make it your own with different additions (sounds delicious!) 🙂
Made this bread today. Baked for 1 hour in the loaf pan, then a good 1/2 hour out of the pan. Turned out very well, cuts beautifully, and tastes good enough for me to eat! My 2 1/2 cups of water weighed 537g and 1/3 cup psyllium was 22g (I used 537g water and 27g psyllium). I find it’s best to bake with weight rather than cup/spoon measurements. And tricky if you mix and match, too. Thanks for a great resource.
Thank you so much for sharing the water weight you used, Isabella, as well as your tips for how you baked your loaf— so helpful 🙂 I am so glad you enjoy the recipe!
I really love this brad. I’ve been making it for several months now. I usually rotate around two or three gluten-free breads and this has become one of my go-to’s. At first I was skeptical, I tend to lean towards yeast and my GF sourdough this was a smashing success from the beginning. I’m really looking forward to trying the banana bread which looks very similar.
The only thing I noticed is that my batter seems a little looser, I just pour it into the pan, I don’t need to level it out at all. Yet I bake it same 90 minutes and it’s completely done inside.
I am so happy that you like the bread, Rose! Thank you for sharing that your batter/dough is looser, yet still works. That will be reassuring for others. 🙂
Thanks so much for this recipe. I make this for my wife who has problems with gluten. She loves it.
Thanks again!
You are so welcome, Craig! I am so glad your wife likes it (and how awesome are you for making it for her :))
Hey Camilla what can we brush on the top of your millet breads and muffins to make them smooth and more od a golden color. Everything looks so pale.please reply to me as i need to make some breads for mysef.
Hi Rose,
It is the nature of the millet, used as solo grain here, that causes the bread to look pale . You can try adding different ingredients to the bread to give it a darker color. Adding some sweetener to the bread will increase the browning, or you could add a bit or turmeric, or carrot/pumpkin/sweet potato puree to add some color.
Camilla,
Best gluten free bread recipe ive ever made and ive made hundred. the ease, the taste. I have celiac and several other health issues. I am so thankful to have this and your other bread recipe.
There was a comment from Jacqueline that she successfully used yeast in this recipe. Could you please tell me the details of this yeasted recipe, such as amount and type of yeast, initial rise and proof times, press-down and shaping, and any changes in ingredients? Thanks.
Hey Camilla i bought this Indian millet flour called-(Raggi) but it is of grey in colour- not yellow. Please tell me what you think if i make your bread. Can you reply soon so that i can make it? make it?
Hi Rosa! I had not heard of raggi/ragi so I looked it up. It is a type of millet, and I see that it is used in many Indian recipes (cooks up to a nice dark brown color). I imagine it should work!
Camilla,
Best gluten free bread recipe I’ve made it several times. I prefer psyllium to xantham 100% however sometimes the smell and taste of psyllium gets to be too much. I love dilly bread with cottage cheese and thought adding some cottage cheese to the recipe might improve the aroma and texture. Do have a suggestion for adding that to the recipe. From what I’ve read it would be equivalent to adding yogurt but I’m not sure how much to add or if I would need to eliminate some liquid. Any suggestions?
Thanks, Michele
Hi Michele,
I am so glad that you like the bread. I am not sure how adding cottage cheese would work, I do not eat it. You could certainly try subbing some of the water with cottage cheese and see how it goes (perhaps make a 1/4 size loaf to experiment?)
Camilla,
Thank you so much for creating that recipe. It was easy and fun to make. I know it called for psyllium husk but I only had powder. I used it but used less, 1/4 cup and cooked at conventional 300 degrees and it came out just like you described. I was looking for a lectin free and fiber rich bread to make.
You are very welcome, Heather, I m so glad that the bread suits your needs (and was fun to make–I think we all need more recipes that require hands-on squishing, yes?). Thank yo so much, too, for sharing that the psyllium powder worked just fine for you, I know that will be very helpful to others.
Best gluten free bread recipe I’ve experienced. Have you tried adding oil to it?
Wow, that is huge, thank you Michelle! I have, for a friend who prefers a moister bread and is fine with added oils. I replaced 1/4 cup of the water with avocado oil(but any oil would work). She loved it!
I’ve just made this bread. It’s brilliant! I’m so pleased. So easy and tasty. Thank you so much for sharing this recipe with us. xx
Gemma, thank you! And thank you for taking the time to let me know you are enjoying it, hurrah!
Thank you for sharing a great recipe. The family approved so I’m happy ????. It was delicious
That is excellent, Rose! I know what you mean–extra special when the whole family likes a recipe! 🙂
Thank you so much for this recipe! It absolutely love this bread! I have been searching for a vegan GF sandwich bread and this is my favourite. I actually add 2 tablespoons of organic sugar (all the ingredients I use are organic) and I find that it refines the taste of the bread, making it suitable for any topping. I also love that it is so easy to make in my stand mixer. My husband and I enjoy this bread daily. Thank you again!
That is so wonderful, Christina! And I am so glad to know that you made it successfully with your stand mixer, that’s excellent.
I tried this a second time because my first bake was a flop. I realized I used 1/3 cup psyllium powder instead of whole flakes so the bread was awful . I ordered the flakes and tried again . Bread came out perfect. Thanks. Taught me to read more closely with unfamiliar ingredients.
Just made the bread and waited for it to cool fully. Can really taste the millet but won’t make it again. I previously made a sorghum bread and didn’t like that much either and it was crumbly. I found cassava bread to be the best with tapioca and arrowroot flours combination.
Hi Annabelle,
I understand, thanks for your honest review. Thanks, too, for your advice to other readers regarding cassava bread. Cheers!
I did it and like it so much, thank you! But i only have a convection oven, should I try the only baking function of my bread machine?
Why 160 and not the usual 180°C?
I am so glad you like it Francesca! If it turned out fine 8n your convection oven then there is no need to change anything. I have not tried making this recipe in a bread machine, but I imagine it could work on the bake only setting. I found the bread baked more evenly at 325.
Thank you so much! After giving up wheat and dairy a few years ago, we struggled to find a bread that tasted decent. This is now my “go to” recipe. It toasts up so nicely.
Susan, I am thrilled to hear it! Thanks so much for taking the time to let me know, too–very kind 🙂
Hello – am in the process of making your miller bread for the 2nd time because the first loaf was very good. I am adding a lot of fresh herbs and garlic for this round to serve with a vegetarian stew. Lookigin forward to many exciting possibilities with this recipe. All the best
Fantastic bread. Thank you for sharing the recipe and method! Being a bit of a perfectionist, I did everything to the letter and it worked perfectly! So happy to find a recipe without using sugar and yeast in a gluten free loaf and no fat either, WOW!
Can you suggest a substitution for baking powder for a corn allergy?
Hi Shannon! I sure can: both Otto’s brand (my favorite) and Gefen brand are cornstarch free! I’ve found otto’s at stores like Whole Foods and Sprouts, but since I don’t have either close by, I typically order them from Amazon.
I am excited to try this recipe and plan to leave a review after it is baked. My question is: what is the purpose of the psyllium husks? I am curious in future bakes if eggs could replace the psyllium? We farmers with our own organic eggs and have no allergies to them so it would be more cost effective if we could eliminate the psyllium with eggs. Thank you!
Hi KJ! The psyllium husks add structure and volume to bread (since the recipe does not contain gluten or eggs). I’m sure you could use eggs in the recipe,instead, but it might take some experimentation. Perhaps use an equal volume of liquids (a combination of beaten eggs plus water or other liquid of your choice). I suspect the baking time will be somewhat shorter. I advise baking at 350 instead of 325. Cheers!
Hi. I just made this bread last night, and it didn’t come out the way it should have. I followed the recipe exactly, and used a scale to make sure I was getting the amounts right. I made the gel, and let it sit for a good 15 mins instead of 5 to make sure it was thick enough, but when I combined everything the dough was very gooey, and stuck to my hands a lot. It was so wet that I couldn’t form it into a loaf shape I just had to dump it in the loaf pan, and spread it out in there.
It also didn’t rise properly. The middle completely puffed up while the sides only rose a bit, and when I went to cut into it the crust on the sides kept falling apart, and the middle is very moist, and dense. It’s more of a cakey consistency. I made sure to use the bake option, and not the convection option, and placed it in the middle of the rack.
I’d really like to get this recipe right because my options for bread are very limited, and out of all the options I have tried this one has tasted the best, and I’d like to continue making it.
Thank you.
Hi Hannah,
Oh no, I am so sorry the recipe had so many issues for you. I’m trying to figure out what could have been the issue based on your notes. It sounds like the dough was too wet (too much water?) or the psyllium was not working properly? I am assuming you used whole husks, not powder, yes? I have no idea why the sides didn’t rise— thus all sounds very unusual, especially since you said you weighed everything. The valet consistency also sounds odd. Just checking that you were using millet flour, yes?
I am from india. Here it’s difficult to get that psyllium husk.can u tell me replacement of psyllium husk.
Hi Ranjith,
Greetings from Texas! I developed a separate millet bread recipe for those who cannot eat psyllium (or, in your case, cannot acquire psyllium ). It is my Millet Chia Bread. Here is the link: https://www.powerhungry.com/2023/01/16/3-ingredient-chia-millet-bread-v-gf-oil-free/ I have not tested it with flaxseed, but if you cannot get chia, you can very likely use an equal weight of finely ground flaxseeds (grind to the consistency of flour). Cheers!
@Ranjith, have you heard about isabgol? It’s psyllium husk.
@Ranjith,
Psyllium husk in India is called isabgol ki bhoosi
It’s easily available.
You can get it online too. I use Telephone Brand Isabgol
I love this recipe and have been baking it for a year or longer now!
I’ve noticed that when I use parchment paper, the crust on the loaves seems to fall off.
Maybe it wouldn’t do that with wax paper.
Hi Heather,
Wonderful. so glad you like the recipe! You definitely do not want to use wax paper–it should not be used for baking. There is, however, nonstick parchment paper (that is what I use. it is wonderful). I order mine online in ready to use pre-cut sheets. You will never use any other kind of parchment once you switch!
You have done the world a great service with this recipe – simple and affordable, easy to make, healthy and wonderfully delicious! I’ve just made it for the first time and I’m hooked ❤️ Thank you so much!
Thank you for the incredibly kind and generous comment, Diana. I am so happy that you love the bread! ❤️
Your website is a godsend honestly. I’m vegan and I avoid gluten, and love trying new grains and flours so it’s perfect for me.
I just made this bread, followed the recipe to a tee. Whenever i make bread, the inside rarely ever cooks through. So knowing this would happen, i took out the bread around the 60 min mark and sliced them. Then put them on a baking sheet and back into the oven. This way i was able to ensure it’s all cooked through evenly. The taste is amazing! Cannot believe there’s no oil in there and yet it’s so moist on the inside yet crunchy on the outside. Absolutely love it.
Thank you for experimenting and coming up with these recipes ????
Billy. Thank you so much for the kind comments! Most of all, I am so happy that (a) you love the bread, and (b) you came up with an innovative method to make it just to your liking. I know that will be super useful to others (including me!) so thank you!
Hi! this loooks great. I love Millet! but i cannot have baking powder. Do you think that it would work only with baking soda?
Hi Daniela,
You can try replacing the baking powder with a combination of 1 and 1/4 teaspoons of baking soda plus 2 teaspoons of lemon juice or vinegar (baking soda needs the addition of an acid to create the reaction).
Just made this for my family. I have multiple food allergies so I liked the simplicity. And my husband and son actually liked it. My husband asked us to make sure to save him some since our soon-to-be 20 yo son can eat quite a bit. I did use 1 cup of buttermilk to replace part of the water and the acid. Can’t wait to try more of your recipes.
How wonderful, Sarah! Such a boon when a recipe that suits the needs of some family members is enjoyed by all ????. Thank you, too, for sharing your buttermilk adaptation.
I just made the bread, which unfortunately didn’t come out that great as I used everything in grams. Dough was quite watery. I cooked it a bit longer in my airfryer,for almost another hour.
Question, any idea if that would work in the first pace on a 160 degree setting for the whole time. Will try it next time, with less water or more psyllium husk in the airfryer.
I do as well, find the after taste of the bread very strange, sort of industrial, bitter, metallic. Loved it with some salted butter while it was still warm and crusty. Thank you. ????
Hi Petra,
I’m so sorry the bread did not turn out as expected. I am wondering about the watery dough: was the psyllium – water mixture a thick gel when you added it to the dry ingredients? The dough is quite thick when the gel has set, so much so that you really have to use your hands to combine. Something must have been off if the dough was, instead, watery.
Regarding the taste: perhaps the millet was slightly rancid? It should not taste like that.
I love this bread recipe! So easy and yummy! ???? Thank you Camilla!???????? I have made 2 alterations to the recipe,I eliminated the salt because to me the first bake was a bit salty for me,and was very pleased with the salt less 2nd go at it???? The last 2 bakes I’ve added activated nuts and seeds to the mix(hemp,pumpkin,sunflower and raw cashews)I don’t measure them but probably around a handful or 2 of each,note the pumpkin and sunflower seeds I buy as a mix and I add them to the flour mix when I add the psyllium husk mix to the flour. It’s AMAZING!???????????????? I always have a slice straight outta the oven(can’t help myself???? Who doesn’t love hot outta the oven bread??????)
I am so happy you love the bread, Cat! Thank you so much for sharing your add-ins, that sounds delicious (I love its and seeds in breads). I am right with you, I love a slice of warm bread from the oven 🙂 Cheers!
I made this again, but swapped the baking powder for yeast (I’m not vegan, just allergic to eggs), and it’s the best GF sandwich bread I have EVER HAD. SO GOOD. I’ll be making this like every week now. Thank you so much for a brilliant recipe!
Jacquelyn, thank you! I am thrilled that you like the bread. I really must try making it with yeast, thank you for the nudge/inspiration 🙂
@Jacquelyn, how much yeast did you use? And do you still use the baking soda if you’re using the yeast?
@Jacquelyn,
How much yeast did you use to replace the baking powder?? And did you still use the baking soda?
Thank you for this recipe! I’m allergic to wheat and eggs, and this is BY FAR the EASIEST GF eggless bread recipe I’ve ever made. It came out perfectly and the texture is really lovely!
I am thrilled to know this was a success, Jacquelyn!
Hi there! So I have been really enjoying playing with this recipe. I’ve been on a journey for a gluten free yeast free bread for awhile now, and only recently learned that Millet was a thing, and have been using this recipe ever since!! I’ve made a sundried tomato basil version, a rosemary version, and an onion cheddar version. All were amazing!!!
I do have a question about substitutions when I want to add a liquid, like honey or butter/buttermilk. Do you have any ideas on how that would effect this original recipe? I just don’t know how adding a fat to the recipe is going to effect the quality of bread that comes out of the oven. Any pointers you have would be well received! Thanks for changing my life with this recipe <3
Hi Shaun! I am so glad that you have discovered millet!
Yes, you can replace some of the water with milk. I would not replace more than half of the water with milk. Milk products will make the bread more tender (a lovely thing). If using buttermilk, you can skip the vinegar (the acidity in the buttermilk will activate the baking soda). Sugars will also tenderize the bread. Both milk and sugars will lead to more browning, too (not a bad thing in any way, the loaf will simply be darker).
Fats will definitely tenderize the bread. Perhaps experiment with small amounts (replace 2 tablespoons of liquid with liquid fat–e.g., butter or oil—to see what changes occur). Have fun!
I made the bread based on this recipe and ingredients.
Have two issues:
1. The bread tastes raw (uncooked) at the centre.
2. The crusts (Top and side) is so hard I have to trim the sides (loosing lot of bread).
The slice size gets reduced to 3/4 of original size.
What could be the reason?
What is the remedy?
More water? Higher oven temperature? Larger loaf pan?
Jaya Shah, Melbourne, Australia
23 July, 2023
Hello Jaya! I am sorry that you are having issues with the bread.
If the bread tastes raw in the middle, it most likely is raw–it needed to bake longer. Based on your description of the sides and crust, I am wondering if your oven is a convection oven (as apposed to a traditional, radiant heat oven). That could be the reason for the hard crust and uncooked center. And if the bread is not fully baked, the slices will collapse in size, too.
Also checking: did you use a 9×5-inch loaf pan? You mentioned using a large pan as an option. If the bread is in a smaller pan, there could be issues with the baking as well.
Hello! Could I make this bread in my bread machine’s gluten free program?
Hi there Cindy! Gosh, I did not know there was such a setting for newer bread machines (my bread machine–much loved and used–is a garage sale find, I think it dates to the 1990s. Super basic!).
My one concern is that the gluten-free setting may be for yeast breads (with rising cycles included in the program). That would not work for this bread, since it is a quick bread. But if the instructions for your machine include options for quick breads, then I imagine it could work. I am sorry I cannot be more help with this one!
Hello, Camilla.
Where I live it is difficult to get the psyllium husk. Is there a substitute I could use.
Thanks.
De
Hi De,
No, not a direct substitute for the psyllium in this recipe, BUT, I came up with a new recipe (even simpler than this one) that uses chia instead of psyllium . Here it is: 3-Ingredient Chia Millet Bread
Hi Camilla,
I just wanted to let you know that I tried making the bread again and it came out just like real bread!!! It had a great rise and tastes really good too!! Yahoo, I was very excited. I added some garlic and onion flakes. I did comment before about having trouble with the dough being so wet so I thought I would let you know that I had success and will make this again. I’ve found, that for whatever reason, I have to bake the bread for closer to 2 hours. It’s worth it!! Thanks for all your work!!
Linda
Oh Linda, that is so wonderful to hear! I am thrilled to know that you persevered and gave the bread another try. Baking can be unpredictable (even with traditional baking)–it’s hard to identify which factors might have thrown off a recipe one time, and not another. But it’s worth repeating and getting a feel for it! I love the sound of your additions, too!
I find these recipe also is lectin free
Hi Camilla.
Thanks for the amazing recipe. Though I haven’t tried it with Proso Millet, I’ve used the millets I am familiar with – Pearl (Bajra) & Sorghum (Jowar – and yes, it works for this flour as well). The inside retains water to quite a degree for these two millets, but after slicing, I use a microwave to get rid of the water and some remnant is just right enough while toasting- so it doesn’t go too dry. Living in Canada, I was looking for a “bread” version of the millet flatbread that is part of our food / culture (from around Mumbai, India). The flatbread requires a lot of skill that I lack – so this is amazing on many levels.
Most importantly, it is fantastic in keeping post-meal spikes in blood sugar in control. For that I’m eternally indebted.
Thank you ! Thank you ! Thank you !
Thank you so much for your review of the bread, Gautam! I am so happy that it serves as an easier subform one of your favorite recipes from home. Thank you so much for sharing your tips regarding ther varieties of millet, too—I know that will be so helpful to others! 🙂
This came out all wet and not cooked properly no matter how long I put it in. Followed the instructions to a tee!
Hi Lucy,
Thank you for taking the time to write. I am so sorry that the bread did not turn out properly. Did the recipe look like my step by step photos as you were making it? Especially the psyllium husk gel–was it quite thick? And was the dough also quite thick/stiff after combining the millet flour and psyllium gel? This is such a reliable bread for me, I am trying to determine what could have gone wrong.
I made this but it’s a lot darker than your photo here!!! I used lemon juice instead. What did I do wrong??
Hi Libby! Gosh, I really have no explanation for that. This bread, if anything, tends to be rather pale. The lemon juice should not make any difference. Were you using a dark metal pan? That could be one explanation. Or perhaps your oven runs hot? Apologies that I do not know what else could be causing the issue.
Hi Camilla,
The dough was very wet. I don’t think the psyllium husk was thick enough. I let it sit about 7 minutes. Like I said, I will keep trying because despite the failures, the breads taste great!! I’ve been trying weekly.
Hi Linda! Oh no, sorry to hear that the dough was very wet. But I am glad it was still tasty enough to eat in the end.
The psyllium gel should definitely be thick and gooey. Mine thickens up in abut a minute. You used a full 1/3 cup? Is there any chance you could have added too much water? Or measured by weight? I wonder if there was something wrong with the batch. The dough should be super thick once everything is mixed.
THANK YOU for this bread, it is a godsend! I cannot eat most grains–millet is an exception–and have missed bread so much. A friend pointed me to your recipe. My first loaf came out perfect. I cannot believed I can have toast and sandwiches again. Thank you, I can hardly wait to try more recipes.
You are so welcome, Elena!!!
Is there any reason this can’t be done with the whole millet and water in the blender like many of the other breads?
Hi Kerrin!
I almost certain the answer is that YES, you can make this with whole millet and blend, as I have done in other recipes.
The reason why this one is different: This was one of my first recipes for sandwich breads using psyllium husks. When I was coming up with subsequent recipes, I started to think of ways to make it easier (i.e., not grinding the millet into flour in a separate step)–that’s where the all-in-one blended batter came from. So this is the Beta method! 🙂 I will add notes about making it all-in-one soon, but in the meantime, feel free to modify it like the other recipes.
Good Morning Camilla,
I made this bread yesterday and despite being in the oven for 1 hr. 45 min. The inside was still a little moist. I read in your notes that the dough should be thick; my dough was very moist. Should I let the psyllium stand a little more than 5 minutes? I measured everything and I bought a thermometer for my oven. I’m having mixed success with the breads but I’m determined because they all taste great!
Thanks,
Linda
Hi Linda! I am sorry the bread came out moist, as you describe. It definitely should not be like that. Can you take a look at the photos in the post–was the bread dough/batter a lot thinner? Also, was your psyllium gel really thick before adding it to the millet flour? I’m just trying to figure out what might have gone awry.
Hi, I have made this bread several times and only once it came out nice, I do not understand why the inside comes out wet and gooey? As if it has not baked inside enough, but even so I let is in the oven for longer, the outer layer/crust is so super tough, and the inside is still ‘wet’…. What am I doing wrong? I even make sure the oven is set as requested in the recipe. Thanks
Hi Sylvia! I am so sorry that you are having issues with the bread. I have a quick question: did you happen to use sorghum flour? I know that in other countries, sorghum is sometimes labeled as a type of millet, even though, botanically, it is not. Several reader have tried making the bread with sorghum flour and had the results you describe (gooey). It should not be at all gooey if made with millet flour. Let me know! If not that, I will try to figure out what else it might be.
Hi
Camilla
I was very excited to make this bread ,since u have gone on 100% nillet diet and was looking for some simple millet bread recipes but mine turned out uncooked in the inside. ..please help ..
Thanks
Hi Neeti! Just checking (I mentioned this just now to another reader): is there any chance that you used sorghum flour (instead of millet flour)?
Can I use banyard millet or foxtail millet.
Can I use the panasonic bread machine to put all the ingredients and let it bake
Hi Shirley! I am guessing that those varieties of millet will work fine, but I have not tried them (because they are not available to me). Amaranth and sorghum are sometimes lumped in as types of millet (botanically they are not)–these flours will not work in theis recipe (I have tried) . Cheers!
Hi,
Is it possible to use psyllium husk powder instead if so hw much would I use
Hi Max,
Some people have mentioned mixed results with psyllium powder. I have not tested it with the powder, but theoretically it should work just fine (they are the same ingredients, the powder is simply ground flakes). Use the same weight of powder as the flakes (it will be much less). It is typically about 1 teaspoon of powder for a tablespoon of flakes, but look on you package and compare with the weight I have listed in the recipe.
I am getting metal aftertaste . I first thought it was Aluminum in the baking powder than I tried again without it and still aftertaste. Is it the vinegar?
Hi Angela,
Oh no, that is is very strange, I am so sorry you are experiencing that–it is definitely not what you should be tasting. Are you using a metal pan? One possibility is, if it is an older pan, and has been scratched in places, the exposed areas can react to acidic ingredients (in this case, vinegar) and cause a metallic flavor. The best solution in that case is to discard the old pan and get a new own. If you are not using a metal pan, perhaps the millet was contaminated? I am sorry I cannot be of more help.
@Camilla, I have the same problem with the metallic after taste, with a silicone bread pan, is 9.6grams of baking powder correct?
Hi Alan,
I am sorry to hear that the bread has an aftertaste. Yes, the amount os correct. I have always used an aluminum-free baking powder. My immediate thought is that you might be using a traditional baking powder (with aluminum). I use Bob’s Red Mill (because it is sold in BIG packages, and I go through a lot with recipe testing). Other aluminum-free brands are Rumford, Trader Joe’s brand, and Whole Foods Everyday Value 365. I hope this remedies the bread!
It turned out great!
This is an excellent bread! What I love most is the simple ingredients that come together to make a lovely loaf that’s perfect for toasting! Both my husband and I give it two thumbs up! Thank you so much for sharing this recipe!
You are too welcome, Jennifer, I am so happy that the two of you like it (and…a big whoot who for toast! One of my favorite comfort foods :))
Both my husband and I enjoyed this bread. I followed the recipe exactly as written and the loaf turned out beautifully! Very easy to slice without being crumbly, and toasts nicely. I will definitely make this again. I’m very grateful to find simple gluten-free recipes without a giant list of obscure ingredients, so thank you for sharing this excellent recipe!
Wonderful, Jennifer! Glad the bread was a baking success, but, even better, that you and your husband both enjoy it!
Made a half recipe and baked for 60 minutes and it was the perfect amount of time. I am so grateful for this recipe and the CRUNCH I’ve been deprived of while cleansing candida. Thank you so much!
I enjoy this bread very much Camilla, but to get the center of the bread to cook right through, I had to reduce the liquid by about 4 tablespoons. This made all the difference. Maybe the organic millet I use from southern Ontario is a different variety than yours, so the outcome is different? Thanks for posting the recipe.
I gone through the entire post but didn’t find how to make millet flour, pls share recipe with grinding time
Hi Vishnu! I have tips for grinding your own millet flour in the notes section of the recipe card. I just throw the whole millet into a high speed blender and blend on high speed until it is a fine flour. I have also had success using a standard blender. It just takes a little bit longer. It takes about 1 minute to grind in a high speed blender, about 3 to 4 in a standard blender.
Hi! I am enjoying this very easy to make recipe and I have made this loaf several times now. In your instructions you mention to sprinkle with optional toppings. Just wondering what you recommend? This bread makes superior toast. Thank you for sharing.
Sorry about that Tracy! I took that out, my mistake–thanks for catching. That being said, you can certainly add topping. I often sprinkle mine with more millet–it gets toasty and crunchy in the oven (I love using toasted millet as an alternative to nuts in other recipes. Here it gets toasted with no extra effort ). You could also sprinkle the top with other seeds, or chopped nuts 🙂
Are there any adjustments that should be made for high altitude (5000 ft)?
Hi Celeste,
Apologies, I do not know much about high altitude baking. But if you google for general guidelines, I suggest following general adjustments. I am sorry that I cannot give specific adaptations for this bread.
If I bake two loaves together do I increase the baking time?
Hi Sandra! You should not necessarily need more time–at most, perhaps a few more minutes. I would suggest changing the loves positions (switch sides, place one where the other wise and vice versa) so that they bake evenly. 🙂
This bread took twice as long to cook as what was stated even at 350F. It was pretty good after l finally got it cooked though a little bland. Next time I’ll throw some cacao nibs in and cook it @ 380F for 2 hours, then check it.
Hi Richard,
I am so glad you were able to make the bread work. Yes, you can definitely add all kinds of flavoring or mix-ins to suit your tastes–cacao nibs sound great :).
Regarding the time: so you baked it for 3 hours at 350F? Wow, that is a long time. I am guessing that your oven temperature may be off. Have you checked it recently with an oven thermometer? Just a suggestion.
Hello,I liked your recipe and want to try. I am planning to use sorghum flour,do you think it will work? And also that it should be baked covered or otherwise..?
Hi Nidhi,
I am not sure that sorghum flour will work as a substitute for the millet flour in this recipe. I know that in other parts of the world, millet is used to describe a variety of different grains (including amaranth and sorghum). But in North America, millet is a single variety of grain (small, pale yellow millet (proso millet). Other varieties of millet should work, but sorghum is not technically millet (it is much softer flour than millet flour) so I am uncertain of the results. I hope this helps!
If your oven has a convection option, do not use it for this bread! This bread need to be baked using the regular (convection) heat.
Can you clarify this sentence?
You used the word convection twice but to mean two different things I think. Very confusing?
Sorry Jo–there was one instance where I (or autocorrect) put convection instead of conventional. Everywhere else I have conventional. Thanks for pointing out my error (I have fixed it). I also added radiant heat to clarify.
Hi wanted to comment on millet. I’ve never found the whole yellow proso millet bitter. It is sweetish and smells to me a lot like corn. Pearl millet however is bitter. So I’m wondering if Bob’s is quietly using some of that to get the fiber content to 1g in 40gr of flour as proso has the lowest fiber of the millets
Hoping to make this bread soon.
Hi Susan,
Hmm, that is very intriguing! Excellent sleuthing, Susan, I wonder , too. I am with you, I have not had any bitterness problems with the millet I buy and grind myself (I do not use Bob’s Red Mill brand for millet). I find it mild and corn-like, too. Most recently, I have been using Anthony’s brand and love it. They have it on amazon, or people can order it directly from their site (Anthony’s Goods–I have no relationship with them, I just like their products and they have great prices).
Hello Camilla, I am relatively new to baking and I’ve just made this recipe for the first time and the bread is delicious! I got a few less air bubbles than in your pictures. I remember when I was preparing the dough it seemed wetter than in your pictures and description. I used Eden Foods Organic Whole Grain Millet ground for one minute in the blender which looked just like flour in the end, and Jiva USDA Organic Whole Husk Psyllium (Isabgol) which does appear to be little flakes like you described. However, I am not sure if I would call the psyllium/water/vinegar mixture I poured into a flour a “gel.” I am wondering if next time I make this recipe I should use a little less water, or if maybe I should try a different source of flour instead. Thank you for the great tasting recipe!
Hi Meredith! It sounds like there may have been an issue with the psyllium since you mention it looked like it did not really gel.
Thank you, this bread has saved breakfast for me–2 slices, toasted with vegan butter, and two poached eggs. Superb!
Wonderful, Katie! I am so happy you are enjoying the bread!
Hi…I want to try your recipe but am confused as to which millet to take. There are about 5 or 6 types of millets.Please specify which one to use.
Hi Radhika,
Sorry for the confusion. Here in the United States, there is only one millet sold in stores, simply labeled “millet.” Proso millet is the only millet grown and harvested (at present) in the US. I did a google search and prose millet goes by multiple names, including common millet, broomcorn millet, kashfi millet, hog millet, white millet, and red millet. I hope that helps!
Hi, just wondering if I can use psyllium powder instead, as that is what I have on hand, and if so, how much would I use. 🙂 thank you. Ev
Hi Ev,
I have not tried this with psyllium powder. But you can try using an equivalent WEIGHT (not volume) of powder. Brands differ, so check your package for weight per teaspoon, then use the equivalent weight to replace the whole husks. Cheers.
Hello:), great recipe, thank you!! The first time I made it, I used millet flour and it came out bitter and dry, the second time I grinded my whole millet and it was great! Then it got me thinking that cassava flour will be perfect with millet to give it the moisture and flexibility, so I finally decided to try it out and it came out better than I thought it would, and I made it very simple without weighing, I soaked half a cup of millet overnight, then blended it with 1 cup of water, then I added two tablespoons of psyllium husk to the mixture, I mixed it up until it was very thick, then I added 1 teaspoon of baking powder and a 1/2 teaspoon of salt, mixed that in and then mixed in 1/2 cup of cassava flour, I formed it in a ball and baked it on a tray on 325F for 45 minute, the texture reminded me a a chewy sourdough bread, hmm maybe some acid and sweetness next time, the millet flavor is also milder and the air bubbles are great. Thanks again!
Thank you so much for sharing your methods, Cat! I am so happy you like the recipe and also that you have made it your own 🙂
@Cat, did you soak whole millet or millet flour? I’m curious to try both versions and it looks like we have similar sensitivities.
Hi Cathy, You can rinse or soak, then dry the millet on a large rimmed baking sheet (you can dry it on the lowest oven temp to speed it along. If it gets a touch toasted, all the better!)
excellent bread. I have a very sensitive digestive system and this bread doesn’t cause a poor reaction.
I am so pleased to hear it, Ari 😊
I have been using the recipe for about four months and it works well. Variations I have used are Teff Flour and Sorghum Flour. More often than not I substitute 1/2 cup buckwheat flour as it appears to make the mixture bind a bit better. I plan to try quinoa flour soon. A note of caution: Teff and Sorghum usually require a bit more water.
I am so glad the bread is a success, Robert! Your variations sound wonderful. Thank you, too, for sharing your tips.
@Robert, hi did you change any of the instructions when you used sorghum. I tried it just now and it did not rise well. Wondering what to change for next time. Any guidance is appreciated. Thank you ????????
@Robert,
I would like to know the secret to good Sorghum bread as well. Mine did not rise as much and was a little gluey in the center. I am assuming the softer texture of sorghum flour caused that.
@Rishi Hi! Yes, this bread will definitely not work with sorghum bread s a direct substitute for millet. The two flours have very different baking characteristics. I am working on some sorghum bread recipes, especially loaves. It is a challenge, but I am determined to get some good ones that work so that I can share with all of you! ❤️
Hi Camilla, Thank you so much for your article! Can you substitute melon juice for the Vinegar? Anything too acidic upsets my stomach. Also, is there a way to use your recipe on a bread machine?
Hi CJ,
I am not familiar with melon juice so I am not sure how it would work as a replacement for vinegar.
Hello, Love everything about this bread. Just wondering why you don’t rinse, soak and dry the millet before grinding.
Hi Diane,
I am so glad that you like the bread! The recipe calls for millet flour, not whole millet. I offer a tip for grinding your own flour from whole millet in the notes. You are certainly welcome to prepare millet flour by soaking and drying before grinding, but it is not required.
Hi Camilla,
I mixed the stuff together but had a hard time doing so. I reread everything saw that I used psyllium powder…..not psyllium husk (my mistake). I’m hoping that the bread will be edible?? Is there a change in measurement using psyllium powder? I only bought it for this recipe so I need to find ways to use it up. Hope to hear back from you…thanks
Hi Lori!
If you used the equivalent volume (instead of weight) of psyllium powder, then (alas) you’ll have used far too much and the bread will probably not be edible. 2 teaspoons of powdered psyllium is about the same as 2 tablespoons of whole psyllium husks.
Hi Camilla
I absolutely loved it. It’s so easy to along with busy schedules. No mess around. Texture is great.
I used millet that I ground into flour in my VitaMix. Recipe was easy and quick. Best rise of the several GF, yeast free, vegan recipes I have tried. Slices easily, toasts well and is delicious. This will be my go-to bread recipe.
I am SOOOO happy to hear it, Susan!!!
I was so delighted to discover this recipe – and your site! I have to severely limit fat content, and have trouble with most grains, rice, and pea protein, leaving me with few options for breads. I sourced millet flour at our local mill, and immediately made the bread. It was easy to make, and perfect for my first sandwich in months! O look forward to experimenting with adding herbs and other things for variety. I also forwarded the links to my very helpful dietician.
I am simply thrilled that you love the bread, and got to enjoy a long-awaited sandwich, Wendy! Thank you, too, for sharing with your dietician. Cheers!
Hi Camilla,
Thank you for the great recipe! I am wondering if this bread can be made in an instant pot.
Hi Diane,
I am so glad that you like the bread! I have never used an instant pot to make bread, so I apologize that I cannot advise on that front. If your instant pot has instructions for doing so, then it could be worth a go.
I Too had the same problem with Bob’s Red Mill brand,the bitter taste is quite annoying,how can i negate it?,could i add some honey to it
Hi Jayesh,
So sorry to hear that you, too, are having problems with millet bitterness. I did some googling, and found multiple sources where individuals commented on bitterness from millet and millet flour from one company: Bob’s Red Mill. Millet does have a slight bitterness, but it should dissipate after cooking and baking. I do not find it bitter at all. I have been using Anthony’s brand (on Amazon–whole millet) and Arrowhead Mills without any problems. I would contact Bob’s Red Mill and report the issue. I have had good responses from them when I have purchased products that have been rancid or off-tasting (even when the exp. date was well within range of use).
I’ve been making your bed for over a year now and my husband much prefers it more than other gf breads!
I triple the recipe(doing my own figuring instead of your website generated adjuster since it is not accurate), then I divide it into two loaves instead of three.
This makes bigger bread slices. I slice the loaves and freeze them on a tray so they don’t stick together. I freeze them in a Ziploc bag and can take a few pieces out anytime we need a sandwich. My husband prefers it toasted, so I just put it in the toaster and tap the defrost button to thaw it.
I will be sticking with this bread for sure!
Thanks a lot!
You are so welcome, Heather!!! Thank you so much for sharing your tips for storing the bread, just brilliant. 🙂
@Heather Randleman, Would you mind sharing how you adjusted the tripling of the recipes.. I’d like to try this too.
I just made a loaf of this and the flavor is amazing! My texture is super crumbly though. I did sub out the psyllium husks for flaxseed because I am on a very strict diet due to breastfeeding. Do you have any tips on how to help the texture next go round?
Hi Erin! I am so glad that you like the bread. I completely understand about needing to swap ingredients for your dietary needs. But using flaxseed meal instead of psyllium husk is definitely what made the bread crumbly. Can you eat chia seeds? Half chia seed flour (ground chia) and half flaxseed meal could hold together better. Alternatively, consider baking the bread in smaller portions (e.g. in a muffin tin). I find that some gluten-free vegan breads that I have experimented with do no work at all in large pans, but hold together well when baked in much smaller sizes. I hope this helps! Enjoy your sweet baby (and I hope you are getting some sleep :))
@Camilla, I thought about doing a chia seed and flax seed combo! Will do and can report back! And will also try muffin style and see if that helps. Appreciate the feedback and the recipes!
You are very welcome, Erin!
I tried this recipe and loved it! Do you think it would be possible to try it with a different flour? Just to change it up? Maybe Sourghum?
Hi Cat, so glad you like the bread! I have some breads that are very similar and use other flours: for example, my Buckwheat Sandwich Bread , Easy Multigrain Bread (use whole grains or whole grain flours), Vegan Coconut Flour Sandwich Bread , and Oat Sandwich Bread. I am not sure a 100% sorghum flour bread would work, but you could sub some in to one of these recipes.
Love the taste and texture! Any way to darken the color for more appeal? Without overtaking?
Hi Sarma,
Glad you like the recipe! Here is a thought: what about using some plain brewed black tea, or black coffee for some of the water to make a darker loaf? There is so much liquid in the bread that I think the added flavor would either be negligible or an enhancement. You can use decaf if you wish to avoid the caffeine.
This bread looks great- I love millet, but I’m wondering if it would be possible to substitute the psyllium with chia seed? Or another substitute? I can’t tolerate psyllium unfortunately.
Hi Chan,
I have been working on some simple breads with chia gel, for the very reason you mention (i.e., readers writing in that they cannot tolerate, or simply do not like psyllium husks). I have not had success with the chia as a straight substitute (yet!) but will post soon (I am determined).
Hi Camilla,
Thanks for creating this recipe. I was so excited to try. The texture is perfect and the looks is great but I can’t get over the bitter taste. I saw the previous post that it could be the flour not being fresh. I got the Bob’s Red Mill brand and the expiration date is in 2024. How do I ensure this doesn’t happen again? Should I buy millet and ground it myself?
I am glad you gave the bread a try, Paige, but I am so sorry that your millet flour was so bitter. I always grind my own, just because it is easier for me to buy and store one big bag of millet (rather than both whole millet and flour), so that could definitely be a good approach. I store all of my grains in the freezer, even before I open the bag. Millet, in particular, can get very bitter if the oil in the grain are oxidized. I would 100% contact Bob’s Red Mill customer support and report that the flour was problematic. They are really good about sending a replacement coupon, plus, it helps them track down the problem with the batch number of the flour.
I made this bread with Ragi flour and added activated sunflower seeds. Probably the best bread I’ve ever eaten and so easy to digest. Some fresh tomatoes, tahini dip and pepper make it complete.
Unbelievable that a gluten free bread can be so fluffy and perfect in consistency.
Thank you for sharing.
Xenia,
Oh wow, that is some serious praise, thank you so much! And your topping choices are making me very very hungry (YUM!)
Hello
can we use Apple cider vinegar in this ?
many thanks
Hi Prachi,
Absolutely, that is what I use in the recipe 🙂
I just made a loaf and it turned out lovely. Thanks for your recipe!
Yippee! So glad you gave it a try, Melissa!
Hi, do you think, I could make it with Sorghum-Flour? It is a kind of Millet, but not as bitter as Millet.
Hi Alexandra,
I don’t know–I have not done any baking with straight sorghum flour, only as part of a flour blend. I know that sorghum is a softer flour, but I do not know if that would make a difference. Perhaps make a half batch of the bread (with sorghum flour) as a test?
hellloooo – I’m excited to try this I just need to up it a touch for an awkward loaf pan size… I’m just a bit confused with the measurements – according to Bob’s Red Mill and other internet sources- Millet flour weighs 120g per US cup so that would make 300g for this recipe. Are you using US cups? Thanks 🙂
Hi Katie! I hope you give this a try! Yes, I am definitely using US cups. Bob’s Red Mill Millet Flour is 40 grams per 1/4 cup, so that equals 160 grams per cup (400 grams for 2 and 1/2 cups ) 🙂
@Camilla, When I measured out my Millet (Arrowhead), 2 1/2 cups weighed 290 g. So I wasn’t sure which measurement to follow. It looked a little wet (though I don’t know exactly what it should look like) so I added another 1/2 cup. Not sure that was enough. Would the weight of different millets be that different? It is in the oven now so we will see.
Hi Christina,
I hope all goes well with the bread! Yes, definitely go by WEIGHT. I am sure there are reasons for some batches of millet weighing a bit more or less in relation to volume, so always go with wright, that is what I am using for all of my baking recipes 🙂
Hi there. Do you in the USA have different cups for liquids and flour etc. i followed the recipe exactly and it seems too wet to mould into a dough. It’s more cake like. I have a standard set of cups.
Hi Hannah! I am not sure where you are, so I cannot tell if US standard cups are different from yours. Do let me know! There should not be a difference in ml (liquid measurements)–i.e., if your liquid measuring cups show ml, go by the ml, not the cup measurement. If you can get your hands on an inexpensive little kitchen scale, it saves a lot of grief with measurement (no worries about differing cup sizes or over- or under- measuring flour).
Why is it important to leave the loaf in the pan on a wire rack for 15 minutes before removing from the pan to cool on a wire rack ?
Will leaving it in the pan before removing it cause a gummy texture ?
Hi Mary,
The bread is left in the pan for 15 minutes for some carryover heat, to continue to set the bread, and to prevent the bread from breaking when removing it from the pan (loaves are more likely to break if they are removed from the pan while they are piping hot).
Leaving it in the pan to cool entirely is not a good idea because it traps the moisture. You want to remove the loaf and place on the rack to cool to avoid this.
We only have convection setting I turned this into flatbread instead and it came out great. used a sheet pan, baked for 40-45 mins
Camilla – This is the most amazing bread I have ever eaten. I can’t tell you how much I appreciate your recipes for I have been looking for everything you offer. Thank you so very much for spending your time creating recipes for those of us who want to eat delicious healing foods that contain wholesome minimal ingredients. I cannot begin to express my gratitude.
Oh Joanie, I am so happy to know that you love this bread! It means so much to know that this suits your needs and that you are enjoying it. I love creating new recipes and your feedback is golden 🙂
I love your bread!!! Just I need advice for the millet . Should I wash it thoroughly and drying before grinding it ? In order to remove that typical millet bitterness?
Thanks Sara 🙂 You could try that. Perhaps spread on a baking sheet and place in lowest heat oven (turn off the heat after preheating the oven) to dry it out?
Wow! This was as good as promised. I’m trying to be grain free as much as possible and millet is a great food. I’ve looked at recipes with coconut flour loaded with eggs but they just didn’t look like a good choice. I just made it, had some toast with goat butter and I am sold. Thanks for figuring this out. It’s a winner.
Thank YOU, Kathy!!! So glad you like it. I love millet, too (nutritious and frugal, 2 of my favorite ingredient qualities). Toasted with goat butter sounds seriously delicious!!!
Can this be made in an instant pot pressure cooker? I just bought one that has a baking setting.
Hi Joanne! Wow, I had never heard about making bread in an instant pot before your comment, so I looked it up (thank you! learned something new!). After reading through an assortment of recipe, I am certain that this would not work for this particular bread. Then again, since I have zero experience on the subject, and love to experiment myself, I would be happy to be proven wrong.
But I think it would be a good idea to make the bread as written to know what it should look and taste like. 🙂
Would this work with yeast instead of baking soda and powder?
Hi Onra, I really do not know. I have not tried yeast in breads with psyllium. It sounds like an experiment ready to try!
@Camilla, Thank you for your quick reply! I will actually try it today and report back! I have another question.. Is the bread bendy? I mean, can you fold it in two without it breaking?
Hi Nora! It is definitely not bendy. It is a very firm loaf and a slice will break in two if folded in half.
@Camilla, To clarify when I asked about the bread being bendy, I meant individual slices of course, not the entire loaf. So if the slices can be folded without breaking).
🙂 Thanks Onra, I knew just what you meant by bendy.
@Camilla,
I have used instant yeast as a substitute for baking powder in gluten-free breads. You will have to let the dough rise for an hour or so before baking, but it gives breads that yeasty taste we associate with “bread”. Regular yeast could be proofed in the liquid used to liquify the psyllium husks.
Ooh, thanks for the tip, Katherine! I will have to try that (very soon!)
For me it came out with a bitter taste. Everything is perfect except the flavor, may i get a hint about what could be the cause of bitterness ? i would be very thankful.
Hi Derek! I am so glad you like the bread (except for the bitterness). It should not be bitter, but there is a reason why it can turn bitter: the millet flour or grains are old. Even if you recently acquired the millet, it could be the manufacturer of store (it has happened to me more than once). Millet is 4% oil, which means that it can turn rancid (bitter flavor— a little or A LOT). So perhaps try again with a new batch and store the grains or flour in a well sealed container in the refrigerator or freezer 😊
Thank you so so much for this amazing recipe i cannot get enough of how this millet bread taste similar to normal bread. Absolutely delicious.
I have made it with dark ragi millet flour and despite having a convection oven i have managed to bake it beautifully. I reduced temperature by 20celsius and extended baking time by about 30 minutes. I did take loaf out of the metal tin towards the end of baking as bottom wasnt cooked well and didnt sound hollow and finished baking without tin. Absolutely gorgeous gf bread, especially when toasted. Thank you so much ❤️
I am so thrilled, Mischa! Thank you, too, for sharing your tips and the equipment you used 😊
it turned out great. this is the best bread for those of us looking to avoid gluten but do not want to have complicated food.
I’ve been making this now for four weeks and it’s my go-to bread. I have developed an allergy to yeast, and my wheat allergy has resurfaced after several years. It is wonderful, but I learned the hard way to let it cool completely! I was so happy to have bread again that on the first loaf, I cut into it way too soon and slathered it with avocado oil. It was so good, I at the whole loaf. Now I know better, and it lasts almost a week. Thank you so much for giving me bread back!
Barbie, that brings tears to my eyes! I am so happy that you can have bread once again! ❤️❤️ You sound like me regarding bread–nothing like a warm loaf for feasting! But glad you were able to make the second loaf toast ☺️ Thank you so much for sharing 😍
Looking forward to this – a question – you say no convection oven, but what about an air fryer. The manufacturer says bread can be baked in the air fryer I have, which is like an oven but smaller, not the kind that has a pull-out drawer.
Hi Chris! It would be worth a try. I have a very basic air fryer, but I know some of the new ones have a lot of special bells and whistles. So if yours says it can bake breads, you can definitely give it a try.
Thanks for this recipe. Do you think I could make a sourdough variation using sourdough starter instead of the baking powder and baking soda? If so, any suggestions on the quantity of starter? For my normal bread I use 150g of starter mixed with 300g of water, then add 430g of wheat flour (white mixed with wholemeal).
Hi Julie, glad you like the bread! Alas, I do not have any experience with sourdough starters. But I looked and found what looks to be a great article (published a few weeks ago) regarding adapting bread recipes to use starter. I would love to know if you have success adapting this millet bread! Here is the article: HOW TO ADAPT ANY RECIPE TO BECOME A SOURDOUGH RECIPE
I have my very first loaf baking in the oven as we speak! I’m so excited to try this. I have about 30+ food allergies, and finding/ making a safe and good load of bread has been one of my greatest challenges these last few years. I’m hopeful that this will be a go to recipe! The ingredients used and how minimal and simple it is, is so wonderful. I can’t wait for it to be done baking! My questions are- can I add a bit of a sweetener to the mix? I added and drizzle of maple syrup in the mix because I do like a bit of sweetness. I likely didn’t even add enough to notice but just wondering how much I could put in next time for a very subtle sweetness? Also, does this bread freeze well? And if so, for how long? Thank you so much!!
Hi Mayen! Yes, you can definitely add some sweetener, as well as sweet spices. You can also check out my 100% millet pumpkin bread and 100% millet banana bread for sweet alternatives 🙂
Hi Camilla! Wanted to thank you for this recipe! Made it for my daughter and she is ecstatic to have a “safe” bread again. The rest of the family loves it, too. 🙂
I’m wondering your thoughts on other flours. Could other flours, such as sorghum, be used rather than the millet?
Thanks so much,
Donna
Hi Donna! Hooray, a brea the whole family can love! I have not tried making a bread with just whole sorghum, but I think you could plug some sorghum in to one of the following recipes, all of which are similar to my 100% millet bread recipe.
Gluten-free Buckwheat Sandwich Bread, Vegan Gluten-Free Oat Sandwich Bread, Easy Multigrain Gluten-Free Sandwich Bread (this is my very favorite), or Vegan Coconut Flour Sandwich Bread. Cheers!
@Camilla,
Thanks so much for your feedback!! My daughter is bothered by so many things, and I’ve experimented (usually unsuccessfully) many times. Sorghum seems pretty wheat-like, flavor-wise, so I will definitely try to add some into one of these above recipes. 😊
Do not hesitate to make this people, it is a perfect recipe in my calculations (for what that’s worth).
I really love this bread and make it often. Since it reminds me a little of cornbread, I tried a green chili and ‘cheese’ loaf by adding chopped green chilis and nutritional yeast to the psyllium mixture. Really good!
Thanks, Karen, so glad you like it. The additions you made sound utterly delicious!
Hey, we just tried this recipe today and it came out great! ? The crust was superb and it tasted good.
Thank you so much for sharing the recipe.
Is there a way to make this in a bread machine?
Hi Lynn,
I have not tried it, but I think you could bake it in your bread machine. I am not sure about doing a full cycle for this bread, though (i.e., mixing it and baking it in the machine). It would have to be an experimental venture.
Hi Camilla. This millet bread recipe is the answer to my prayers. I live in Uganda where millet is a staple but could never figure out how to make bread. Being gluten intolerant. I was desperate for a solution. This recipe is simple and delicious. Thank you!
Sheila, that is so wonderful!!! Thank you so much for taking the time to let me know. I am so happy that this works for you 🙂
This is an amazing recipe. Reading the Longevity Paradox had me searching for a way to add more millet and fiber to our diet. Found your recipe and was amazed by how simple it is. So I made four loaves on my first try. They came out amazing! Love the flavor and the texture is wonderful – super soft spongy inside, with a nicely crunchy crust. We have been yearning for toast after going gluten-free. This is the best bread ever, home-made or store-bought, and at a fraction of the cost of alternate breads – which have become crazy expensive. This is a real game-changer for us. Thank you!
Oh Mike, thank you so much for the kind words about the bread! I am so happy that this was such a success, right from the start (4 loaves on your first try? Wow! You are one bold baker 😊). Thanks so much.
Hi – I really liked the bread. The texture was great – but found it a bit bitter for me – can I add in some coconut flour or green banana flour to take of the edge a bit?
Hi Brenda— yes, you can use a combo of flours here. I have never used green banana flour, so I am not sure how that will work. For the coconut flour— it has very different properties compared with grain flours, so it might take some experimenting. Or… a much easier solution, use my coconut flour sandwich bread recipe and replace the brown rice flour with millet flour ? I think it would work really well . Here is the link: https://www.powerhungry.com/2022/01/vegan-coconut-flour-sandwich-bread-gluten-free-oil-free/
@Camilla, thanks!! Can’t wait to try it
Might this recipe change if I soak the millet overnight before grinding it into flour?
@Lois, I would love to know the answer to this question as well. My doctor recommends soaking to reduce phytates. Thanks for asking, Lois! Perhaps reduce the liquids in the recipe?
Hi Virgi–you could definitely soak the millet. To keep track of the amount of water the millet absorbs, use a specific amount for soaking (for example, 6 cups). After soaking, drain and measure the remaining liquid. That will tell you how much liquid the millet has absorbed. You can reduce the water in the recipe by that amount.
Hi Camilla. Loved your recipe to bits and can’t wait to try my hands on it. Just wanted to ask you alternatives to baking it without convection as i do not own a conventional one. Please suggest alternatives. Many thanks
Dipti
Thank you so much, Dipti! Alas, I do not have a convection oven, or one with a convection setting, so I cannot give first-hand advice on how to adapt for convection. But I googled and found some good articles, like this one: http://www.marthastewart.com/8071049/convection-oven-recipe-conversion that has multiple sources weighing in on how to make adjustments. Also, I can suggest that making smaller loaves will be more successful in convection (so perhaps 2 or 3 smaller loaves, or even muffins). Cheers, Dipti!
Hi can I replace the psyllium husk with xanthum or guar gum
Hi Peter,
Apologies, but I have not used either, so I cannot predict how they would work as replacements.
I’d love to make the millet bread – it looks good, but there are no amounts listed for the ingredients. How much is needed please.
Hi Jackie! All of the exact amounts are in the recipe card (at the end of the post). You can use the JUMP TO RECIPE button at the top of the post 😊
Hi Camilla,
I have made this bread 4 times and only one loaf came out good. Three of the loaves fell flat and so I tested my oven temperature and found that the oven measured about 25 degrees above the temp set. The one that turned out okay, I had to stand in front of the oven for 90 minutes and either open the oven to reduce the temp or increase the temp on the dial to make it warmer.
Would a bread maker be better for me to get consistently good results? Have you made this bread in a bread maker or have any of your followers. I want to make this recipe regularly as it has all the ingredients that I can eat with no issue! Please help! Thanks!
Hi Terri!
Oh no, I am sorry you are getting such inconsistent results. That can be so frustrating.
It is odd that one recipe came out ok, but 3 failed, so I am wondering, do you use a kitchen scale to measure ingredients? That can make a difference. When you say that 3 loaves fell flat, do you mean they literally fell after baking? If not, what exactly happened to the loaves that did not “work”? Also, I just want to double-check that you are using whole psyllium husks, not psyllium powder. I know several readers have mentioned issues with psyllium powder.
@Camilla, the first time I just used measuring cups and spoons but read through your recipe notes and responses to others and saw that the oven temp tip, weighing ingredients, advice and tried again. When I was vigilant about standing by the oven to insure the temp stayed as close to 325 degrees as possible, I got a loaf that didn’t rise as high as the loaf in your recipe photo. But still tasted good. I am using whole psyllium husks. I started to wonder if this recipe would work in a bread machine which would probably bake at a more precise 325 degree temp. I loved the taste of the one partially risen loaf and wondered if you or your followers ever used a bread machine for this millet bread recipe. Thanks for your assistance in helping me get consistent results! I love this recipe!
Terri
Hi Terri,
A thought: have you checked your baking soda and baking powder? Since you mention that you are not getting a good rise, these could be the problem (if they are old and have lost some strength— especially the baking powder).
I have not tried this in a bread machine, but I am guessing that it would work well 😊
1. I love how easy this recipe is.
2. It’s so tasty! Has a slight corn flavor, but better.
3. It’s healthy.
4. It’s a dense and filling bread.
I am so happy you like it, Tessa! I agree, it does have a corn-like flavor–I am glad you are keen on that, too!
I can’t eat psyllium husk as I’m allergic to it and same with eggs and nuts.
Is there some other ingredient I could use instead for this millet bread please.
Thank you
Ann S.
Hi Ann,
There is no direct substitute for the psyllium in this particular recipe, but I do have a suggestion that could work–you just would not be able to bake it in a loaf. You could replace the psyllium with about 1/3 cup ground flaxseed meal and instead of baking in a loaf, spread the bread onto a greased rimmed baking sheet (more like a focaccia). I would bake it at 350F instead of 325F, perhaps start checking the bread at45 to 50 minutes.
I just made my first millet sandwich bread, and I’m so impressed with it. And even two of my sons love it too. Thank you so much for sharing such a great recipe, one that’s simple and tasty.
Well done!
I am so happy it is a success at your house, Warrick! And kudos that your sons like it, too!
Hi Camilla,
I also adapted your recipe and made a buckwheat loaf using the same ingredients, as well as making a millet/quinoa bread using equal amounts of both grains. I recall I had to add extra water in the latter. They all turned out great. Going to make a millet loaf and a millet/quinoa bread this morning.
Thanks again,
Warrick
How wonderful, Warrick! Those sound soooo good! ❤️
Oh my!! This is the best bread since, well, sliced bread!!! I have been gluten free for a few years now and finding a good replacement has been difficult. But then, I found your recipes, and BOOM!! Real bread!! I have made a loaf of bread (and ever so joyfully made grilled cheese sandwich- my childhood comfort food).
Just last night, I made a batch of dough and then used a bun pan to make 8 hamburger buns. I put about 1/3 cup dough into the greased wells and baked at 325F for 30 minutes. And violá, hamburger I could eat without a fork!! AMAZING!
Thank you!! (Next task, pizza dough!)
I am so glad this is such a hit, Amber! And I love that you made hamburger buns, brilliant! 🙂
@Amber, SO GLAD you wrote this comment as I was wondering how to do this!
@Camilla, what are the quantities of the ingredients for the gluten free bread.
Hi Shelia! All of the quantities (both cups and grams) are in the recipe card at the bottom of the post. Cheers 🙂
I loved making this bread but the psyllium husk didn’t sit well as it’s a bit of a course fiber. Is there something I could replace it with? Maybe eggs?
Hi Alexandra,
I have not tried it, but I think that could work well. I would suggest 3 to 4 large eggs. Remove the psyllium husk and reduce the water by 3/4 cup (for 3 eggs) or 1 cup (for 4 eggs). I would love to know how it goes if you try it !
I love this bread and fix it every single week. The only two things I do differently are: (1) I only let the psyllium seed mixture thicken for about 3 minutes so it isn’t too hard to mix in, then (2) I dump the final mixture directly into the greased loaf pan (I use “baker’s goop,” then I use a wet spatula to smooth the top before sprinkling on tri-color sesame seeds and baking. No need to use the hands on the dough. It’s a wonderful recipe!
Wonderful. Bea!!!
Hi, I’ve tried several millet flour bread recipes over the years, with limited success. This recipe is the best one I’ve tried and is a winner for me. I can only eat millet flour, as every other kind of flour upsets my very sensitive stomach. So, thank you so very much for sharing. Ros 😊
Ros, that is beyond wonderful! I am so happy that you are enjoying the recipe!
Hi Camilla I’ve just come across this recipe as I’m looking for a more toast able ‘bread’ than those made with almond flour. I am on a restricted SIBO diet and not allowed psyllium. Can I substitute with egg and how many? Thanks Elizabeth
Hi Elizabeth! I am not sure how that will work. But you could try it with, perhaps 3 or 4 eggs (3/4 cup to 1 cup of liquid would need to be reduced from water amount).
I really like your recipes because they are yeast free. I have celiac but I’m also sensitive to yeast. I made the millet bread twice. i like the bread and crust very much. However, it has a small bitter taste so I think I have to cut down on the baking powder. What do you think? 2 teaspoons is a lot.
Hi Ann,
I am so glad you like the bread. The bitter taste is most likely from the millet itself. It can turn rancid quickly if not stored properly.
2 teaspoons of baking powder is a normal amount for a loaf of sandwich bread. Ut needs the leavening power! 🙂
The store was out of millet flour, so I tried with sorghum flour.
Came out fantastic. Pleased as heck!
Camilla, what a wonderful job you’ve done with this recipe, and thank you SO MUCH for posting it and sharing it with us all!!
Do you think this recipe would work with fresh yeast instead of baking powder? I’m really trying to avoid the latter, but it makes me worry it might not raise all too well… Any idea/suggestion on the subject?
Whatever the case might be, yet again, thank you for this<3
Hi Sam!
I am so glad that you like the recipe.
I have not tried yeast, but it is worth trying. I would use and instant yeast and do one quick rise, right in the pan (30 or 40 minutes?). Perhaps use very warm water to blend and might need to add a small amount of sweetener (a tablespoon) to help activate the yeast.
Hi Chris! I am so sorry you had issue with the bread.
I am going to add a note in the instructions about baking with convection. While a convection oven is wonderful for many recipes, it is actually not as good for long, slow bakes such as this one. It can force a faster initial rise (which, for psyllium breads can lead to a forced bubble under the crust with a gooey bottom). You want a slow, steady rise from the lower temperature and steady, radiant heat. Does your oven have the option for conventional heat? If so, I would advise using that if possible.
Hi there,
I love this recipe! It was so easy and the bread turned out great! I’m just wondering if it would be possible to add egg and butter to this? I’m gluten, dairy and sugar free but I do eat eggs and butter, so I’d like to add them to this recipe if at possible?
Thanks!
Eva
Hi Eva! So glad you like the bread! For adding butter, I would suggest cutting back on the water (e.g., if adding 1/4 cup butter, cut back the water to 2 and 1/4 cups). Add melted butter when combining the psyllium gel and the dry ingredients. The eggs I am less sure about. The psyllium gel takes the place of eggs, so you may need to do some experimenting (a little less psyllium, a tablespoon or more less water, for each egg).
can chia seeds or flax seeds be used instead of psyllium husk. and if so would i use the same amount. i have both of those and really want to try this bread but really don’t want to have to buy psyllium husk. especially when i tried doing a search for it and was so confusing all the different varieties i got so confused and seemed really expensive especially if i can just use flax or chia and not have to spend the extra money. thanks.
Hi Denise! I completely understand about not wanting to spend money on an expensive ingredient if it is unnecessary. I am a tightwad! But whole psyllium husks really are key here. You could try an equal amount of ground chia seeds or flax, but it will not rise the same (and will be denser/flatter).
I need to do a post about whole psyllium husks (soon!), but until then, here are some tips that will (I hope) help:
1. Whole psyllium husks are actually pretty cheap (yay!) I order mine online (I’ll show some options below)
2. One bag of psyllium husks lasts a long while (it is oil-free, so no risk of going rancid)
3. Psyllium husk works in ways that flax and chia do not (especially for gluten free snd vegan snd grain free baked goods) it does more than bind, it adds structure and volume
Getting no affiliate $, just sharing where I get my supply. I almost always by NOW Foods whole psyllium husks. I have also use Yerba Prima and Frontier Co-op brands— all are great.
I have ordered from Amazon, but I most often order from Swanson vitamins or vitacost. The latter are both great sources for a lot if the ingredients I use here (almond flour, grains, flaxseed meal).
I hope this helps, Denise! Just be sure to get WHOLE PSYLLIUM HUSKS (not powder)
Thank you for this great bread! I goofed the first time I made it (I didn’t soak the psyllium separately) and it came out gooey. The second time I followed the instructions exactly snd it came out perfect. Even the kids live this one (mommy’s gluten- free bread!)
Great Neela! Kudos that the kids like it, too! 🙂
I’ve been making toasted peanut butter and jelly with this bread. Weekly! I use a natural no salt creamy peanut butter and St Dalfour Fruit Spreads. It’s so delicious! Thank you Camilla!’
Yum yum and yum!!! I love pb & j , too, Holly 😍 I am so happy that the bread is a success ♥️
I used this to make vegan French toast . I dried out slices in the oven before soaking in a flax-coconut milk-vanilla custard. HUGE success!!
I’ve made this bread twice and it is incredible.
Very happy.
Delicious! Worked out just as it looked☺️ Finally a “squishy” soft GF, real bread! Thanks for sharing it! I used a substitute fir baking powder (1/2tsp baking soda and 1c yogurt) and it was fab!
Yay, wonderful, Jenn!!! 😊
Which millet you have used in the millet bread
Hi Fidaul,
My apologies for the lack of clarity about the millet. Here in the US, there is only one millet sold, simply marked “millet.” It is very small and pale yellow in color. It looks like it might be foxtail millet.
@Camilla,
I’m Uganda we only have the dark brown Finger Millet. It works well. The bread looks like a chocolate loaf 😋
Ooh, that sounds so good, Sheila! 🙂
Hi, I stumbled across your page and had to try making this bread. I didnt have enough of the millet flour for the quantity here so did half millet and half buckwheat. I also reduced the baking powder (as mentioned in other comments)
It gave off a nice bake and a sort of malt brown colour to it instead which is the only aesthetic difference and seems to taste really good so thank you for sharing this!
You are very welcome, Mike— thanks for sharing your adaptations, sounds wonderful 😊
Can you use this recipe to make Cinnamon Raisin Bread or muffins?
Ooh, those sound like great ideas, Susan. I would say full steam ahead with both!
Where do i place it in the oven? Lower, middle or top?
Hi Alexander,
Middle. Cheers 🙂
This is so ridiculously easy and delicious! I’ve been making it once a week. I use sherry vinegar – odd but it was in the pantry. I also add about a tsp of LorAnn butter flavoring. The last loaf I added cinnamon for ‘breakfast bread’ and I love it. It does not affect my blood sugar. Thank you for this fantastic recipe!!
That is wonderful, Patti! I love the sound of your additions 🙂 So happy that you are enjoying the bread 😍
Hi! Love your recipes!
Can I omit the salt?
Thank you!
Hi! Thank you so much, glad you are enjoying the recipes. Yes, you can definitely omit the salt 😊
I’ve made the bread several times now and have tweaked it to our tastes a bit with positive results. I’ve decrease the baking powder from 2 teaspoons to 1 1/2 teaspoons to lesson the twang on the tongue from the baking powder. I used the 2 1/2 cups of water boiled & poured it over four or five cuttings of fresh thyme to steep for 15 to 20 minutes. I used that time water to steep the psyllium husk and in our case, lemon juice. I also added fresh thyme leaves to the dry mixture. The result is a delicious and very fragrant thyme loaf.
Hi Käären! Ooh, I love the sound of your adaptations— thank you so much for sharing them with me and others 😍
@Camilla, I do believe that the bitterness that many other people have posted about has to do with the baking powder and not the millet flour. I hope that helps! ❤️
That could be, thanks Käären 😊
I made it! I cooked it the recommended 90 min but I feel that maybe a bit longer for my oven might be better. The bread did not rise as much so the slices were shorter. Nevertheless I love the taste! I added flax and sunflower seeds as toppers. Thank you for sharing this easy and yummy recipe!!
You are so welcome, Patsy–I am glad it was a success!
I’m excited to try this recipe! Could I substitute hemp seeds for the psyllium husks?
Hi Sue,
Alas, no, that will not work, psyllium forms a thick gel when wet (allowing the bread structure to rise and hold). Hemp seeds do not have such properties.
This is delicious. The texture is perfect, although I wasn’t able to shape the batter with my hands since it was too wet. So I put it right into the pan and it baked beautifully, coming out of the oven tall and sturdy, with nice brownish edges.It does have a bitter edge from the millet but that’s fine, you don’t taste it when eating the bread smeared with some good nut butter and chestnut spread on top of it, for sweetening. Thanks for another winner, Camilla.
You are so welcome, Keren!
This is an awesome recipe – THANK YOU! It’s easy, the bread toasts well with a neutral flavor that makes it versatile. Most importantly, it’s great for someone like me with many food sensitivities (and can’t have yeast, sugar, oil, ACV. I use lemon juice instead of ACV which is just as good.) Been telling a few friends about it!
Yay!!! Thank you so much, Betty! 😊
Fantastic bread!!!!! I was recently told I cant have rice, wheat, eggs, gluten, etc……This bread is perfect!
I am so thrilled, M! Thanks for taking the time to write, too 😊
I tried the recipe, the texture is great but the psyllium gives it bitter flavor. Can I use any substitute?
Thanks!
Hi Dassy! Glad you enjoyed the recipe overall 🙂
Hmm, it is unlikely that the psyllium is causing the bitter flavor. It does not have a bitter edge at all. The more likely culprit is the millet. Millet can go bad very quickly, which will lead to a bitter flavor once it is cooked. Use a brand new package of millet or millet flour and store any leftover flour in the freezer (in an airtight container) to keep it fresh.
Hi Camilla , I’m new to gluten free baking and I’m very excited to try this gorgeous looking bread. Im just wondering if it would be ok to add a little bit of oil. Thanks.
Hi Claudia! Welcome to the world of GF baking 🙂 Yes, you can certainly add some oil to this recipe (up to 1/3 cup should be delicious). Simply replace some of the water with the amount of oil you add. Cheers!
@Camilla, when you say replace some water when adding the oil does it mean that you use less water? Thank you
Hi Grace,
Yes, that it what I mean. So, for example, if you decided to add 2 tablespoons oil, you would use 2 tablespoons less water than is called for in the recipe. 😊
I have really enjoyed this bread. I like it toasted best!
Thank you for all the work you’ve put into this to make it available for those who are healing their gut and really enjoy a slice of bread. Thank you Dale Ann from New Mexico
You are so welcome, Dale Ann!
hello Camilla. I tried this recipe and I was so happy to see the results. this loaf is delicious, not crumbly or mushy, it cooked evenly and had a nice mild flavor. I made two batches, one 3x and another 2x the recipe. the second batch (2x) came out better. I actually did not have so many 1 pound loaf pans so I divided the last double recipe in 3 parts and my smaller loaf pans worked great. I have sliced and freezed 5 of the loaves and kept one out for today. The backing times were the same for both batches so probably what improved the double batch is that I could mix the ingredients better as it was not such a large amount. I used my hands in the end to mix them better.
Thank you so much!
Maria
Thank you for the wonderful tips, Maria! That is so helpful, I really appreciate you sharing 🙂 I am so happy that you have been enjoying the bread!
Camilla, your recipes and website are “the bomb”. Thank you so very much for the bread recipes, the cookie recipes……I can now forgo the store bought gluten free bread and now I can make my own. I am so grateful that I found you. It all started with the Teff bread and now the Millet. Can’t wait to try the other recipes on your amazing site. I am just so happy…….
Thank you,
Christine Patten
Oh Christine! You brought tears to my eyes 🥰 I am so happy to share my creations!
Can the millet bread be baked in a breadmaker?
Hi Patricia! I think that should work on the quick bread setting. It is really important to make the water-psyllium gel first , so I would do that in a separate bowl and then add to the bread maker. I would love to know how it turns out!
Hi there,
I tried baking a Millet flour-based bread, and after cooking it for over an hour and a half then resting, While edges were nice and golden, the inside was still very very wet and sticky. If cooked longer, which happened, the crust would get darker, but the inside doesn’t change.
I’ve tried multiple times, and I often get the same results. I’m using all of the ingredients you mention in the recipe… psyllium powder, etc…
Is there any workaround, people experiencing and fixing this?
Thank you.
Hi Maxine!
Oh no, I am so sorry to hear that the bread is not baking in the middle. So frustrating.
You mention that you used psyllium powder, is that correct? I mention in the post that the powder version of psyllium will not work. I use the whole husks. That might be the problem.
I also want to check: it sounds like you might be outside the US. Is that correct? I ask because a few people have written with baking issues and they were using other grains (that were labeled as types of “millet” but were in fact sorghum, which is different) Might that be an issue?
@Camilla, I’m having the same issue. I’m using whole husk psyllium. The middle is just goo no matter how long I cook it
Hi Aaron, I am so sorry you are having gooey issues with the bread. I am really perplexed. I remade the bread two times given that several people said they got gooey results. I get an evenly baked bread every time, no goo. Are you weighing the ingredients or using cup measures?
@Camilla,
this is a stone cold winner! easy, delicious, affordable. many thanks!
I doubled your recipe,and it turned out very bitter. I used Arrow head brand of millet flour. What should I do? I don’t like the taste.
Hi Rossaukhon,
Oh no, I’m so sorry to hear that your bread was bitter. Millet and millet flour should definitely not taste bitter, at all, when fresh. If the flavor is bitter, it is a sure sign that the flour is rancid. Was it a bag that was opened awhile back? If it was a brand new bag, I would contact the manufacturer’s customer service (they will most likely replace your purchase).
@Camilla,
Hi Camilla, it was unopened bag and didn’t reach the expiration date yet. I will contact the Arrowhead Mills. Thank you
👍🏻😊
This bread is everything you said t is. I am on a Lectin-Free free diet and have been enjoying your 2 ingredient almond tortillas, now am enjoying this wonderful millet bread, the best thing since sliced bread! 😀
Thank you for sharing,
Trina
I am so happy that the bread worked for you, Trina! 🥰
I just tripled this recipe, without using the automatic doubling or tripling on this recipe page and it turned out much better than the time before when I used the tripling option above the recipe.
When using the doubling and tripling option above the recipe, it does not give the proper amount of flour or water in the recipe.
Just wanted everyone to be aware of that.
Thank you, Heather! 😊
Why is the water less than it should be in the tripled recipe?
Hi Heather, I’m sorry about that confusion. The double and triple options on the recipe card application that I use does not properly scale all of the measurements. I wish I could disable it all together. I am going to be switching the recipe card application that I use so that this won’t be an issue any longer. My apologies!
Hi there, can you share the brand you used for psyllium husk? I’m a little confused. I have whole psyllium husk, but it looks like a powder, it is not ‘flakes’. Please help 🙂
Hi Josie, oh no that must be very confusing! I always use one of two brands: either NOW foods, or Anthony’s.
I would look at the package nutrition measurements if the bag you have for insight: 1 tablespoon of whole husks is 5 grams, 1 teaspoon of the powder is 5 grams. I am wondering what your bag indicates.
I measure my ingredients by the gram these days, it makes life a lot easier when it comes to baking. You can pick up a digital kitchen scale for under $10 😊
I’m very glad that you invented and made available this recipe! It is my new go-to bread. I just add olive oil and sprinkle with spice mixes, and then pair it with whatever else I’m eating. This is awesome for my body, satiating, with digestive benefits. Much thanks, and kudos, to you!
Angela, thank you so much for taking the time to write. It means so much! Most of all, I am so happy to know that you are enjoying the bread 🥰
Which millet did you use? There are Pearl millet, porso millet, finger millet, foxtail millet, kodo millet, barnyard millet, sorghum millet, little millet and brown top millet.
Hi Bhumika,
I’m sorry for the ambiguity. Here in the US, there is only one kind of millet sold, and it is simply labeled “millet.” I have photos of the millet I use in my post: tiny, pale yellow, it is a type of finger millet. I hope that helps.
Hi
I had made your sunflower seeds bread and it had come out quite well. Now wanted to try this but I am a little unclear on which millet flour I need to use. In India we have a variety of millets such as Amaranth,Barnyard Millet,Buckwheat,Foxtail millet,Kodo millet,Little millet,Pearl millet,Proso millet ,Sorghum. There are a few others which due to their color I am eliminating myself. Would you please guide me on which to use
Cheers
Hi Shalini,
Apologies for the confusion. The millet that is sold in the US is pale yellow finger millet. Other varieties are not available. Cheers!
I made this bread exactly according to the recipe… It turned out pretty good. Little bit of a bitter aftertaste that I pray goes away as we get used to it
Thank you for sharing this
Blessings to you and your family
This bread is incredible! I followed the recipe to the letter and it came out looking gorgeous. The taste exceeded my wildest expectations and I would have to say it is the tastiest, simplest gluten free bread I’ve ever made.
Brilliant! Thank you so much!
I am absolutely thrilled to hear it, Loulou!!! What a compliment, thank you 🙂
Although the bread was tasty I think the texture was off. I also had some pretty bad heartburn after eating it. I can only think of two reasons: 1. I didn’t grind the millet long enough OR 2. I am sensitive to the psyllium husks. What do you think?
Hi Sonia, sorry you had problems with the bread. It is not possible for me to know from afar what the issue was. Since you asked whether you may not have ground the millet enough…perhaps you suspect you did not? The millet needs to be ground into a fine flour, so if it was not finely ground, that would definitely affect everything about the bread (the rise, the texture, the water absorption).
Can I sy. The psyllium.husk with flax,seeds? If yes what proportion ? Also can any kind of millet flour be used successfully ?
Hi annupamma,
Alas, no, flax does not work as a sub for psyllium with this bread.
Followed your recipe exactly the way it is and although the bread came out looking absolutely gorgeous, the insides were uncooked like raw dough. This happened after I added an extra 30 minutes to the cooking time and thereafter, left it on the wire rack inside the oven to cool off for the night (it was late and I had to sleep). It gave a nice hollow sound and looked so fab, I had no doubt that it was still undone. So off it went in the oven for 40 minutes more, in the morning. Came out the same. Where could I be going wrong? Which millet did you use? I have so many different varieties of millets and used sorghum for this one. Any tips from you would be highly appreciated.
Hi Meetu,
Sorry you had problem with the bread! I was not sure what the problem could be until I got to the end of your comment, where you mention you used sorghum. Sorghum and millet are not the same. The main difference between millet and sorghum is that millet refers to grains from the Panicum miliaceum plant, while sorghum refers to grains from the Sorghum bicolor. They work quite differently when ground into flour, too.
Here in the States, there is pretty much only one millet variety available for purchase. It is pale yellow (a type of finger millet— it is what is pictured above. Sorghum grains are much bigger)
I hope this helps!
I agree with previous commenters, this bread is amazing! Thank you so much for sharing
That means so much, thanks, Jin!
I’d give 10 stars if I could!
By far the best GF bread I’ve tried since I gave up gluten. I was amazed (still am) how close to a sandwich-type of bread looks like.
Indeed, it tastes as corn, which I find funny, but it doesn’t bother me at all, I actually like it.
But the fact that it has a crust which turns even more crunchy once you toast it, A-MA-ZING! When i was chewing the crunchyness, so good!
And i really like how simple the recipe is and how fast it’s prepared. No complications with multiple flours or starches or whatsoever! And the result is great, from both taste and texture perspective.
Thank you! 🙂
WHOOHOO!!!!!! I am thrilled to pieces that you love the bread as much as I do, Ioana!
This bread turned out so well with just few ingredients, i am still amazed! And indeed, it tasted as corn, but it’s delicious nevertheless.
Being glutenfree, i am all about healthy breads with very few ingredients and this recipe is just IT! So easy to make and I was so happy to see how well it gets toasted, plus my boyfriend, who is more of a white flour, unhealthy bread fan, actually enjoyed this bread, plus, he was able to dip it in his fried egg!
I’ll definitely remake it. I am so delighted by it! Thank you!
Hi Camilla. Given I don’t have the whole ones s there any way one can use the psyllium powder or perhaps flax seed powder, any ideas?
Hi Seweryn,
You can certainly try using an equal weight of psyllium powder. I have not tried it and I only know that a number of people have had problems when subbing the powder for whole husks in my psyllium based breads. Alas, flaxseed meal will definitely not work as a substitute here.
what type of millet flour is used here, sorghum, finger etc?
Hi Stephanie,
The millet sold in the US is pale yellow finger millet (simply labeled “millet” by US manufacturers). 🙂
@Camilla,
Can we use any other millet flour like barnyard millet flour , foxtail millet flour.
Hi Puja,
So sorry, I wish I knew! Pale yellow finger millet is the only kind of millet here in the US.I do not have any familiarity with other kinds of millet
Hi Camilla,
I’ve been making your fabulous buckwheat and rice flour bread regularly for the last few months and was eager to try the millet bread. It came out well. I followed the quantities exactly and found the dough seemed really wet, more like a batter, so I added extra flour. Couldn’t form any kind of ball and just poured it into the baking tin. Is it supposed to be quite a bit wetter than the dough in the buckwheat/rice recipe? Or should it be more like 3 cups of millet flour, rather than 2 and 1/2?
Love all your recipes and keep trying new ones.
Thanks
Radha
Hi Radha,
Glad you enjoyed the breads! Hmm, that is unusual that it was a batter. Perhaps it is related to the mL issue brought up by Veggie (in the comment previous). I definitely use 400 grams of millet flour (2 and 1/2 cups) when making the dough; do you weight the flour or use cups? It might be a mismeasurement somewhere along the way.
why is 2 and 1/2 cups 625 mL? 2.5 US cup is equal to 591 mL. I am confused to follow which measurement for water.
Hi Veggie!
I am going by standardized cups to mL conversions (i.e., what is commonly found on a liquid measuring cup, where 1 cup liquid is equivalent to 250 mL; for example, this chart: How to Convert Liquid Measurements for Baking. Being in the US, I use cups to measure; you could add 591 and add a bit more as needed.