
This post may contain affiliate links. Please read my disclosure and privacy policy.
This post may contain affiliate links. Please read my disclosure and privacy policy.
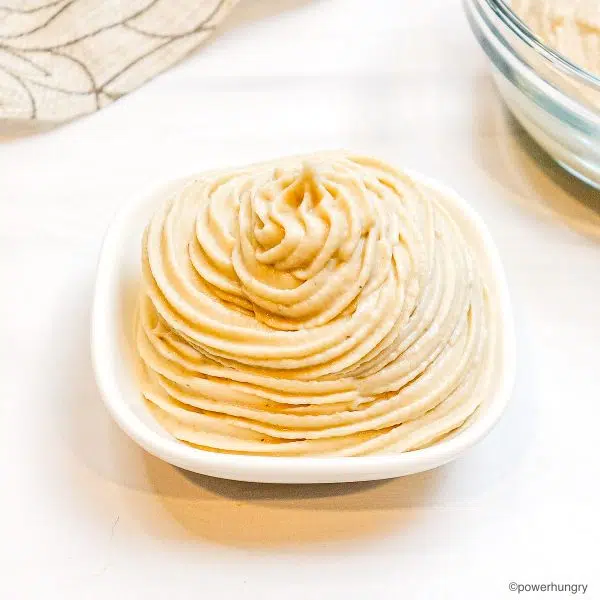
Chickpea breadcrumbs, made with canned chickpeas, are grain-free, oil-free, & bread-free! High-protein, oil-free, frugal, and easy-to-make, they are every bit as delicious & versatile as traditional bread crumbs.

I am a sucker for all things crunchy. Toasted nuts & seeds, crisp crackers, cold crudités, and crumb-coated anything–yes please, it’s all satisfaction to me. If you have spent any time here on my blog, then you know I have quite a thing for chickpeas in all forms.
Add these two together and you can imagine that I wanted to leap for joy when I spotted a new variety of breadcrumbs at the health food: Chickpea Crumbs.
Chickpea crumbs!!! With nary a hesitation, into the shopping basket they went.
What are Chickpea Breadcrumbs?
Chickpea breadcrumbs–or chickpea crumbs–are a breadcrumb alternative made from nothing more than whole chickpeas.
The chickpeas in question are cooked (canned or homemade) and the crumbs are a result of processing (ultra-fine, chunky, or any where in between) into breadcrumb-size bits and then baked until dry.

My purchase of ready-to-use chickpea crumbs was worth the new discovery. The price, however…less than thrilling. At almost $8 for a 7-ounce bag, I knew I had no other choice:
I had to make my own version.
And so I did! Moreover, I am happy to share the recipe for this healthy, grain-free staple with all of you.
Ingredients for Chickpea Breadcrumbs
The exact amounts of each ingredient are indicated in the recipe card at the end of the post. Toggle between US Customary (volume) and Metric (weights) for preferred measurement option.
To make the breadcrumbs, you will need a single ingredient:
- Cooked chickpeas
Specifically, you will need two 15-ounce of chickpeas (garbanzo beans). If home-cooked chickpeas are your preference, you will need about 3 and 1/4 cups of cooked chickpeas.
Ingredient price: about $.75 to $3.00 for a comparable yield. That’s more like it!

How to Make Chickpea Breadcrumbs
Note that the complete directions are also in the recipe card below.
Making chickpea breadcrumbs is almost as simple as the ingredient list. The active time commitment is a few minutes. The remaining time is unattended baking.
Ready? Let’s have a crumby day!
Step 1: Rinse, Drain & Blot the Chickpeas
Begin by rinsing and draining the chickpeas in a colander or mesh sieve. Transfer the drained chickpeas to a layer of paper towels or a clean dish towel and blot to remove any excess moisture. Discard any loose skins that come off as a result of blotting.

Step 2: Bake the Chickpeas
Spread the drained and dried chickpeas on a large rimmed baking sheet. There is no need to grease or spray the baking sheet, nor line with parchment paper. I usually avoid the word “dump” in relationship to food, but dump and go is all the prep that you need here.

Bake the chickpeas in a preheated 350F oven for 40 minutes. The chickpeas will shrink, feel dry to the touch, and have a light golden brown color.
Let the chickpeas cool on the baking sheet for 10 minutes (leave the oven on).
Step 3: Blitz the Chickpeas
Time to make some crumbs! Transfer the baked chickpeas to the bowl of a large food processor.

I prefer to use the pulse function here, for greater control (plus, I am easily distracted:)). Keep pulsing until the crumbs are the desired size.
Fine crumbs are best for coating and all-around use. Stop and scrape the sides and bottom of the bowl once or twice. Do not worry if the crumbs start to look somewhat powdery; the remaining moisture in the breadcrumbs will help the crumbs glom together into crumbs (not dust) during the final bake for crumbs.
If the goal is large crumbs, for garnishing purposes, then the texture can be (and is preferable) ragged and uneven (i.e., no need to scrape down the bowl as you go). Pulse to desired level of chunky crumbleness
Spread the crumbs on the same baking sheet used for the first bake.

Step 4: Bake a Second Time
Bake the chickpea crumbs (still at 350F) for 10 minutes. Turn off the heat and allow the crumbs to remain in the oven as it cools. This will dry out the crumbs without over-toasting them. You want to remove all the moisture so that the crumbs remain crisp and crunchy once cooled and stored.
The resulting breadcrumbs will be a bit more golden, but not much. This light golden level of toasting is best for a multipurpose breadcrumb uses, such as breading, topping baked dishes, and as filler for meatless meatloaves, burgers and stuffing.

Coarser breadcrumbs (intended for topping soups, pastas, and salads) can be toasted longer (15 to 18 minutes total), as desired, for increased crunch and toasty flavor.
Cool the crumbs completely before transferring to an airtight container for storage. That’s it, crumbs done!
How to Store Chickpea Breadcrumbs
The chickpea breadcrumbs will keep, in the aforementioned airtight container, at cool room temperature for a month (for optimal flavor and crunch). Alternatively, store in the freezer for up to 6 months.

Can I Season the Chickpea Breadcrumbs?
Yes! You can season the crumbs with any dried herbs or spices you choose. Seasonings are especially welcome on chunkier crumbs (intended for topping soups, salads, and pasta).
I recommend adding an seasonings to the blitzed crumbs before the second bake (for better adhesion). Consider some of the following options:
- herb blends (e.g., herbes de Provence, Italian seasoning)
- garlic powder
- ground pepper (black or cayenne)
- smoked paprika
- ground dried chiles/ chili powder
I hope you enjoy these breadcrumbs in a wide range of delicious recipes. Happy baking!

Chickpea Breadcrumbs (grain-free, oil-free)
Ingredients
- 2 15- ounce 425 g cans chickpeas (see notes for options)
Instructions
- Preheat oven to 350F (180C).
- Rinse and drain the chickpeas in a colander or mesh sieve, shaking off excess water. Transfer the chickpeas to a clean, dry dishtowel or several layers of paper towels. Blot until dry (discard any loosened skins).
- Spread the chickpeas on a large rimmed baking sheet. Bake in the preheated oven for 40 minutes until light golden brown and dry to the touch. Cool on the baking sheet for 10 minutes (keep oven on).
- Transfer the chickpeas to the bowl of a food processor. Pulse into fine crumbs, stopping once or twice to scrape the bowl. Spread in an even layer on the same baking sheet.
- Return the baking sheet to the 350F oven to bake for 10 minutes. Turn off the heat, leaving the chickpea crumbs in the oven for an hour longer (to dry).
- Remove the crumbs from the oven and cool completely. Transfer to an airtight storage container.


WOW thank you so much! This crumb topping can be used on so many things, we searched all over YouTube amd google before we found your recipe. It’s amazing!!
Yay, so happy you found it here, Bev and even more happy that you like it!
Dear Camilla! I can’t thank you enough for the recipe to make gf bread crumbs! I can’t find the the brand I used to buy anywhere! Another great product falls to the big company’s an their buy outs!! You are a chef genius to me!! May you be blessed 100x’s over for all those you’ve helped with your sharing!!
Linnet
I bought Chickpea crumbs for a homemade soup topping (added garlic powder, turmeric, and black pepper – store in pantry until ready to use I add freshly grated parmesan cheese, fresh parsley, and ground flaxseed) – My brand is no longer available and others well like you said – I need to find a better option. You did all the work for me! So grateful! This worked out perfectly. Appreciate the step-by-step comments and pictures that made it so easy. Depending on the food we choose to top with it – determines the other ingredients added. Thanks again!!!
yay, yay and yay! I am so happy that this simple recipe came to the recipe, Angie!!!
You come up with the cleverest most unusual and great recipe ideas. I love your blog and your unique take on some many foods. These crumbs will go into my daily salad from now on. Thank you!
Thank you so much, Liz!