
This post may contain affiliate links. Please read my disclosure and privacy policy.
This post may contain affiliate links. Please read my disclosure and privacy policy.
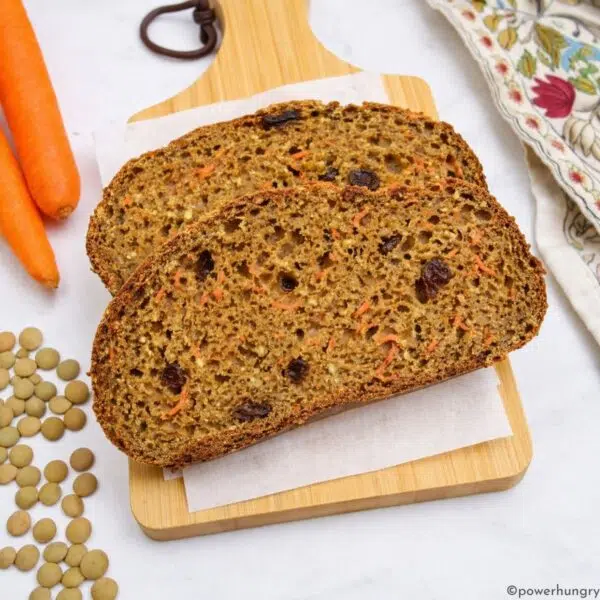
Easy, high protein bread that tastes like wheat bread! My bean millet protein bread, which has 7 grams protein per slice, is frugal, flourless, easy to make, oil-free, and vegan.

Table of Contents
- High Protein Bread Made Easy
- Recipe Benefits
- Ingredients for Bean Millet Protein Bread
- What is Millet?
- Step by Step Directions
- Step One: Soak the Beans & Millet
- Step Two: Prepare the Baking Pan
- Step Three: Rinse and Drain Millet & Beans
- Step Four: Blend into a Batter
- Step Five: Spread Batter & Preheat Oven
- Step Six: Let Bread Batter Rise (Watch Closely!)
- Step Seven: Bake the Bread
- Step Eight: Cool & Slice the Bread
- Texture & Taste of the Bread
- Flavor Variations
- Storage
- Ingredient Substitutions
- Tips for Success
- FAQ
- Related Recipes
- Bean Millet Protein Bread (Vegan, GF, Oil-Free) Recipe
High Protein Bread Made Easy
Choosing a favorite recipe is like choosing a favorite friend or child. Close to impossible.
But I can say, with confidence, that this simple, frugal protein bread is rocking my world for breakfast, lunch, dinner, and snacks. It is stellar for all kinds of sandwiches (layered and open-faced), can be sliced super thin or thick, and makes outstanding toast.
Oh, and despite having no flour, it tastes like a loaf of rustic, wheat flour bread.

Recipe Benefits
- High Protein (7 grams protein per slice)
- High Fiber (8 grams fiber per slice)
- Flourless (e.g., no buckwheat flour, gluten-free flour blend, millet flour or quinoa flour)
- Gluten-free
- No added starches (such as cornstarch, tapioca starch, arrowroot, or potato starch)
- No added gums (e.g., xanthin gum)
- Vegan (egg-free & dairy-free}
- Oil-free (no vegetable oil, butter, olive oil, safflower oil, or other added fats)
- Minimal ingredients
- Easy
- Frugal (cheap!)
I have the nutritional information included at the bottom of the recipe card, below.
Ingredients for Bean Millet Protein Bread
The exact amounts of each ingredient are indicated in the recipe card at the end of the post. Toggle between US Customary (volume) and Metric (weights) for preferred measurement option.

- Uncooked millet (labeled “millet in U.S.; for international readers, it is proso millet)
- Uncooked white beans (I use white navy beans. See recipe card notes for more options)
- Coconut sugar (See recipe card notes for other options)
- Whole psyllium husks (See recipe card notes regarding psyllium husk powder)
- Instant yeast (it may also be labeled rapid rising yeast, or quick yeast) (Note: do not use Red Star brand platinum yeast. It is not gluten-free).
You will also need water (for soaking and blending the batter. I use filtered tap water. I like to add one teaspoon of salt to the batter, but it is always adjustable according to your tastes and needs.
It is essential that instant yeast, not regular active dry yeast, is used in the recipe.
What is Millet?

Millet is a nutritious, versatile, gluten-free grain. It has a neutral flavor that is slightly reminiscent of dried corn. It is:
- Gluten-free
- Lectin-free
- One of the only grain flours/grains that is alkalizing to the body
- Good source of protein
- Good source of fiber
- An excellent source of B vitamins
- Easy to digest in general
- Low in cost compared to other gluten-free grains (such as quinoa, teff, and amaranth)
In the U.S. and Canada, we pretty much have one millet available, labeled “millet.” North American manufacturers do not specify the type of millet on packages (just “millet“), but various sources indicate that the only millet grown for human consumption in the United States is proso millet. If you have the choice of several millets in your country, opt for proso millet.
Step by Step Directions
Note that the complete directions are also in the recipe card below.
Step One: Soak the Beans & Millet
Place the raw (uncooked) millet and white beans in a large mixing bowl. Add boiling water to the bowl (enough to cover the by about 1 inch / 2.5 cm). Soak for 45 minutes.
Overnight Soaking Option
If you prefer, soak the millet and beans overnight. Place the millet and beans in the bowl, as described above, but cover with room temperature water. Soak for anywhere from eight to twenty four hours.

Step Two: Prepare the Baking Pan
Prepare a 9×5-inch (22.5×12.5 cm) loaf pan. If using a nonstick loaf pan (e.g., ceramic coated, silicone), no preparation is needed. Otherwise, line the pan with nonstick parchment paper. If you do not object to oil, spray the pan with nonstick cooking spray, or lightly oil/grease the pan.
Step Three: Rinse and Drain Millet & Beans
Drain the soaked millet and beans through a mesh sieve and rinse under cold water. Shake off the excess water.

Step Four: Blend into a Batter
Scrape the soaked, drained millet and beans into a high-speed blender (or regular blender) container.
Add the warm water, coconut sugar, yeast, and salt. Blend on high speed until the batter is silky smooth and warm.
Add the whole psyllium husks to the bean millet mixture. Blend until just combined (or stir with a spatula). It will resemble a batter, not a dough.

Step Five: Spread Batter & Preheat Oven
Immediately spread batter into the prepared baking pan, smoothing the top. Use a knife to make a lengthwise slash through the top of the batter.
Place the pan in a draft-free warm place. Immediately preheat the oven to 350F (180C). Do not hesitate!
The bread rises quickly. The oven needs to be hot and ready to go as soon as the bread hits the needed rising mark (see next step).
Step Six: Let Bread Batter Rise (Watch Closely!)
Let the bread batter rise for 20 to 25 minutes (if your kitchen is cold, it may take longer). It happens quickly, so stay close by.
The bread is ready to bake as soon as the batter is a short distance away from the the top edge of the pan (the batter should be no closer than 1/4 inch away from the top). If the batter is all the way to the top, it could overflow the top of the pan once it hits the oven.
Step Seven: Bake the Bread

Bake the bread in the preheated oven for 45 to 50 minutes until deep golden brown. The loaf will be relatively flat on top.
Step Eight: Cool & Slice the Bread
Let the loaf cool, in the pan, on a cooling rack for 15 minutes.
Remove the bread from the pan. Cool the loaf completely on a wire rack, or other cooling rack. You just made a gorgeous loaf of bread!

This is a sturdy bread, with minimal crumbs. You can slice it thick or very thin, as you desire.

Texture & Taste of the Bread
This is a firm bread with a neutral, go-with-anything flavor that is very much like breads made with all-purpose flour.
Use slices to make sandwiches (open face, or two slice sandwiches) with a variety of sweet or savory fillings. For example, avocado toast, nut butter or seed butter, hummus, vegan cream cheese, or fruit preserves.

The bread is a great accompaniment to dinners and lunches, too. It is wonderful with soups, stews and salads.

Flavor Variations
Consider adding any of the following options to the bread:
- Dried herbs or fresh chopped herbs (add fresh herbs to the batter after blending, to avid green bread)
- Dried ground spices, such as ground cumin, curry powder, garlic powder, or onion power.
- Sweet spices (such as cinnamon, cardamom, or ginger)
You can also sprinkle the bread batter with seeds, such as pumpkin seeds, sunflower seeds, and/or chia seeds on the loaf before baking.
Storage
Store the bean millet protein bread in an airtight container at cool room temperature for one day, the refrigerator for one week, or the freezer for up to six months.
Ingredient Substitutions
- Will this bread work with other uncooked grains? I have only tested this recipe with millet. I do not know if any other grains will work.
- Can I use cooked beans (including canned beans) to make the bread? No. The recipe will not work with cooked beans.
- What can I use in place of coconut sugar? You can use an equal amount of maple syrup, agave nectar, molasses, or granulated sugar of your choice. Sugar substitutes will not work (for the same reason, above, that the sugar cannot be omitted from the recipe).
- Can I use psyllium husk powder in place of whole psyllium husks? Possibly. I have not tested the bread with psyllium powder. If you decide to substitute psyllium powder, use the same weight (20 grams), which is about 4 teaspoons (compared to 1/4 cup for whole psyllium husks)
- Can I leave out the sugar? No, sugar is needed to activate (and feed) the yeast. The bread will not rise much at all without it.
- Can I add oil or other fat to the bread? Yes! replace 1 to 4 tablespoons of the added water (in the blending phase) with the oil or melted fat of your choice. It will make the bread softer.
- Can I make the high protein gluten-free bread without yeast? No, this is a yeast bread. The overwhelming majority of bread recipes on my site are for yeast-free bread (including ones that use rice flour, sorghum flour, chickpea flour, teff flour, and chickpea flour). Other options abound! Simply type bread into the search box.
- Can I sub other dried legumes for the white beans? Yes. You can use an equal weight of dried pinto beans or dried chickpeas. You could also use an equal weight of dried lentils.
Tips for Success
My Bean Millet Protein Bread did not rise as expected. Why?
The most likely reasons are the following:
- Regular yeast was used instead of instant yeast. This recipe will not work with regular yeast. You must use instant yeast.
- Sugar was reduced or eliminated. The sugar was left out, reduced, or replaced with artificial sugar. The sugar is essential for “feeding” the yeast (to produce gas bubbles).
- Oven temperature is off. I regularly check my oven temperature setting using an inexpensive oven thermometer. Check to make sure the oven is accurate before baking. If the oven is too hot, it can force a faster rise to the bread, leading to a bubble under the top of the loaf.

FAQ
- Can I make this gluten-free protein bread in a bread machine? I have not tested this in a bread machine so I cannot recommend how to make bread machine adaptations to the recipe, or whether it will work.
- My oven has a convection setting. Should I use it for this bread? I tested this bread in a conventional oven (radiant heat, not convection). So for best results, I recommend using radiant heat, if possible. If you are used to baking bread in a convection oven, you are welcome to experiment with baking the bread in a convection oven.
- Can I blend the batter in a food processor? No. A food processor cannot break down the millet and beans into a completely smooth batter, which is necessary for the success of the bread.
- Can I bake the white bean millet bread in a toaster oven? I do not recommend it. Even if the bread pan can fit into a toasted oven, the bread batter will be too close to the heating element in a small oven (toaster oven) for the bread to bake evenly.
Happy baking!
Related Recipes

Bean Millet Protein Bread (Vegan, GF, Oil-Free)
Equipment
- 1 9×5 inch loaf pan
- 1 high-speed blender (or regular blender)
Ingredients
- 1.5 cups uncooked (raw) white beans, (see notes for examples)
- 1/2 cup uncooked (raw) millet
- 2 tablespoons coconut sugar , (see notes for options)
- 2.5 teaspoons instant yeast, (it MUST be instant/ fast rising yeast)
- 1 teaspoon salt, (optional/adjustable)
- 1.5 cups warm water
- 1/4 cup whole psyllium husks, (not psyllium powder)
Instructions
- Place the raw (uncooked) millet and white beans in a large mixing bowl. Add boiling water to the bowl (enough to cover the by about 1 inch / 2.5 cm). Soak for 45 minutes.(see notes for overnight soak option).
- Prepare a 9×5-inch (22.5×12.5 cm) loaf pan. If using a nonstick loaf pan (e.g., ceramic coated, silicone), no preparation is needed. Otherwise, line the pan with nonstick parchment paper. If you do not object to oil, spray the pan with nonstick cooking spray, or lightly oil/grease the pan.
- Drain the soaked millet and beans through a mesh sieve and rinse under cold water. Shake off the excess water.
- Scrape the soaked, drained millet and beans into a high-speed blender (or regular blender) container.Add the warm water, coconut sugar, yeast, and salt. Blend on high speed until the batter is silky smooth and warm. Add the whole psyllium husks to the bean millet mixture. Blend until just combined (or stir with a spatula). It will resemble a batter, not a dough.
- Immediately spread batter into the prepared baking pan, smoothing the top. Use a knife to make a lengthwise slash through the top of the batter.Place the pan in a draft-free warm place. Immediately preheat the oven to 350F (180C). Do not hesitate! The bread rises quickly. The oven needs to be hot and ready to go as soon as the bread hits the needed rising mark (see next step).
- Let the bread batter rise for 20 to 25 minutes (if your kitchen is cold, it may take longer). It happens quickly, so stay close by.The bread is ready to bake as soon as the batter is a short distance away from the the top edge of the pan (the batter should be no closer than 1/4 inch away from the top). If the batter is all the way to the top, it could overflow the top of the pan once it hits the oven.
- Bake the bread in the preheated oven for 45 to 50 minutes until deep golden brown. The loaf will be relatively flat on top.
- Let the loaf cool, in the pan, on a cooling rack for 15 minutes.Remove the bread from the pan. Cool the loaf completely on a wire rack, or other cooling rack.
- Slice the bread, thick or (relatively) thin, as desired. The bread is wonderful plain, toasted, as part of a sandwich, or any way that you prefer!
Notes
- Regular yeast was used instead of instant yeast. This recipe will not work with regular yeast. You must use instant yeast.
- Sugar was reduced or eliminated. The sugar was left out, reduced, or replaced with artificial sugar. The sugar is essential for “feeding” the yeast (to produce gas bubbles).
- Oven temperature is off. I regularly check my oven temperature setting using an inexpensive oven thermometer. Check to make sure the oven is accurate before baking. If the oven is too hot, it can force a faster rise to the bread, leading to a bubble under the top of the loaf.


Fabulous . Perfect. Delicious. Made it this morning. It will be gone by tomorrow.
Helena, you made my day 😊 so glad you like the bread!
This turned out surprisingly good. I did use psyllium powder and pinto beans and I’m really surprised at how good it tastes! It was a bit salty, but that may be my fault.
Great, Claudia so glad you like the bread! Thanks for sharing that it was successful with psyllium powder and pinto beans, that will come in handy for other readers 🙂
This is a fantastic bread! I did the overnight soak method and made the bread yesterday evening. We couldn’t wait to try it with breakfast this morning. I toasted it and it has excellent structure. Enjoyed the toast with our mung bean scramble! Delicious! Will definitely make this again. Thank you for sharing this recipe.
Oh wow, I am so glad it was such a success, Jennifer, whoohoo! I love this bread but was somewhat anxious that the name I gave it (bean millet protein bread) was not exactly tantalizing 🤭 So I am doing an extra happy happy-dance that your household is enjoying it!
I have made bean bagels which were amazing. I would love to try this. Turns out I am intolerant of white beans. Do you think this will work with other beans? I realize the color of the bread will be darker.
Hi Kathy,
Yes! I mention pinto beans, but you could use back beans or kidney beans, too (may be grayish and pinkish, but good! ) I wager you could use an equal weight of lentils, too. Cheers!
Nowhere in the body of this post does it say how long to soak the beans and millet using the boiling water method, rather than the overnight method (and I’ve read the whole thing three times). I’m looking forward to making this.
Hi Rene,
Fixed! I somehow deleted it when I was editing, thank you for catching my error!
A great bread. As someone who craves carbs, I think this bread will be good for me. One slice is very satisfying and filling. I don’t want to immediately eat three slices. I found that mine rose enough in about 15 or 16 minutes. It may be my vitamix but I was not able to easily mix in the 1/4 cup of psylium husks so I opted for the spatula. Thanks for this great recipe!
Maureen
Maureen, I am beyond delighted that you gave the bread a try straight away, and love it. Thanks for sharing your tip about mixing in the psyllium by spatula, the mix does get very thick.
Sounds like a great recipe, do you know of a substitution for psyllium and I cannot have oats but I can do quinoa.
Hi Diane,
I have note tested it, but I am fairly confident that you could sub about 1/3 cup flaxseed meal or ground chia seeds with success. Cheers.
Yummy
Thanks, Jeanette–it is worth every bite! 🙂