
This post may contain affiliate links. Please read my disclosure and privacy policy.
This post may contain affiliate links. Please read my disclosure and privacy policy.
Looking for a tasty and nutritious snack? Try this easy recipe for homemade millet crackers that are gluten-free, oil-free and vegan. The crackers are crisp, tender, & made with 2 ingredients–perfect for snacking!

Table of Contents
- Millet Crackers Recipe: Easy, Gluten Free, Vegan, Oil -Free
- Recipe Benefits
- Ingredients
- Step by Step Instructions
- Step One: Preheat Oven & Prep Baking Sheet
- Step Two: Make the Dough
- Step Three: Portion the Dough
- Step Four: Place Dough on Baking Sheet
- Step Five: Flatten the Dough Portions
- Step Six: Bake the Crackers
- Step Six: Cool the Crackers
- Taste & Texture
- Storage
- Variations
- Millet Flour Alternatives
- Related Recipes
- Millet Crackers (Oil-Free, V, GF) Recipe
Millet Crackers Recipe: Easy, Gluten Free, Vegan, Oil -Free
When reader Natalia wrote to ask if my No-Roll Oat Crackers could be made with other grains, I was intrigued. What a great question! Oats are so versatile, but I love the idea of experimenting with other grains, too. Mild, gluten-free millet, in particular, seemed like a promising candidate. So, I set off on a kitchen adventure to find out.
Alas, despite my enthusiasm (and three earnest attempts), millet just did not behave the same way as oats. The crackers turned dark brown and never reached anything close to the perfect crispness that makes the oat version such a winner.
Still, the attempts were not a loss—I realized I had another recipe that might serve as an experimenting template: my No Roll Almond Flour Crackers. With some trial and error, I soon had a delicious no-roll millet crackers recipe after all.
Sometimes a recipe flop is really just the beginning of another delicious discovery! I hope you enjoy these simple and versatile millet crackers.

Recipe Benefits
- Quick & easy to make
- Made in 1 bowl
- Only 2 ingredients required (plus some tap water)
- No-roll (no rolling pin needed)
- No mixer, no food processor, no blender needed
- Vegan (egg-free & dairy-free)
- Gluten-free
- Oil-free (i.e., no olive oil, avocado oil, or vegan butter)
Ingredients
The exact amounts of each ingredient are indicated in the recipe card at the end of the post. Toggle between US Customary (volume) and Metric (weights) for preferred measurement option.
To make the crackers, you will need the following:
- Millet flour
- Cashew butter (or ANY smooth nut butter or seed butter; see notes for suggestions)
You will also need two tablespoons of water to combine the ingredients into a dough. I recommend adding about 1/8 teaspoon salt (I love using sea salt), as well, but it is entirely optional/adjustable according to your preferences.
Measure Flour with Care
For the best cracker results, take care measuring the ingredients. In particular, the millet flour. If using tablespoons, very lightly spoon the flour into the tablespoon measure. Use a straight edge (e.g., a knife) to level off each measured spoonful.
Alternatively, weigh the flour with a digital kitchen scale instead of using a measuring cup or tablespoon. The scale ensures that the correct amount goes into the recipe, every single time. Sixty grams of millet flour (the amount used in this recipe) is the equivalent of six tablespoons of millet flour.
Step by Step Instructions
Note that the complete directions are also in the recipe card below.
Step One: Preheat Oven & Prep Baking Sheet
Preheat the oven to 325F (160C). These crackers need low heat to avoid scorching. Line a large baking sheet with parchment paper.
Step Two: Make the Dough
In a medium bowl, combine all of the ingredients: millet flour, cashew butter, the two tablespoons of water and (optional) salt.

Step Three: Portion the Dough
Using a 1/2 teaspoon measuring spoon, portion the dough. Level off the tops (I use my finger to remove excess) for even portioning. Use your finger to scoop out the 1/2 teaspoons of dough. You should end up with 32 portions.
You can place the dough portions directly onto the prepared baking sheet, or onto a piece of wax paper or parchment paper, as you go.

Step Four: Place Dough on Baking Sheet
As mentioned above, this does not need to be a separate step. You can place the dough portions directly on the prepared baking sheet as you shape them. The dough pieces should be mostly round, but they do not need to be perfect. If you like, roll each portion into a ball for greater uniformity.
Place the rounded dough portions on the prepared baking sheet, spacing about 2 inches (5 cm) apart.

Step Five: Flatten the Dough Portions
Place a small piece of wax paper, plastic wrap or parchment paper on top of a dough portion. This is important to keep the dough from sticking, so do not skip this.
Using a flat-bottomed measuring cup (or glass, or any other flat-bottomed object in the kitchen), press down on the dough. Flatten until it is roughly 1 and 1/2 inches (3.75 cm) in diameter. These do not need to be perfect, just flat.
Remove the piece of paper/plastic and continue until all of the dough portions are flattened.

Tip: Do Not Press Too Thin
Although you need not fuss about the shape of the crackers, do not press them too thin (i.e., do not press much larger than 1.5 inches for this amount of dough). If you flatten the dough too thin, simply nudge in the edges, and then press with your fingertips to even things out.
Step Six: Bake the Crackers
Bake the crackers in the preheated oven for 9 to 12 minutes until light golden brown. Eleven minutes is just right for me, but begin checking at 9 minutes to avoid over-baking. If your oven runs hot, 9 minutes might be enough.

Step Six: Cool the Crackers
Leave the crackers on the baking sheet for 1 minute before transferring to a cooling rack to cool completely. Crackers, done!

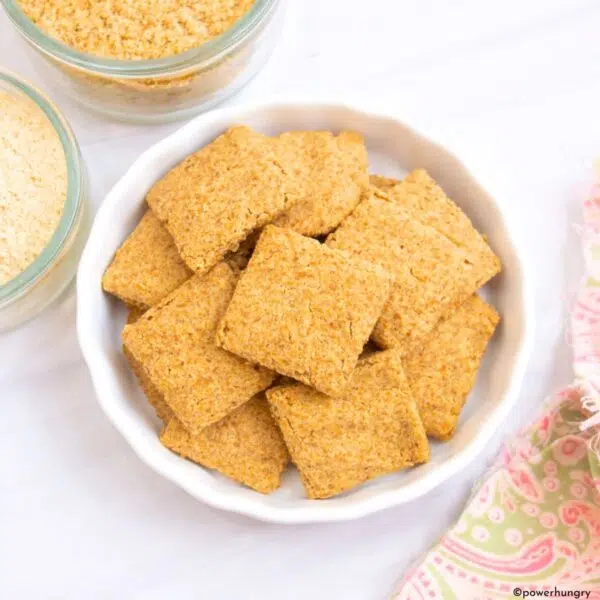
Taste & Texture
Millet crackers have a light, toasty flavor with a faint hint of dried corn that makes them wonderfully snackable. The taste shifts slightly depending on which nut or seed butter you use—cashew, almond, or peanut butter each lend a subtle sweetness that beautifully balances millet’s occasional touch of bitterness.
The texture of the crackers is crisp, with a delicate crunch. These aren’t the hearty, heavy-duty crackers meant for dunking into hummus or other thick dips. Instead, they shine as graceful nibblers—perfect eaten solo, topped with vegan cheese, or spread with your favorite savory or sweet toppings.

Storage
Store the cooled millet crackers in an airtight container at cool room temperature for 5 days, the refrigerator for 2 weeks or the freezer for up to 6 months. They stay crisp!
Variations
- Flavor the Crackers
- Add flavorings to the dough. Add your favorite herbs or spices directly to the dough (about 1/2 to 1 teaspoon for most herbs and spices, for this quantity of dough).
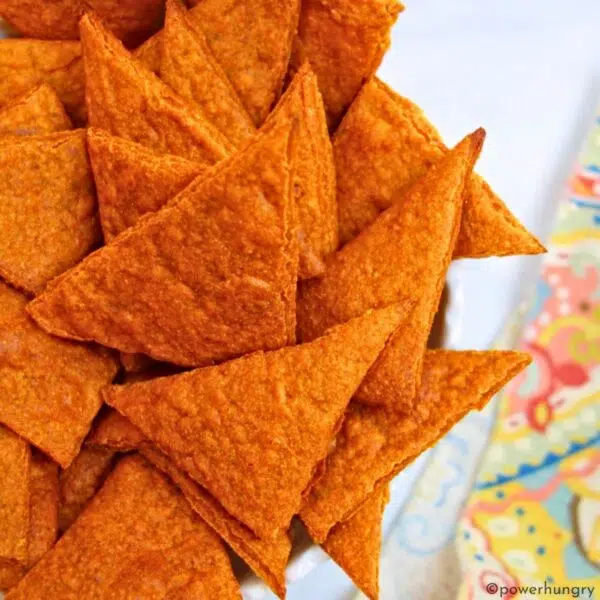
- Press toppings onto dough. on top of the pressed dough circles, as I have done with the everything bagel seasoning and cracked black pepper crackers, below.
- Use Your Prefered Nut Butter or Seed Butter: You can use an equal amount of just about any other smooth nut butter or seed butter in place of the cashew butter. For example, almond butter, peanut butter, sunflower seed butter, or pumpkin seed butter.
- Tahini Note: I made these with tahini and found that the slight bitterness of tahini + the slight bitterness of millet = a slightly bitter cracker. Not in a bad way (I like bitter foods!), but I wanted you to know ahead of time. You can easily overcome this with added herbs or spices.
- Make Larger Crackers. The primary recipe makes crackers with 1/2 teaspoon dough, which are then flattened and baked into 1 and 1/2 inch wide crackers. But you can go as big a tablespoon of dough (or more; I stopped at 1 tablespoon).
- Keep thickness the same. No matter which size you choose, the thickness should remain the same. Below is a guide for how wide to press the dough portion, depending on the amount of dough used. The baking time remains the same, regardless of the cracker size.

Millet Flour Alternatives
I have only tested this recipe using millet flour, so I cannot recommend any direct substitutes. Based on my baking with other gluten-free flours, the best candidates for experimenting, measure for measure (by weight), are:
- sorghum flour
- teff flour
- quinoa flour
- amaranth flour
Happy baking, friends!
Related Recipes

Millet Crackers (Oil-Free, V, GF)
Equipment
Ingredients
- 6 tablespoons millet flour
- 3 tablespoons cashew butter, (or any smooth nut butter or seed butter, see notes)
- 2 tablespoons water
- Optional: 1/8 teaspoon salt
Instructions
- Preheat the oven to 325F (160C). Line a large baking sheet with parchment paper.
- In a small bowl, stir together the millet flour, cashew butter, water and optional salt until completely blended into a dough.
- Using a measuring spoon, portion level 1/2 teaspoons of dough (you should have 32 blobs). Place onto the prepared baking sheet, 2 (5 cm) inches apart, rounded sides up (or, roll the dough portions into balls).
- Place a small piece of wax paper, plastic wrap or parchment paper on top of a dough blob (prevents dough from sticking, so do not skip this). Flatten the dough using a flat-bottomed measuring cup until the dough blob is roughly 1 and 1/2 inches (3.75 cm) in diameter.
- Remove the piece of paper/plastic and continue until all of the dough pieces are flattened.
- Bake in the preheated oven for 9 to 12 minutes until light golden brown (start checking at 9 minutes)
- Leave the crackers on the baking sheet for 1 minute before transferring to a cooling rack to cool completely.


Great crackers! I love your millet sandwich bread but this was a delicious and easy way to enjoy some crunch.
Glad you enjoyed the crunch, Sela! 😊
I love your millet bread! It’s especially good toasted. I’m certain to enjoy these crackers, too. Millet really has an interesting taste, one which I enjoy. These crackers look so good that I can’t wait to try them! Thank you for all the lovely recipes. They’re wonderful and very helpful for my dietary needs.
I’m so glad you are enjoying the millet bread, Sandy! I agree, millet has a satisfying flavor, I enjoy it, too. I hope you like the crackers!