
This post may contain affiliate links. Please read my disclosure and privacy policy.
This post may contain affiliate links. Please read my disclosure and privacy policy.
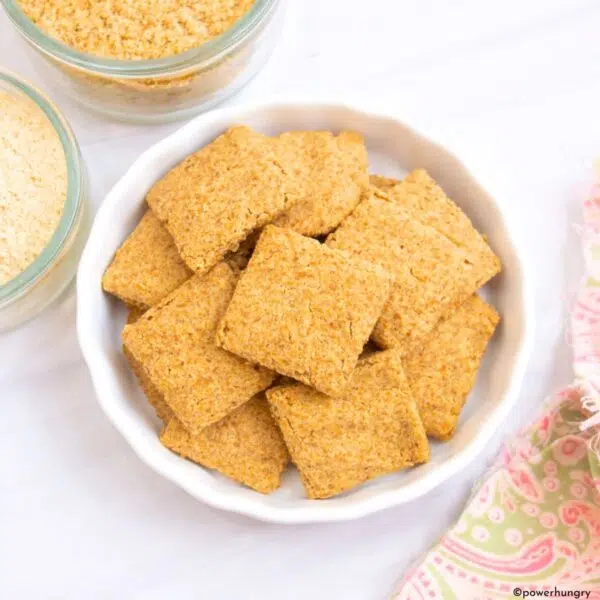
Your new favorite nibble: 2-Ingredient Baked Split Pea Nuts! Made from humble split peas, they are nut-free, vegan, high in protein, gluten-free, grain-free, frugal, and fabulous.

‘Tis the season to enjoy all kinds of snacks and nibbles, and I have a great one to share: baked crispy “nuts” made from split peas!
I’m a nibbler. Always have been, always will be. I need my between meal snacks, both for energy and the pleasure of eating multiple foods throughout the day. Anyone else with me on this one? 🙂
My nibbles of choice these days are typically fresh, simple, minimalist options, but darn it if I don’t crave something salty and crunchy on a given afternoon (or evening, or mid-morning). That, along with my minor hoard of bagged split peas, spurred the development of this simple recipe for nut-free split pea-nuts!

So here’s the truth: I’ve attempted crispy split peas in the past. Not here on power hungry. but ages ago, from a recipe in Martha Stewart Living magazine. They were dreadful. They were, however, a fine test for molar strength.
I recalled the recipe (it was deeply suppressed) while wondering about new things to do with my dried split peas. Yes, the recipe was a stinker. But, perhaps that was it: the recipe may have been awful, but the concept for a salty, crispy, split pea snack, was sound. Possibly super, if I could figure it out.
Many batches later, I did! I knew I had to share with all of you, ASAP.
Table of Contents
- The Many Benefits of Split Pea-Nuts (aka Crispy Split Peas)
- How to Make Baked Split Pea-Nuts (the Delicious Way)
- Step 1: Par-Boil the Split Peas
- Step 2: Dry, Dry Dry the Peas
- Step 3: Toss & Spread
- Step 4: Bake the Peas in a Moderate Oven
- Step 5: Cool the Peas
- What is the Texture of the Baked Split Pea-Nuts?
- Will Green Split Peas Work in the Recipe?
- Related Posts:
- Baked Split Pea Nuts (Nut-free, High Protein) Recipe
The Many Benefits of Split Pea-Nuts (aka Crispy Split Peas)
It’s great to satisfy a craving for a crispy, crunchy snack, but these split peas offer so much more. They are:
- 100% Nut-free
- Vegan
- A good source of protein
- Very high in fiber
- Rich in B vitamins and minerals
- Grain-Free
- Gluten-free
- Super-frugal (well under $1 per batch)
- Made with only 2 ingredients (plus salt)
How to Make Baked Split Pea-Nuts (the Delicious Way)
Here’s how to make crispy spit peas that are actually crispy & delicious.
Step 1: Par-Boil the Split Peas
The original recipe for crispy split peas, as well as a few variations I found online, call for soaking the split peas. I found that soaking, even for many hours, is not enough to make the peas tender enough to eat (eating is always my ultimate aim with any given recipe).
Boiling is the solution.

Par-boiling the peas (boiling them part way) plumps and softens the peas in one fell swoop. It is far faster than hours of soaking, too (bonus!).
To par-boil the peas, add 3/4 cup dried split peas (I give the peas a rinse beforehand, to rinse off any debris) to a pot of boiling water. Reduce the heat slightly (to prevent boiling over), and cook for 20 minutes.
Twenty minutes is the sweet spot, yielding peas with a toothsome, yet tender, texture that is still nowhere near falling apart. If you try to bite though one of the peas (do not swallow; the peas are not fully cooked), it should give way easily, much like the texture of a peanut.
Drain and rinse the peas under cold water., shaking off as much water as possible.
Step 2: Dry, Dry Dry the Peas
Tenderness, done. On to crispiness!
Critical to crispy split peas is drying them as much as possible before baking. I mean it, dry, dry, and dry again. Blot like you mean it.
I do a double dry. After shaking off as much water as possible after draining and rinsing, plop the peas in a clean, dry dishcloth. Enclose the peas and gently press as much moisture off as possible. Next, place the nearly dry peas in a second clean dry dishcloth (or paper towels) for a final blotting.

Step 3: Toss & Spread
Once the peas are dry, transfer them to a mixing bowl. Add a tablespoon of oil (I used olive oil; use any variety you prefer) and 1/4 teaspoon salt (adjust to your liking). Toss until completley coated.
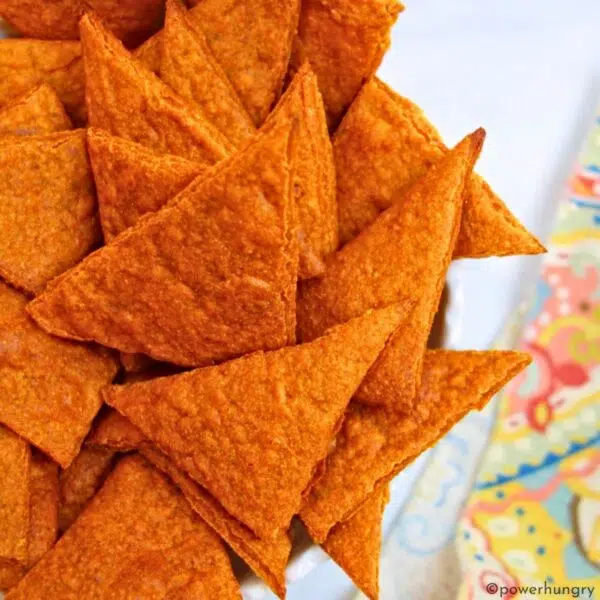
If you’re feeling spicy, go for it, and add your favorite now (before baking). I have a list of suggestions at the bottom of the recipe. Smoked paprika is my hands down favorite, but good old garlic powder is a close second.
Spread the split peas in an even layer on a large, rimmed baking sheet that has been lined with parchment paper.

Step 4: Bake the Peas in a Moderate Oven
Baking the split peas is another departure I made from the recipe I used years ago. That recipe called for frying the peas in oil on the stovetop. I found the results both greasy and hard. No thanks.
I chose my comfort zone, baking, instead. 400 and 375 degrees burned the peas and made them too hard before drying them. A moderate oven–preheated to 350F–is perfect, drying out and oven-frying the peas with a small amount of oil
Bake the peas for 23 to 28 minutes, opening the oven and stirring once or twice. Twenty-five minutes is perfect for my oven, but begin checking at 23 minutes (in case your oven runs hotter than mine).
The peas are done when they are golden brown and appear dry & crispy. A few peas will become more dark at the outer edges.
I
Step 5: Cool the Peas
Immediately transfer the peas to a a medium bowl and cool completely.
That’s all there is to it! Commence nibbling!

What is the Texture of the Baked Split Pea-Nuts?
Once cooled, the split pea-nuts have a texture similar to peanuts: crisp, but not too hard (eating them should not be cardio for your jaw).
I find that the peas achieve the best texture after being stored in an airtight container. So if you think the peas are a bit hard immediately after cooling, seal them in a jar and come back the next day for some snacking.
Will Green Split Peas Work in the Recipe?
Yes, you can definitely use green split peas! They are every bit as tasty & crispy as yellow split peas.

A mix of yellow and green split peas is especially beautiful and festive.
I hope you enjoy this recipe as much as I do :). Happy baking!
Related Posts:
- 1-Ingredient Split Pea Tortillas {Vegan, Grain-Free}
- Swedish Split Pea Falafel {Grain-free, Vegan, Baked
- Split Pea & Green Pea Soup {4 ingredients, Vegan, High Protein}
- Swedish Yellow Split Pea Soup {Vegan}
- Baked Split Pea Meatballs {vegan, gluten-free, high protein}
- Skinny Green Pea Hummus {oil-free, tahini-free, 5 ingredients
- Grain-Free Lentil Loaf {Vegan, High Protein}

Baked Split Pea Nuts (Nut-free, High Protein)
Ingredients
- 3/4 cup 153 g dried split peas, rinsed and drained (to remove any debris)
- 1 tablespoon 15 mL olive oil (or oil of your choice)
- 1/4 teaspoon fine sea salt
Instructions
- Preheat the oven to 350F (175C). Line a large baking sheet with parchment paper.
- Bring a medium saucepan, filled at least halfway with water, to a boil over high heat. Add the split peas, reduce heat slightly (to prevent boiling over) and boil for 20 minutes. The peas should be just tender enough to bite through.
- Drain the peas and rinse under cold water until cool. Place the peas in a clean dish cloth to towl off as much water as possible. Transfer to another dry dish towel or paper towels to dry fruther (get the peas as dry as possible).
- Place the peas in a medium mixing bowl; toss with the oil and salt (& any optional spices) until coated. Spread in an even. single layer on the prepared baking sheet.
- Bake in the preheated oven for 23 to 28 minutes–opening the oven and stirring once or twice– until dried, golden brown, and crispy-looking (a few peas, at the edges, will be turning a darker brown). Remove from oven and immediately transfer peas to a medium bowl. Cool completely.
Notes
- Black pepper
- Chile powder (regular, chipotle, ancho)
- Cumin
- Smoked paprika (hot or sweet)
- Garlic powder
- Onion powder
- Curry powder
- Garam masala
- Ras el hanout


Tried soaking the peas overnight and then air frying. Peas were absolutely too hard to enjoy. Thanks for the suggestion to boil instead. They were rather soft initially, but they achieved the perfect amount of crunch. The test batch made in the cast iron pan on the stove was a little better than the large batch made in the oven. Either way, this is a great recipe.
Great Trina, I am so glad you like the recipe!
These were great! Only – I tried mixing in some red lentils. Unfortunately, those soften up quite a bit before the split peas. Second try, I added salt, garlic powder and smoked paprika. Taste was wonderful, had a great texture, and I portioned them into three small containers to enjoy later. Otherwise, I would have chomped them all down in one sitting.
I am so glad that you enjoyed these, Kristy! I get carried away with my nibbling/testing–I think I ate half a batch of the ones in the photograph in one sitting 🙂
Could I use green split peas for this recipe?
Yes, definitely, Debra!