
This post may contain affiliate links. Please read my disclosure and privacy policy.
This post may contain affiliate links. Please read my disclosure and privacy policy.
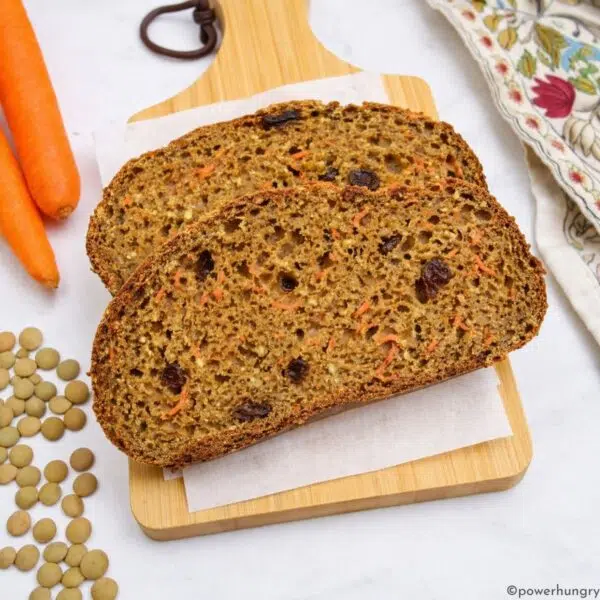
Four ingredients (plus water & optional salt) is all that you need to make my amazing flourless brown rice yeast bread! It is psyllium-free, gluten-free, oil-free, cheap, easy, and all around wonderful. Soak the rice for 30 minutes, blend the batter, and you have sandwich bread in no time!

Table of Contents
- Gluten-Free Bread Recipe made with Uncooked Brown Rice
- Brown Rice Works (with One Essential Tweak)
- Additional Rules Overturned
- Recipe Benefits
- Ingredients for Brown Rice Bread
- Step by Step Directions
- Step One: Fast-Soak the Brown Rice
- Step Two: Prepare the Baking Pan
- Step Three: Rinse and Drain the Rice
- Step Four: Blend the Batter (Without the Yeast and Baking Powder)
- Step Four: Add the Yeast and Baking Powder
- Step Five: Pour Batter Into Pan and Preheat Oven
- Step Six: Let Bread Batter Rise (Watch Closely!)
- Step Seven: Bake the Bread
- Step Eight: Cool the Bread
- Slice the Bread
- What is the Texture & Taste?
- Flavor Variations
- FAQ
- Tips for Success
- Related Recipes
- Flourless Brown Rice Yeast Bread (GF, Oil-Free, No Psyllium) Recipe
Gluten-Free Bread Recipe made with Uncooked Brown Rice
A lovely reader left a comment for me a few weeks ago, asking if I had heard about the gluten-free rice bread recipe that was popular on platforms such as YouTube and TikTok. I had not, so I immediately went to take a look.
Sure enough, it is a thing! I watched multiple recipes for turning uncooked white rice into impressive, squared-off loaves of sandwich bread, with the minimal additions of sugar, oil, and yeast (plus water, and salt as desired). However, the scale of the loaves, and exact proportions, were often vague, as were the sizes of the baking pans.
Many of the recipes made exacting assertions (without explanation; it annoyed me), including the following:
- White rice is the only rice option (some authors insisted it had to be Calrose rice, sushi rice, or other short-grain white rice, in particular)
- The rice must be soaked overnight
- A high-speed blender is essential for blending the batter (no regular blenders allowed)
- The bread can only be baked in a narrow baking pan (although exact dimensions were not provided)
- The sweetener must be granulated white sugar for the recipe to “work”
- Oil is critical for the success of the recipe
Really? I was not going to take anyone else’s word for what could or could not be done. I needed to know firsthand. Moreover, if I was going to share a recipe for the bread, I wanted it to be my own creation.
That is exactly what I have done. I put the bread mandates to the test, made many batches, my way (including multiple fails), and finally figured out my own version of this wonder bread. I am finally ready to share the results!

Brown Rice Works (with One Essential Tweak)
To make a long story short, the rice does not have to be white rice. Brown rice works! Further, it does not need to be a specific type of brown rice. I tested with short grain, long grain and medium grain. They all produced great bread.
A caveat: brown rice works so long as you add one additional ingredient.
When made with yeast alone, the center of the bread does not rise. The sides rise, but the gas bubbles from the yeast fermentation are not strong enough to support the center of the bread.

I knew I could likely add some psyllium gel (from whole husks or powder), but I specifically wanted this recipe to be free of psyllium for those who cannot tolerate it. I also wanted to keep the recipe cheap and easy, with readily available ingredients. What else could I add?
Baking powder is the answer. I have several old-fashioned bread and biscuit recipes that use a combination of yeast and baking powder, and/or baking soda (angel biscuits are a classic example, a staple in the American South).

I tried it (several times, to get the proportions just right), and it worked like a charm! The combination of CO2 bubbles from the baking powder, plus the fermentation bubbles from the yeast, works to lift and support the center of the loaf. Hooray!

Additional Rules Overturned
Those “rules” I mentioned earlier (e.g., the bread can only be made this way or that way…”) ? I tested all of them. As I result, I was also able to:
- Cut the rice-soaking time down to 30 minutes (with a simple trick)
- Create a 9×5 inch (22.5×12.5 cm) full size sandwich loaf
- Eliminate the oil (if you want to add some, you can. Notes are in the recipe card)
- Use (almost) any sugar (I used coconut sugar; maple syrup, molasses, or any sugar (except artificial) will work to “feed” the yeast)
- A regular blender can be used (with some minor guidelines)
Are you excited to try this? I hope so, because this is such a fun, easy and delicious bread to make and eat!
Recipe Benefits
The hearty, vegan bread recipe is all of the following, and more:
- No psyllium husks
- Frugal (cheap!)
- Flourless (no white rice flour or brown rice flour)
- No added starches (such as cornstarch, tapioca starch, arrowroot, or potato starch)
- Gluten-free
- Vegan (egg-free & dairy-free}
- Oil-free (no vegetable oil, butter, olive oil, safflower oil, or other added fats)
- No xanthan gum, no guar gum
- Oil-free
- Good source of fiber
- Minimal ingredients
- Easy
I have the nutritional information included at the bottom of the recipe card, below.
Ingredients for Brown Rice Bread
The exact amounts of each ingredient are indicated in the recipe card at the end of the post. Toggle between US Customary (volume) and Metric (weights) for preferred measurement option.

Good news: this excellent gluten-free loaf of bread requires no more than four ingredients.
- Uncooked (raw) brown rice (i tested with medium grain brown rice and long grain brown rice)
- Coconut sugar (other options, such as brown sugar or maple syrup can also be used. Options are included in the recipe card, below)
- Instant yeast (it may also be labeled rapid rising yeast, or quick yeast) (Note: do not use Red Star brand platinum yeast. It is not gluten-free).
- Baking powder (yes, yeast AND baking powder. I will explain why below)
You will also need water (for soaking and blending the rice in a batter. Use regular tap water, or filtered water). Salt is optional, according to your needs and preferences. I like to add one teaspoon of salt to the batter.
It is essential that instant yeast, not regular active dry yeast, is used in the recipe.
Make sure you are using baking powder, not baking soda (sodium bicarbonate). Baking powder is a combination of baking soda plus an acidic ingredient (cream of tartar). Baking soda is used in much smaller quantities than baking powder.
Step by Step Directions
Note that the complete directions are also in the recipe card below.
Step One: Fast-Soak the Brown Rice
Place the uncooked brown rice in a large mixing bowl. Add boiling water to the bowl (enough to cover the rice by about 1 inch / 2.5 cm).
Allow the rice to soak for thirty minutes. The rice can soak for longer (for example, if another matter becomes pressing! Or, you get distracted (who, me?) :)).
Note: You are welcome to soak the rice in a more traditional manner. Place the brown rice in the bowl, as described above, but cover with room temperature water. Allow the rice to soak for anywhere from six to twenty four hours.

Step Two: Prepare the Baking Pan
Prepare a 9×5-inch (22.5×12.5 cm) loaf pan. If using a nonstick loaf pan (e.g., silicone), no preparation is needed. Otherwise, line the pan with nonstick parchment paper. If you do not object to oil, spray the pan with nonstick cooking spray, or lightly oil/grease the pan.
Step Three: Rinse and Drain the Rice
Drain the soaked rice through a colander or mesh sieve and rinse under cold water. Gently shake off the excess water.

Step Four: Blend the Batter (Without the Yeast and Baking Powder)
Scrape the soaked, drained rice into a high-speed blender container. Add the room temperature water, coconut sugar, and optional salt. Blend on high speed for 90 to 120 seconds until the batter is silky smooth and very warm (it is very important that the batter be very warm to activate the instant yeast).
Regular Blender Instructions: Use warm water instead of room temperature water. Blend at 30 second intervals (to avoid overheating the blender motor) until the batter is completely smooth and silky, and the batter is very warm.

Step Four: Add the Yeast and Baking Powder
Add the instant yeast and baking powder to the blender container. Blend for 15 to 20 seconds until combined.
Step Five: Pour Batter Into Pan and Preheat Oven

Pour the bread batter into the prepared pan. Place the pan in a draft-free warm place. Immediately preheat the oven to 350F (180C). Do not hesitate!
The bread rises very quickly. The oven needs to be hot and ready to go as soon as the bread hits the needed rising mark (see next step).
Step Six: Let Bread Batter Rise (Watch Closely!)
Let the bread batter rise for 20 to 25 minutes. It happens quickly, so stay close by. I mean it.

The bread is ready to bake as soon as the batter is a short distance away from the the top edge of the pan (the batter should be no closer than 1/4 inch away from the top). If the batter is all the way to the top, it will overflow the top of the pan (not good for so many reasons) once it hits the heat of the oven.
I suggest doing a task or chore directly in front of the bread.
The timing for the rise will depend, in part, on the warmth and humidity in your kitchen.
Step Seven: Bake the Bread

Bake the bread in the preheated oven for 45 to 50 minutes until crusty in appearance and deep golden brown at the edges. The loaf will be flat on top (no peaks in the center) and somewhat pale towards the middle (even when it is completely baked).
Step Eight: Cool the Bread
Let the loaf cool, in the pan, on a cooling rack for 15 minutes.
Remove the bread from the pan and cool the loaf completely on a wire rack, or other cooling rack.

Slice the Bread
This is a sturdy bread, with minimal crumbs. You can slice it thick or (relatively) thin, as you desire.

What is the Texture & Taste?
This is a firm, crusty bread. It may seem dry as you slice it, but it has a pleasing, rustic texture and warm, yeast bread.
Use this bread to make sandwiches (open face, or two slice sandwiches) with a variety of sweet or savory fillings. It is perfect for avocado toast, or top your toast with nut butter or seed butter, hummus, vegan cream cheese, or fruit preserves.

The bread is a great accompaniment to dinners and lunches, too. It is wonderful with soups, stews and salads.
Flavor Variations
Consider adding any of the following options to the bread:
- Dried herbs or fresh chopped herbs (add fresh herbs to the batter after blending, to avid green bread)
- Dried ground spices, such as ground cumin, curry powder, garlic powder, or onion power.
- Sweet spices (such as cinnamon, cardamom, or ginger)
FAQ
- How should I store the flourless brown rice yeast bread? Store the cooled bread in an airtight container at cool room temperature for one day, the refrigerator for one week, or the freezer for up to six months.
- Can I use brown rice flour (instead of soaking whole grain rice)? I do not have directions for using brown rice flour in place of whole rice. It may very likely be possible, but would require testing to adapt the proportions of the ingredients.
- Can I use white rice instead of brown rice? Yes. You are welcome to substitute any variety of white rice for the brown rice. Use the same weight of rice.
- Will this bread work with other uncooked grains? I have only tested this recipe with brown rice. I do not know if any other grains will work.
- My oven has a convection setting. Should I use it for this bread? I tested this bread in a conventional oven (radiant heat, not convection). So for best results, I recommend using radiant heat, if possible. If you are used to baking bread in a convection oven, you are welcome to experiment with baking the bread in a convection oven.
- Can I blend the batter in a food processor? No. A food processor cannot break down the rice into a completely smooth batter, which is necessary for the success of the bread.

- Can I use cooked/leftover rice to make the bread? No. The recipe will not work with cooked rice.

- Can I bake the bread in a toaster oven? No. Even if the bread pan can fit into a toasted oven, the bread batter will be too close to the heating element in a small oven (toaster oven) for the bread to bake evenly.
- Can I add oil or other fat to the flourless brown rice yeast bread? Yes! replace 1 to 4 tablespoons of the room temperature water with the oil or melted fat of your choice. It will make the bread somewhat softer.
Tips for Success
- My flourless brown rice yeast bread did not rise as expected. Why?
- The most likely reasons are the following:
- Regular yeast was used instead of instant yeast. This recipe will not work with regular yeast. You must use instant yeast.
- Batter was not very warm after blending. The batter needs to be very warm after blending to help activate the yeast.
- Sugar was reduced or eliminated. The sugar was left out, reduced, or replaced with artificial sugar. The sugar is essential for “feeding” the yeast (to produce gas bubbles).
- Oven temperature is off. I regularly check my oven temperature setting using an inexpensive oven thermometer. Check to make sure the oven is accurate before baking. If the oven is too hot, it can force a faster rise to the bread, leading to a bubble under the top of the loaf.
- The most likely reasons are the following:
- Can I make the bread without yeast? No, this is a yeast bread. The overwhelming majority of bread recipes on my site are for yeast-free bread (including ones that use rice flour, sorghum flour, chickpea flour, teff flour, and chickpea flour). Other options abound! Simply type bread into the search box.
- Can I make this flourless brown rice yeast bread in a bread machine? I have not tested this in a bread machine so I cannot recommend how to make bread machine adaptations to the recipe, or whether it will work.
- Can I leave out the sugar? No, sugar is needed to activate (and feed) the yeast. The bread will not rise much at all without it.
- Can I Use another Type of Sweetener in Place of Coconut Sugar? Yes! You can use an equal amount of maple syrup, agave nectar, molasses, or granulated sugar of your choice. Sugar substitutes will not work (for the same reason, above, that the sugar cannot be omitted from the recipe).
Happy baking!

Related Recipes

Flourless Brown Rice Yeast Bread (GF, Oil-Free, No Psyllium)
Ingredients
- 1 lb uncooked (raw) brown rice , (any variety)
- 2 tablespoons coconut sugar , (see notes for options)
- 2 1/4 teaspoons instant yeast, (it MUST be instant/ fast rising yeast)
- 2 teaspoons baking powder, (certified GF, as needed)
- 1 teaspoon salt, (optional/adjustable)
- 1 1/4 cups WARM water, (not cold)
Instructions
- Place the uncooked brown rice in a large mixing bowl. Add boiling water to the bowl (enough to cover the rice by about 1 inch / 2.5 cm).
- Allow the rice to soak for thirty minutes. (See notes for soaking overnight, instead of a fast soak).
- Prepare a 9×5-inch (22.5×12.5 cm) loaf pan. If using a nonstick loaf pan (e.g., silicone), no preparation is needed. Otherwise, line the pan with nonstick parchment paper. If you do not object to oil, spray the pan with nonstick cooking spray, or lightly oil/grease the pan.
- Drain the soaked rice through a colander or mesh sieve and rinse under cold water. Gently shake off the excess water.
- Scrape the soaked, drained rice into a high-speed blender container (see notes for using a regular blender). Add the 1 and 1/4 cups warm water, coconut sugar, and optional salt. Blend on high speed for 90 to 120 seconds until the batter is silky smooth and very warm (it is very important that the batter be very warm to activate the instant yeast).
- Add the instant yeast and baking powder to the blender container. Blend for 15 to 20 seconds until combined.
- Pour the bread batter into the prepared pan. Place the pan in a draft-free warm place. Immediately preheat the oven to 350F (180C). Do not hesitate (the bread rises very quickly. The oven needs to be hot and ready to go as soon as the bread hits the needed rising mark (see next step).
- Let the bread batter rise for 20 to 25 minutes. It happens quickly, so stay close by. The bread is ready to bake as soon as the batter is a short distance away from the the top edge of the pan (the batter should be no closer than 1/4 inch away from the top). (Note: If the batter is all the way to the top, it will overflow the top of the pan once it hits the heat of the oven).
- Bake the bread in the preheated oven for 45 to 50 minutes until crusty in appearance and deep golden brown at the edges. The loaf will be flat on top (no peaks in the center) and somewhat pale towards the middle (even when it is completely baked).
- Let the loaf cool, in the pan, on a cooling rack for 15 minutes.
- Remove the bread from the pan and cool the loaf completely on a wire rack, or other cooling rack.
- Slice the bread, thick or (relatively) thin, as desired. The bread is wonderful plain, toasted, as part of a sandwich, or any way that you prefer!
Notes
- Regular yeast was used instead of instant yeast. This recipe will not work with regular yeast. You must use instant yeast.
- Batter was not very warm after blending. The batter needs to be very warm after blending to help activate the yeast.
- Sugar was reduced or eliminated. The sugar was left out, reduced, or replaced with artificial sugar. The sugar is essential for “feeding” the yeast (to produce gas bubbles).
- Oven temperature is off. I regularly check my oven temperature setting using an inexpensive oven thermometer. Check to make sure the oven is accurate before baking. If the oven is too hot, it can force a faster rise to the bread, leading to a bubble under the top of the loaf.


I’ve just tried making this bread and was very puzzled when the recipe said to pour the batter into the bread pan. Mine was unbelievably thick so pouring it wasn’t an option. It was so thick I struggled to get it off the spoon when I was putting it into the loaf pan! It was almost like normal bread dough without the stretch. I used brown basmati rice and soaked it as per the recipe instructions. I measured everything out properly and even added a quarter cup more water because it was so thick when I was blending it in my Vitamix. It didn’t rise at all during the proofing period but I baked it anyway. It didn’t rise during the bake either, and was very dense and inedible. I followed the recipe to the letter. I would really like to try making this bread again but I honestly don’t know what went wrong so I’m sure the next one won’t be any different.
Hi Ali,
Thank you so much for trying the recipe—and I’m really sorry it didn’t turn out as expected. I know how frustrating that is.
This recipe produces a *loose batter*, not a thick dough. I’ve tested it many times, and the proportions as written consistently give that texture. Because of that, I’m wondering if perhaps a **2-pound package of raw brown rice** may have been used instead of a **1-pound package**—that’s the only explanation I can imagine given the results you describe.
With the correct amount of rice, you will definitely end up with a batter that will rise properly.
I really appreciate you giving it a try 💛
HI, with the concerns for arsenic in rice, there are directions to parboil rice to remove arsenic before cooking. See: “Scientists found that when rice is thoroughly rinsed and then cooked in an excessive amount of water using the PBA (parboiled and absorbed) method, it removes 54% and 73% of inorganic arsenic for brown and white rice respectively.? The method is teh bloil 4 to 6 cups water for every 1 cup of rice, add the rinsed soaked rice to the pan and boil for 5 minutes then remove and drain the rice and rinse again. This removes much of the arsenic. Question: Do you think or would you want to try and parboil the rice first, before putting in the blender? This could remove teh arsenic but I do nto know if the recipe would work with parboild rice? Help? I am trying to reduce arsenic on gluten free diet!
Hi Bj S,
I think parboiling will work fine here! Cheers 🙂
Hi, I didn’t get the even rise either????the middle of loaf totally sunken..,sides are good. I used white rice, and everything was fresh…I did add oil to provide some moisture as suggested.Im thinking to try a 3/4 size batch in case it was too much batter to cook evenly.
Hi K,
Oh no, sorry to hear that happened. I am assuming you added the baking powder, yes? Was it the traditional variety of baking powder (double acting)? I’m trying to trouble shoot. Also, was the risen batter the same height as shown in the photo and description? If it rises too high before hitting the oven, it could over-prove and later sink.
Hello camila,
I have tried out the recipe twice now following the intructions to the tee but cant seem to get the batter to rise. Even used the variation suggested by K but still no luck.
Hi Leah,
Oh no, I am sorry to hear that. Are you certain that you are using instant yeast (it can also be labeled fast acting/quick yeast)? The recipe will not work with regular yeast. Second, is your batter very warm after blending? This is also essential. If your answer is yes to both of these, then the most likely answer is that your yeast is no longer alive/active. You can test whether your yeast is active to make sure (you can google how to test your yeast to see if it is active). Cheers.
Fascinating recipe. Used red rice. I didn’t have instant yeast, only active dry, but managed to still do it this way: After soaking and rinsing the rice, blend it with only 1 cup hot water. Save the extra 1/4 cup of warm water and combine it with the active dry yeast and your sugar. Wait until yeast is proofed and very bubbly (15 mins?), then add it to the blended rice, add the salt and baking powder, and blend until smooth, foamy and warm (30-ish seconds). Have your bread pan ready because this way it rises insanely fast – less than 5 minutes and it’s ready for the oven. Has a rich, chewy, bready-yeasty flavor, almost like a very ripe sourdough, excellent toasted. I did find the texture a tad gummy, and will bake longer than recommended next time (maybe dependent on type of rice). WILL be making again soon. Next time I will try pouring a portion of batter into a hot cast iron pan and baking it as a pizza base. I have high hopes. Brilliantly simple, adaptable recipe.
Thanks for sharing the red rice notes, Sarah; I have some in the freezer that I should use. And thanks so much for sharing how you modified the recipe for active dry yeast instead of instant. I know that will really help others who are in the same situation 🙂
How long can you store this bread on the counter? Are you supposed to just keep it refrigerated or Frozen? Thank you!
Hi Kati! Yes, you store the cooled bread in an airtight container at cool room temperature for one day. After that, it is best to refrigerate or freeeze the bread (or else it can dry out and become tough).
Hi Camilla,
Thanks for a great recipe! I tried 2 different kinds before finding yours and I’m so happy to have a fat free recipe now! The flavor is great. And the only recipe so far that actually rises! Wonderful ☺️
I do have a problem with slicing the bread(s). With all the different recipes. I can’t seem to get the consistency to be dry(?) enough to slice with a bread knife. I have to slice it with a steak knife that has the serration narrow. And still the bread tores apart and the knife get sticky with the bread. Have to clean it between every slice.
Any ideas? ???? I bake it as long as recommended, maybe just my oven needs much longer… ???? Or to start with a cold baking?
Thanks for your thoughts ????
Hi Emma,
I am so glad that you like the bread! Especially glad that it rose properly. It sounds like the bread needed to bake longer–it should not be sticky at all when you slice it, and should slice without tearing (that definitely makes me think it is not fully baked). I do not recommend cold baking (if you mean start with a cold oven and then heat it). But I do recommend buying an inexpensive oven thermometer to check your oven’s temperature accuracy.
Another thought: is your oven convection/fan? This bread will do best in a radiant heat (traditional) heat oven. If you are using fan, and can switch to radiant heat, I would do that.
Thanks Camilla for the tips. I definitely need to check the oven temp.
I’m already up to 1hr 15min with the baking and still it’s sticky.
I have a traditional oven so I think I’m good there ????
I’ll check back in when I get everything sorted out. Maybe somebody else has the same issues and can get tips to solve them. I’m baking the bread in loads now, my roommate loves it too ???? Always making two loaves, otherwise it runs out ????
let it rise covered with cloth or uncovered?
I have done it both ways, it rises quickly so in many ways it is better to keep it uncovered so you can keep track of when it is risen enough (the bread will not do well if you let it rise too long–it can overflow the pan–so best to keep a watchful eye).
HI, I keep trying to make this and it always sinks in the middle….I tried two other brown rice blender recipes one from powerhouse.com, and one from bamboo princess, and they do not say to use warm water, as it can over cook the yeast….. what am I doing wrong? thanks
Hi Bernadette,
Im so sorry you are having sinking issues with your bread. Did you try all three breads (mine, and the other two websites you mention) with the same results (sinking)? It is hard to know what went wrong from afar–did the bread look like the photos up until the point of baking?. Yeast breads (even traditional flour yeast breads) can sometimes sink for seemingly small reasons, such as (1) too much yeast was added (a little bit too much, when measuring, can actually lead to sinking); (2) the yeast was old ; (3) the oven was not fully preheated before baking began and uneven baking temp. Did the bread begin to sink AS it was baking, or did it sink after? The warm water is to help activate the fast-rising yeast. If it was too hot, the bread would not rise before baking, you would know that something was off.
Also, be sure to test that your baking powder is active/ fresh. This is the critical extra component to prevent sinking, so if it is not working, the bread will definitely sink.
I am beyond excited to try your recipe. Do you think that I could use brown rice that is sprouted or that has been previously boiled and dried in the oven? I’m trying to find ways to do this with less arsenic, as unaltered brown rice usually has quite a bit. Thanks so much for formulating this recipe!
Hi Kati! would the boiled rice be boiled briefly and then dried? Or fully cooked and then dried? I feel confident that it would work for the former, but not the latter. For the sprouting: I think that can definitely work (perhaps add a tablespoon or 2 less water to make up for any water absorbed in the soaking sprouting process. Unless you are using a dried sprouted brown rice, then there should be no adjustment needed at all. 🙂
@Camilla, thank you. I appreciate the input 🙂
@Kati 🙂
Hi Camilla,
THANK YOU SO MUCH for this recipe made without psyllium. It’s amazing. I make it with brown Calrose rice from Australia (the brand is Sunbrown). This bread is so good. Soft on the inside, crispy on the outside! Almost all gluten free recipes for bread have psyllium to which I’m allergic. So thank you again!
You are SO welcome, Jojo! More psyllium free options to come…xo
Hi! I’ve made this twice, as directed, and both times it rose well but then collapsed in the middle while in the oven, resulting in a big crater along the top of the loaf. I measured the yeast and baking powder by weight the first time and by volume the second, which didn’t make a difference, and my oven thermometer indicates the temperature is correct. The loaves look terrible and are rather dense but still very tasty. I don’t have an high speed blender but the batter was smooth and warm when I added the yeast. Any idea what I could try differently?
Hi Robin,
I am so sorry you got a big crater in the middle of your bread! My guess is that your baking power is inactive. The crater in the middle is what I experienced when I made the bread with just yeast, no baking powder. The baking powder corrects the crater. So if you are still getting the crater n the middle, then I would definitely try again with a new container of baking powder. Cheers!
You’re a food scientist star! Thank you so much for putting all those “rules” to the test and sharing an even more flexible recipe. Easy, delicious, and nutritious. It’s like eating a delicious serving of rice every time you eat bread. 😀 As a note, my oven is a convection oven, and I just put another pan on top of the bread pan to keep it covered, and remove the top pan in the last 10 minutes of cooking. It works! 🙂
Isabel! Thank you so much for the sweet comments 🙂 And thank you thank you (from me, and readers who have convection ovens) for sharing your tips for making the bread work in a convection oven–brilliant!
First thank you so much for sharing your recipe. I would love to try your recipe but I’m a little hesitate as you mentioned not all instant yeast are Gluten free. Many packages don’t seem to say if it is gluten free or not. As I have celiac decease, can you help suggest which instant yeast you used? Thank you!
Hi Clara! I hope you give the bread a try! The only instant yeast on the market that is not gluten-free is Red Star brand platinum yeast. It contains enzymes derived from wheat. I use SAF-instant yeast (I order it online). It is gluten-free, as is Fleischmanns instant yeast. You can always check a manufacturer’s website to double or triple check!
Just baked it and it is fantastic!!! I am coeliac and have eaten so much terrible expensive bread in my life. Your recipes have changed my life. Thank you for all that you do!
I am so happy that you like it, Frances!
OMG Camille, this is why we love you! You can’t resist a challenge and you don’t disappoint!
What an interesting, fun recipe…I can’t wait to try it! Thank you for all your effort!
June, you are too generous! Thanks for such a lovely compliment, this one was a fun one to test 🙂 My pleasure!
@Camilla, I could not wait to try this bread. I made it today and it is delicious…great taste and texture!
I used short grain rice and it made a beautiful loaf…I don’t know how you did it with so few simple ingredients!
Thank you for all your effort!
Wonderful, June! I’m thrilled you tried it and enjoyed it, too ????