
This post may contain affiliate links. Please read my disclosure and privacy policy.
This post may contain affiliate links. Please read my disclosure and privacy policy.
Easy 2 ingredient brown rice chips that are light, crispy and delicious! Made with cooked brown rice and flaxseed meal, these baked chips are oil-free, vegan, gluten-free, and can be flavored in multiple ways!

Table of Contents
- Make Chips from Leftover Brown Rice
- Recipe Benefits
- Ingredients
- Step by Step Instructions
- Step One: Preheat the Oven & Prep Baking Sheets
- Step Two: Blend the Batter
- Step Three: Spread the Batter
- Step Four: Bake the Chips
- Step Five: Cool Chips & Break into Pieces
- Taste & Texture of Easy 2 Ingredient Brown Rice Chips
- FAQ
- Can I Add Oil to the Chips?
- Can I Use A Different Grain (other than Brown Rice)?
- Related Recipes
- Easy 2 Ingredient Brown Rice Chips (oil-free, V, GF) Recipe
Make Chips from Leftover Brown Rice
Humility aside, these chips are a wee bit amazing.
I have contemplated making chips or crackers from cooked brown rice for awhile. What can I say, I hate to throw away perfectly good food.

I finally got around to consulting my semi-legible scratchings about the topic. I had no leftover brown rice on hand, so I cooked and cooled a mountainous new batch and set to work experimenting.
My first few attempts were grim. Results teetered between leathery and tooth-breaking. My husband and son looked on (and then away) in horror.
I kept at it, and finally, after making what I thought was a mistake (adding too much water), I came up with a stellar result. The chips are crispy-crunchy (and remain so for up to 2 weeks!), delicious, and super-easy to make, too. They even got the green light from husband and son.
Recipe Benefits
My easy 2 ingredient brown rice chips are:
- Made with 2 ingredients (plus water & optional salt)
- Baked, not fried
- Vegan (egg-free & dairy-free)
- Oil-free
- Gluten-free
- Sugar-free
- Mixed in the blender or food processor (in seconds)
- Frugal (make that super-duper cheap)
- Made without rolling (simply spread the batter)
- Customizable (add in, or top with, extra ingredients)
Ingredients
The exact amounts of each ingredient are indicated in the recipe card at the end of the post. Toggle between US Customary (volume) and Metric (weights) for preferred measurement option.
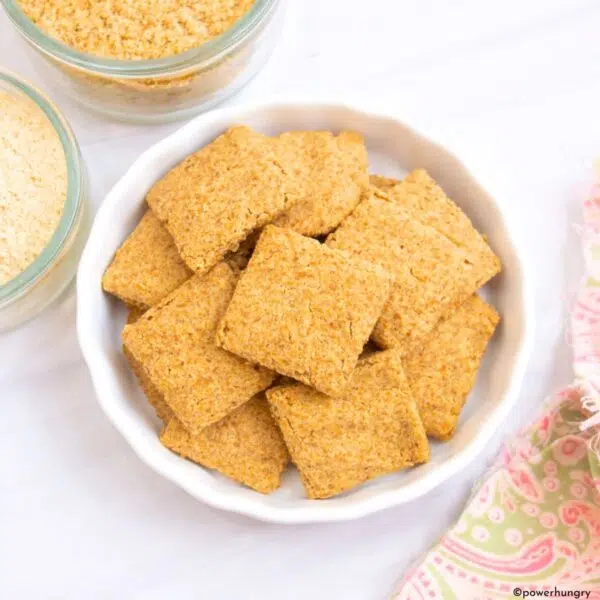
To make the chips, you will need:
- Cooked and cooled brown rice
- Flaxseed meal
You will also need regular tap water. I recommend adding salt, as well (I have specific amount recommendations in the recipe card, below), but it is entirely optional/adjustable.
Any variety of cooked brown rice (short-, medium-, or long-grain, brown basmati, brown jasmine, etc.) will work in the recipe. Use what you have and/or prefer. I have guidelines in the recipe for how much to cook, if starting with uncooked brown rice.

I prefer the mild flavor of golden flaxseed meal, but the common variety (which is darker) will work just as well.
You can flavor the chips in many ways. Suggestions follow in the FAQ section at the end of the post.
Step by Step Instructions
Note that the complete directions are also in the recipe card below.
Making these chips could not be simpler. This is how to do it.
Step One: Preheat the Oven & Prep Baking Sheets
Preheat the oven to 350F (180C). Lightly spray two large, rimmed baking sheets with nonstick cooking spray. If you do not have cooking spray, lightly rub the pan with a bit of neutral cooking oil.
The large baking sheets I use (day in and day out) are standard half sheet pans, which are heavy pans measuring 18 x 13 inches (45 x 32.5 cm).
If your baking sheets are smaller than a half sheet pan, I recommend dividing the batter into additional smaller metal pans (e.g., cake pans, square pans). The batter should be spread relatively thin, but enough to coat.
Step Two: Blend the Batter
In a blender or food processor, blend the cooked and cooled brown rice, water, flaxseed meal, and optional salt until smooth. Stop to scrape down the sides of the container once or twice to ensure that any stray bits get incorporated.
The results will resemble a thick muffin batter. Unlike a flour-based batter, it will look watery in patches (as seen in the photo below).

Step Three: Spread the Batter

Pour half of the brown rice chips batter onto each of the prepared baking sheets.
Use a spatula to spread the batter into even layers that cover almost all of each baking sheet.
An offset spatula works especially well for spreading the batter. If you have one, use it. Otherwise, a regular silicone spatula, or even the back of a large spoon, will work fine.
Step Four: Bake the Chips
Bake the chips in the preheated oven for 45 to 50 minutes. I know, it sounds like a long while, but the very wet batter + the long bake is the secret to the success of thee chips.
As the batter bakes and dries out, light, crispy, lacy chips are formed (chip magic?). The chips (really, one giant chip on each baking sheet at this point) pull up and away from the baking sheet as the water evaporates.

The chips should look completely dry and golden brown.
Turn off the oven and leave the chips in the oven for another 30 minutes.
Step Five: Cool Chips & Break into Pieces
Remove the baking sheets from the oven. Leave the chips on their baking sheets until completely cooled.
Lastly, break the chips into chip-size pieces.

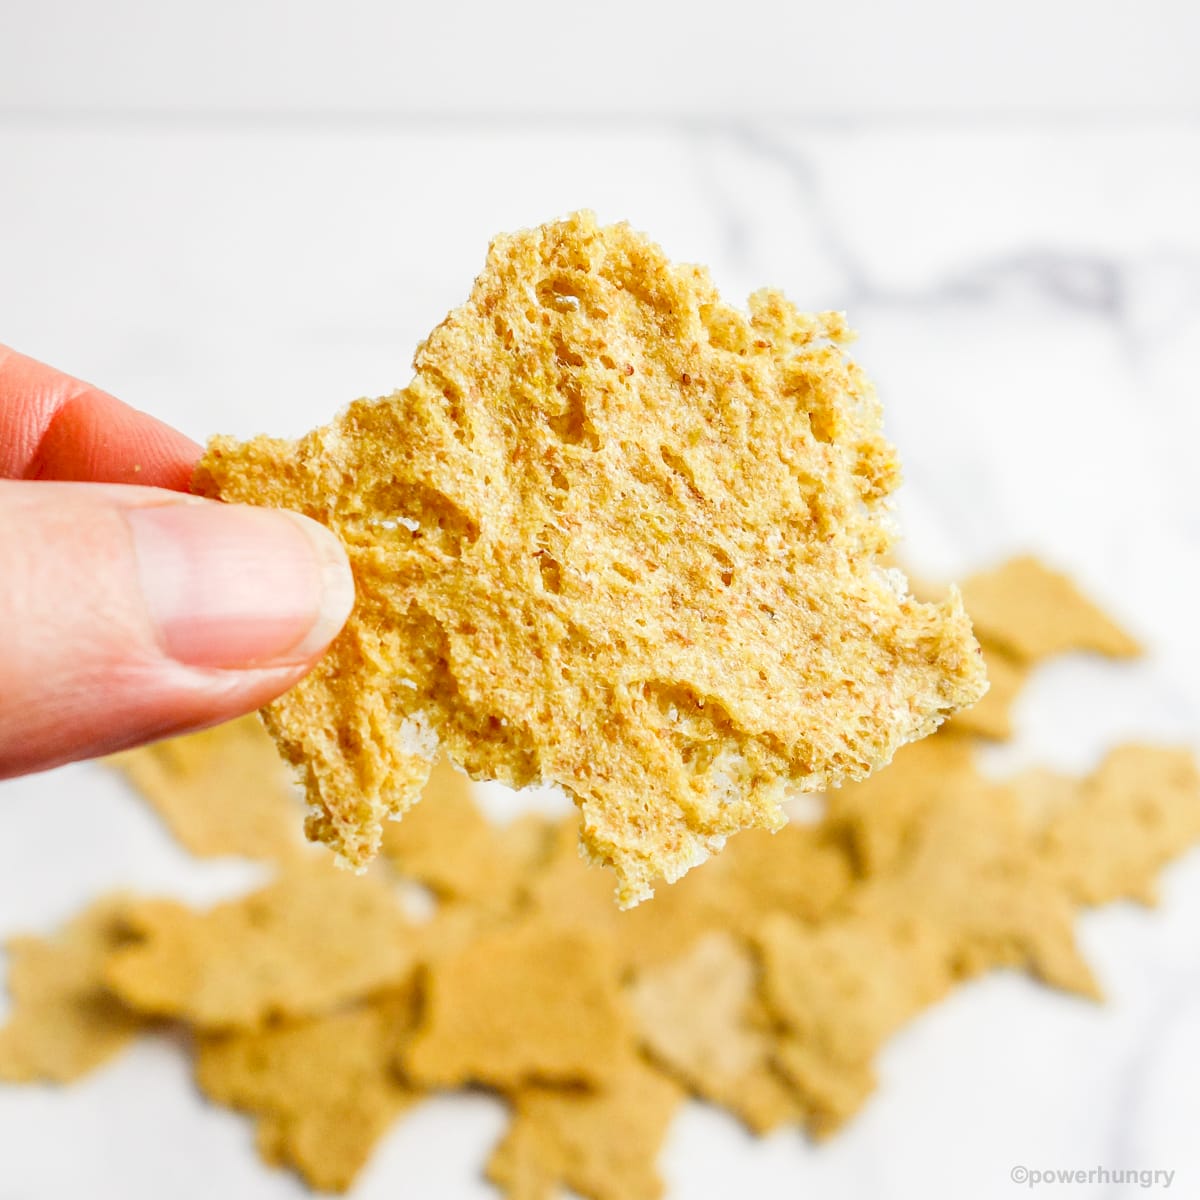
And just like that, you have a heap of delicious, crispy, crunchy, light and airy chips. The photo below is merely a mini sampling of the total bounty:

Taste & Texture of Easy 2 Ingredient Brown Rice Chips
The chips have a mild, toasted, whole grain flavor. They are eminently munch-worthy. Delicious plain, the chips are also a blank slate for adding in an assortment of flavors (see my suggestions in the FAQ section below).
The texture is, as mentioned (sorry, too many times?) light and crispy. Substantial, too. The chips are not crumbly, in the least, and stand up to dipping.
I think you are destined to love these as much I do!

FAQ
- How Much Raw Brown Rice Do I Need to Cook? You will need to cook 1 and 1/2 cups of raw brown rice to equal the amount needed for this recipe. Cooking times vary depending (significantly) depending on the variety of brown rice (i.e., short, medium, or long grain). Long grain rice varieties will take the shortest amount of time to cook. Follow the directions on the bag or box for the exact cooking time.
- How Should the Easy 2 Ingredient Brown Rice Chips be Stored? Store the cooled chips in an airtight container at cool room temperature for 2 weeks. I do not recommend freezing the chips.
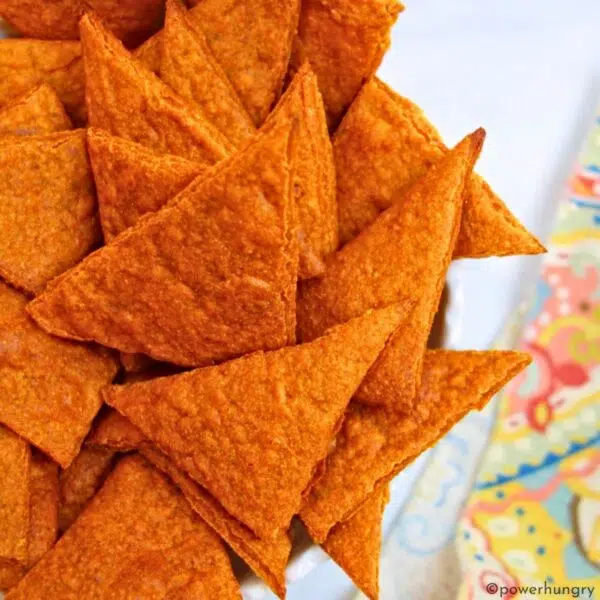
- Can I Flavor the Brown Rice Chips? Yes! Just like my No-Roll Cassava Flour Crackers and Easy No-Roll Oat Crackers, there are myriad options for adding flavors to these versatile chips.
- Dried Herbs & Spices to the Batter: Whisk your favorite herbs or spices directly into the batter. About 2 to 3 teaspoons for most dried herbs and spices, for this quantity of batter, is a good general guesstimate.
- Fresh Chopped Herbs: Add up to 1/4 cup of mild herbs, such as parsley, cilantro, or basil. For stronger herbs, such as rosemary, oregano or thyme, add 3 to 4 teaspoons maximum.
- Garlic powder and onion powder are easy, delicious additions, as well.
- Cheese-y flavor: Add some cheese-y flavor with the addition of nutritional yeast. I suggest adding 1/4 to 1/3 cup of nutritional yeast for this quantity of batter.
- Liquids and Pastes: Consider adding wet flavor enhancers, as well. For example:
- Hot sauce
- Curry paste
- Tomato paste
- Tomato juice (in place of the water)
- Wasabi paste
- Sprinkle with Flavorful Toppings: You can also sprinkle toppings directly onto the chip batter after it has been spread out on the baking sheet. Some ideas include:
- Seeds (e.g., sesame, poppy, sunflower)
- Finely chopped nuts
- Chopped dried onion
- Everything bagel topping
- Flaky sea salt
- Cracked black pepper
Can I Add Oil to the Chips?
Yes. The chips are already super-crispy, but if you wish to add oil to the chips, simply replace some of the water with the oil of your choice (e.g., olive oil, avocado oil, coconut oil). For every tablespoon of oil, reduce the water by 1 tablespoon.
Can I Use A Different Grain (other than Brown Rice)?
I am confident that you can make the chips with other varieties of rice (e.g., white rice, red rice, black rice).
I am not sure if this recipe will work with other grains. have not tried the recipe with any other grains at this point, so subbing in a different cooked grain would be an experiment. You may want to try a mix of brown rice and another grain before trying to replace all of the brown rice.
Related Recipes

Easy 2 Ingredient Brown Rice Chips (oil-free, V, GF)
Ingredients
- 4 cups cooked brown rice, made from 1.5 cups/270 g raw brown rice
- 1.5 cups water
- 1/2 cup flaxseed meal
- Optional: 1/2 to 3/4 teaspoon salt
Instructions
- Preheat oven to 350F/180C. Spray 2 large (18×13 inch/45 x 32.5 cm) baking sheets with nonstick cooking spray.
- In a blender or food processor, blend the cooked, cooled brown rice, water, flaxseed meal, and optional salt. Process until smooth, stopping once or twice to scrape down the container.
- Pour half of the batter on each of the 2 prepared baking sheets. Using a spatula or the back of a spoon, spread in a single layer to cover (almost completely) the baking sheets in single layers.
- Bake in the preheated oven for 45 to 50 minutes until the batter on each looks like a golden brown, lacy cracker (the batter will crisp up and away from the baking sheet.
- Turn off the oven. Keep the baking sheets in the oven for 30 minutes longer.
- Remove the baking sheets and let the chips cool completely before breaking up into chip-size pieces.
- Enjoy plain or with your favorite dips and dunks!


I have only one baking sheet, so had to break this up into 2 batches. The first came out wonderful. I was so excited to have finally found a good rice cracker! The second, however, stuck so hard to the pan that I only got a few crackers from around the edges, while the rest had to be soaked and chipped off, which made me quite unhappy. Any idea what went wrong? I did everything the same way and can’t imagine why the result was so different.
Hi Didi,
So glad you like the chips! Hmm, that is odd regarding the second batch. Did you coat the pan with nonstick spray on the second batch? That could explain why they stuck.
wonderfully light and crisp!
Glad you like them, Renata!
Hi Renata – yes, I did coat it with olive oil, but not as lightly as I did the first time. That’s the only difference, other than the baking sheet still being slightly warm. I’m wondering if it would be OK to use baking parchment.
Hi Didi,
The warm baking sheet may be making a difference (just thinking of what was different from the first batch). I’m not sure. But yes, I think you can try with parchment. I’ve done that with other pourable batter crackers and chips. The parchment paper will really curl (do not be alarmed! It will become wet from the batter, then curl and bubble up as it dried back out). But it is very easy to remove the crackers when done 🙂
Yummm…. thank you for sharing this one. Mine came out great.
That’s great, redrusty, glad you like them!
Ok I have to ask – has anyone tried this with vinegar replacing some of the water? Salt and vinegar chips??
Oh my goodness, that is such a good idea, Sarah!
Do you think you could score these with a pizza cutter before baking for a more square cracker?
Sounds like a good idea to me, Jodi— definitely worth trying!
These look like a dream come true! Has anyone tried them with just parchment paper? I don’t even keep oil any more.
Just tried this. I made a quarter batch with leftover Forbidden (black) rice and substituted the flax meal with chickpea flour. After I added the batter to my pan, I then tossed sesame seeds on top. My pan was smaller so there was more batter depth. The timing was perfect and it came out great. Because the batter was deeper, these were more cracker-like but very crunchy.
Oh my goodness, that sounds SO good, Judy!
My batter didn’t spread as nicely as yours did by the look of your photo lol , but these are a great cracker!! I really enjoyed them! I look forward to changing them up with different seasonings , and yes , they are definitely light and crispy!! Really appreciate the recipe!
You are so welcome, Marlene!
Wow!!! These are great, Camilla! (I’m trying to not finish the entire tray right now) As someone who needs to be both gluten & legume free, I’m VERY appreciative of this recipe.
I used 1/2 flax & 1/2 chia seeds (I don’t love the taste of flax)
I prepared a mix of 1 cup brown rice & 1/2 cup quinoa and topped the batter with sesame & sunflower seeds.
This worked beautifully and they’re just as crisp and crunchy as you promised.
Thanks so much, Camilla!
Awesome, Karen! I love that you were able to swap in half chia, as well as some cooked quinoa, with no issues— thanks so much for sharing that! And yum regarding seeds on top 😍
Thank you very much for this handy recipe. I cooked my brown rice with green lentils for added fibre and nutrition. Still using the original recipe measures the crackers came out great.I might try them in the dehydrator next time.
How smart (re the lentils), Sherry! I am definitely going to try that 😊